Transform your wedding venue into a romantic wonderland without breaking the bank using these budget-friendly lighting ideas. String lights and fairy lights in bottles create a warm, enchanting atmosphere. Candles and lanterns add intimate charm, while paper lanterns offer colorful, affordable elegance. Uplighting dramatically enhances your venue's features, and romantic hanging chandeliers provide a magical focal point. Twinkle light curtains make stunning backdrops, and DIY light-up centerpieces personalize your tables. Illuminated balloons bring a modern, whimsical touch to your decor. With these creative options, you'll craft a dreamy ambiance that'll leave your guests in awe. Discover how to bring these ideas to life and make your special day truly shine.
Key Takeaways
- String lights and fairy lights create a warm, romantic atmosphere at an affordable price.
- DIY candle centerpieces and mason jar luminaries offer personalized, budget-friendly lighting options.
- Paper lanterns in various colors and sizes provide cost-effective, customizable lighting solutions.
- Affordable color-changing LED uplights transform venues and create dynamic ambiance.
- Twinkle light curtains serve as magical backdrops, adding romance without breaking the bank.
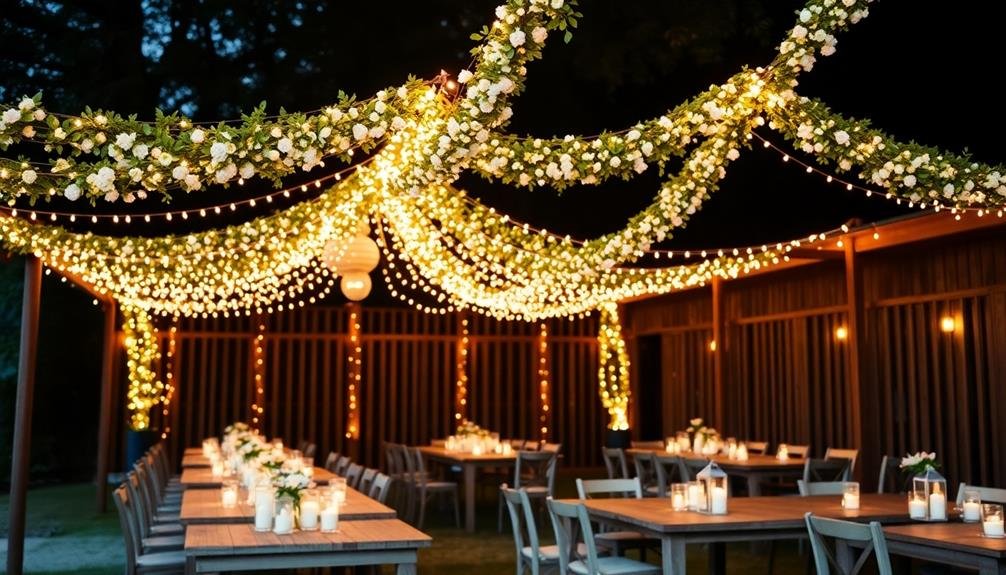
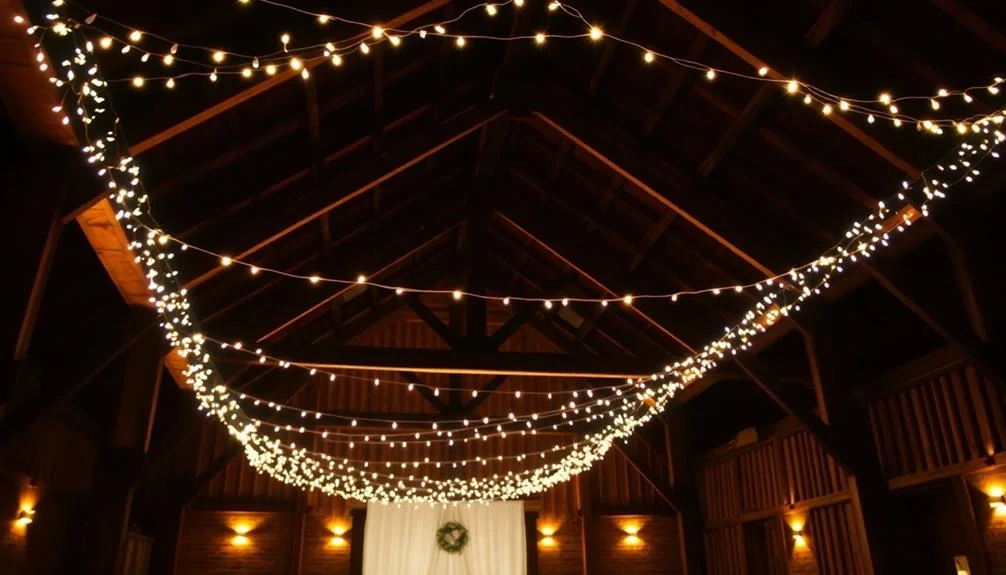
String Lights
When planning your budget wedding, string lights can be a game-changer. These versatile and affordable decorations create a warm, romantic atmosphere that'll transform any venue. You can drape them across ceilings, wrap them around pillars, or weave them through trees for an enchanting outdoor setting.
Opt for LED string lights to save on energy costs and reduce the risk of overheating. They come in various colors, but warm white is a popular choice for weddings. You'll find battery-operated options for areas without easy access to power outlets, giving you more flexibility in your lighting design.
Consider mixing string lights with other budget-friendly elements like paper lanterns or mason jars for added visual interest. You can create stunning backdrops for photo booths or ceremony spaces by hanging string lights vertically.
Don't forget to check if your venue allows string lights and if they've any specific installation requirements. You may need extension cords or special clips to secure the lights safely.
Start planning early and enlist the help of friends and family to set up your DIY lighting display, ensuring a magical ambiance for your special day without breaking the bank.
Candles and Lanterns
Candles and lanterns offer an affordable way to create a romantic glow for your wedding.
You can craft DIY candle centerpieces using simple materials like mason jars, floating candles, or tea lights surrounded by flowers.
For outdoor celebrations, consider hanging lanterns from trees or lining pathways with them to create a magical atmosphere.
Affordable Romantic Glow
Nothing sets the mood quite like the soft, flickering glow of candles and lanterns. These budget-friendly lighting options create an intimate atmosphere that's perfect for your special day. You'll find countless ways to incorporate them into your wedding decor, from centerpieces to aisle markers.
To achieve an affordable romantic glow, consider these ideas:
- Cluster pillar candles of varying heights on mirrored trays for elegant centerpieces.
- Hang paper lanterns from trees or tent ceilings for a whimsical touch.
- Line pathways with mason jars filled with tea lights for a charming, rustic feel.
- Float candles in clear bowls or vases for a mesmerizing effect.
When using candles, opt for unscented varieties to avoid overwhelming your guests' senses. LED candles are a safe alternative for outdoor weddings or venues with strict fire regulations.
For lanterns, mix and match sizes and styles to add visual interest. You can find affordable options at thrift stores, dollar stores, or online marketplaces.
Don't forget to check if your venue has any lighting restrictions before finalizing your plans. With these budget-friendly ideas, you'll create a warm, inviting atmosphere that enhances your wedding's romantic ambiance without breaking the bank.
DIY Candle Centerpieces
Creating your own candle centerpieces can be a fun and budget-friendly way to add a personal touch to your wedding décor. You'll find endless possibilities for crafting stunning arrangements that suit your theme and style. Start by selecting affordable candles in various sizes and shapes, then pair them with complementary holders or vessels.
Consider these popular DIY candle centerpiece ideas:
| Style | Description |
|---|---|
| Floating | Place tea lights in water-filled bowls with flowers |
| Rustic | Use mason jars or tin cans as candle holders |
| Elegant | Arrange pillar candles on mirrored trays |
| Natural | Surround candles with pinecones, leaves, or pebbles |
To save even more, opt for LED candles instead of real ones. They're safer, reusable, and won't melt or drip. Enhance your centerpieces with ribbons, lace, or twine to match your wedding colors. Don't forget to incorporate fresh or silk flowers, greenery, or seasonal elements to complete the look.
Remember to test your centerpieces beforehand to verify they're stable and won't pose any fire hazards. With a little creativity and planning, you'll create beautiful, budget-friendly candle centerpieces that'll impress your guests and add a romantic glow to your special day.
Outdoor Lantern Displays
Illuminate your outdoor wedding space with enchanting lantern displays that create a magical ambiance without breaking the bank.
You'll find various affordable options, from paper lanterns to rustic metal designs, that can transform your venue into a dreamy wonderland. Hang them from trees, line pathways, or cluster them on tables to achieve a romantic glow.
To create stunning outdoor lantern displays on a budget:
- Mix and match sizes: Combine large, medium, and small lanterns for visual interest and depth.
- Use battery-operated LED candles: These safe, reusable alternatives to real flames are perfect for outdoor settings.
- Repurpose household items: Transform mason jars, tin cans, or wine bottles into charming DIY lanterns.
- Incorporate string lights: Weave fairy lights around lanterns for an extra magical touch.
Don't forget to take into account your wedding's color scheme and theme when selecting lanterns.
White paper lanterns offer a classic, elegant look, while colorful options can add a playful touch. For a rustic vibe, opt for metal lanterns with a distressed finish.
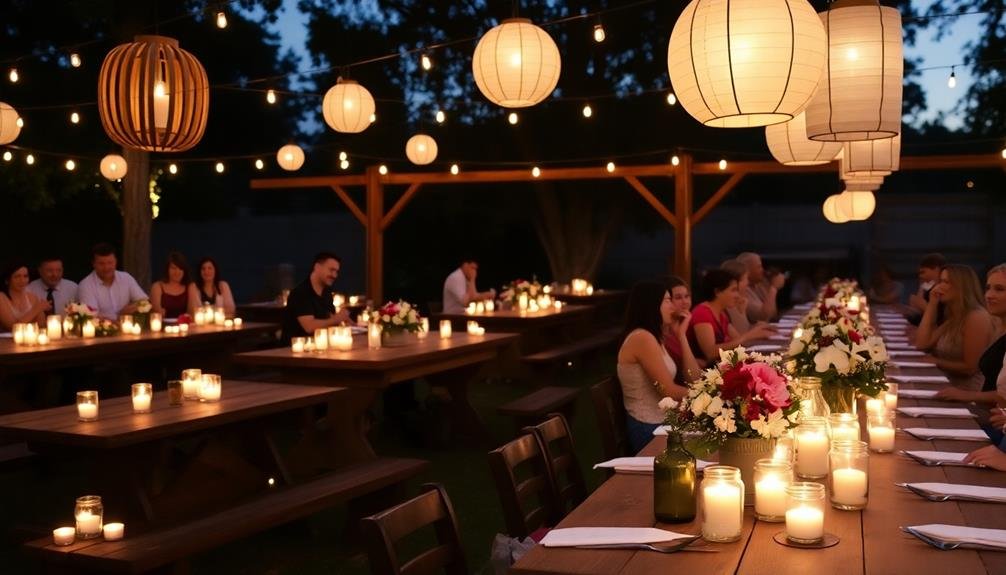
Paper Lanterns
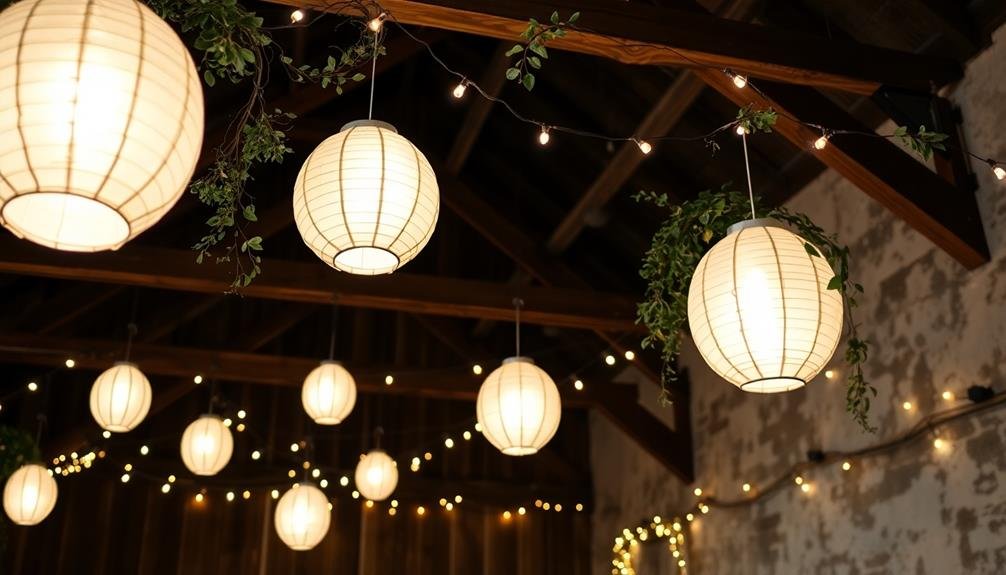
Paper lanterns offer a charming and cost-effective lighting solution for your wedding. These versatile decorations come in various sizes, shapes, and colors, allowing you to create a customized look that matches your theme. You'll find options ranging from classic round lanterns to intricate designs like stars or flowers.
To maximize their impact, hang paper lanterns at different heights to create visual interest. Cluster them together for a dramatic effect or space them out evenly for a more uniform look. Consider using battery-operated LED lights inside the lanterns for a safe and long-lasting glow. This option eliminates the need for electrical outlets and reduces fire risk.
For outdoor weddings, choose weather-resistant paper lanterns or opt for nylon versions that can withstand light rain. You can easily string them along trees, gazebos, or tent poles using fishing line or clear wire.
Inside, suspend them from the ceiling or create a stunning backdrop behind the head table.
Don't forget to incorporate your wedding colors into your lantern selection. Mix and match hues for a playful atmosphere, or stick to a monochromatic palette for an elegant touch.
With their affordable price point and versatility, paper lanterns are an excellent choice for budget-conscious couples seeking a romantic ambiance.
Fairy Lights in Bottles
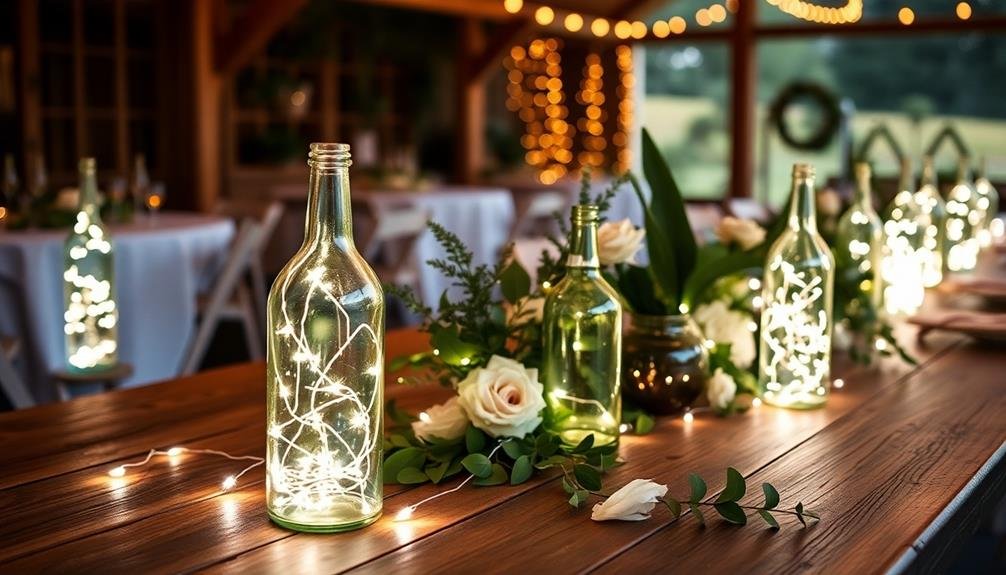
Magic in a bottle takes on new meaning with fairy lights nestled inside glass containers. This charming DIY project adds a whimsical touch to your wedding decor while keeping costs low.
You'll create a warm, inviting atmosphere that'll captivate your guests and enhance your venue's ambiance.
To craft these enchanting centerpieces, you'll need:
- Clear glass bottles or jars
- Battery-operated fairy lights
- Decorative elements like ribbons or twine
- Optional embellishments such as flowers or beads
Start by cleaning your bottles thoroughly. Insert the fairy lights, making sure the battery pack is hidden or easily accessible. Wrap ribbons or twine around the bottle's neck for a rustic touch.
You can also add flowers, beads, or other decorations to match your wedding theme.
Arrange these illuminated bottles on tables, along walkways, or hang them from tree branches. They're versatile enough to work in both indoor and outdoor settings.
For added impact, use bottles of varying sizes and shapes. You can even repurpose wine bottles from your engagement celebrations, adding a personal touch to your decor while being eco-friendly.
Uplighting
Uplighting can transform your wedding venue without breaking the bank.
You'll find affordable color-changing LED options that allow you to create the perfect ambiance, and you can learn DIY placement techniques to maximize their impact.
Consider whether renting or purchasing uplights is more cost-effective for your budget and future needs.
Affordable Color-Changing LED Options
Versatility shines through affordable color-changing LED options for uplighting at your wedding. These budget-friendly lights offer a dynamic way to transform your venue's atmosphere throughout the evening.
You'll find wireless, battery-operated LED uplights that can be easily placed around the room without the hassle of cords or the need for nearby outlets.
Many affordable LED uplights come with remote controls, allowing you to adjust colors and brightness with ease. You can create a soft, romantic ambiance during dinner and then switch to vibrant, party-ready hues for dancing later.
When shopping for color-changing LED uplights, consider these key features:
- Battery life: Guarantee they'll last throughout your entire event
- Color range: Look for options with a wide spectrum of hues
- Brightness levels: Adjustable settings help you achieve the perfect mood
- Ease of use: User-friendly controls make quick changes simple
Don't forget to test your chosen LED uplights before the big day. Experiment with different placements and color combinations to find the perfect look for your wedding.
With these affordable options, you'll create a stunning, personalized atmosphere without breaking the bank.
DIY Uplighting Placement Techniques
Mastering the art of DIY uplighting placement can transform your wedding venue from ordinary to extraordinary. Start by identifying key focal points in your space, such as columns, corners, or architectural features. Place your uplights at the base of these elements, angling them upward to create dramatic shadows and highlights.
For walls, position lights every 5-8 feet to guarantee even coverage. Experiment with different angles to achieve the desired effect, typically between 30-45 degrees. To create depth, place some lights closer to the wall and others farther away.
Don't forget vertical elements like trees or curtains. Uplighting these can add height and dimension to your space. For centerpieces or floral arrangements, consider using small, battery-operated LEDs to illuminate from within.
To avoid harsh shadows on guests' faces, keep dance floor lighting lower and directed away from seating areas. Use dimmer switches or adjustable LED settings to control intensity throughout the evening.
Rental vs. Purchase Considerations
When it comes to uplighting for your wedding, should you rent or buy? This decision can greatly impact your budget and overall experience. Consider these factors:
- Cost comparison: Calculate the total cost of renting vs. purchasing. Don't forget to include delivery fees for rentals or shipping costs for purchases.
- Event duration: If you're planning multiple events or a multi-day celebration, buying might be more cost-effective.
- Storage and future use: Do you have space to store uplights after the wedding? Will you use them again for other events?
- Quality and variety: Rental companies often offer higher-quality, professional-grade equipment with more color options.
If you're tech-savvy and comfortable with DIY setups, purchasing uplights can be a smart investment. You'll have full control over the equipment and can use it for future events.
However, if you prefer a hassle-free experience, renting might be the way to go. Professional rental companies often include setup, takedown, and technical support in their packages.
They'll guarantee everything runs smoothly, allowing you to focus on enjoying your special day without worrying about the lighting logistics.
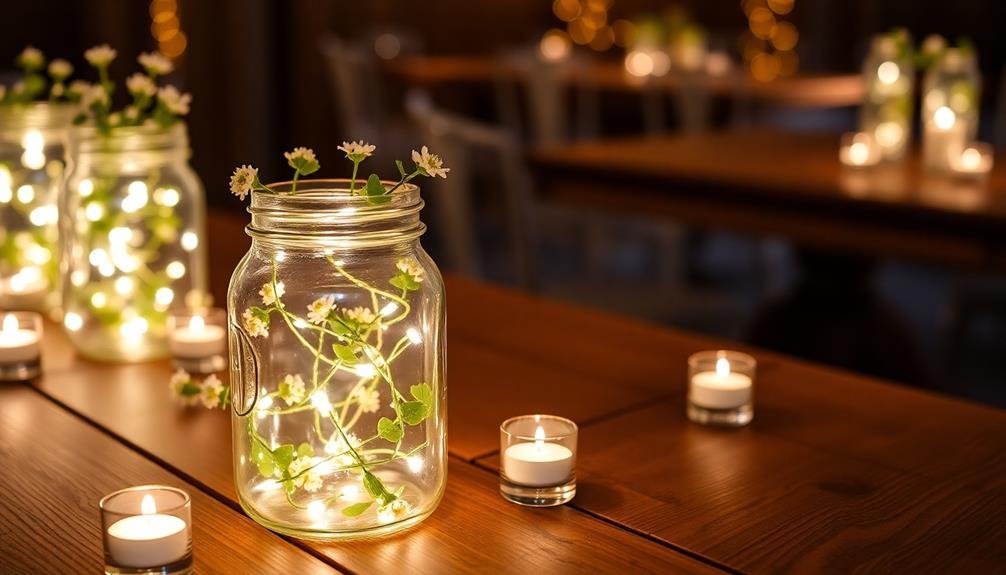
Mason Jar Luminaries
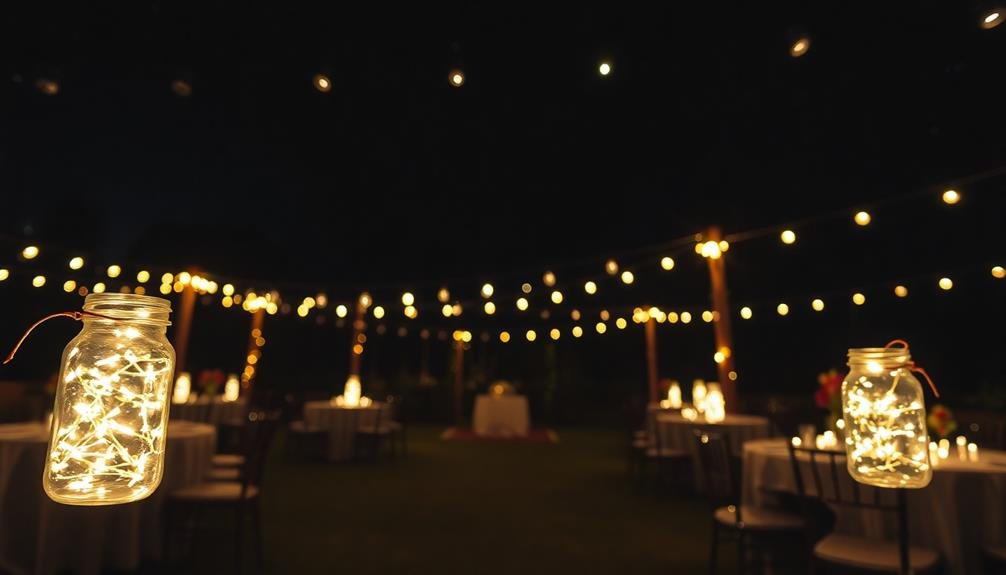
With their rustic charm and warm glow, Mason jar luminaries offer an enchanting yet budget-friendly lighting option for your wedding. You can easily create these DIY centerpieces using materials you likely have on hand or can purchase inexpensively.
To make Mason jar luminaries, you'll need clean jars, tea lights or battery-operated candles, and decorative elements like twine, lace, or ribbons. For added sparkle, consider filling the jars with fairy lights or coating the insides with glitter. You can also paint the jars in your wedding colors or leave them clear for a classic look.
Arrange these luminaries along walkways, on tables, or hang them from trees to create a magical atmosphere. They're versatile enough to complement various wedding themes, from rustic barn weddings to elegant garden affairs.
One of the best aspects of Mason jar luminaries is their reusability. After your wedding, you can repurpose them as home decor or gifts for guests. This eco-friendly approach not only saves money but also reduces waste.
Remember to test your luminaries before the big day to verify they provide adequate lighting and meet any venue safety requirements.
Romantic Hanging Chandeliers
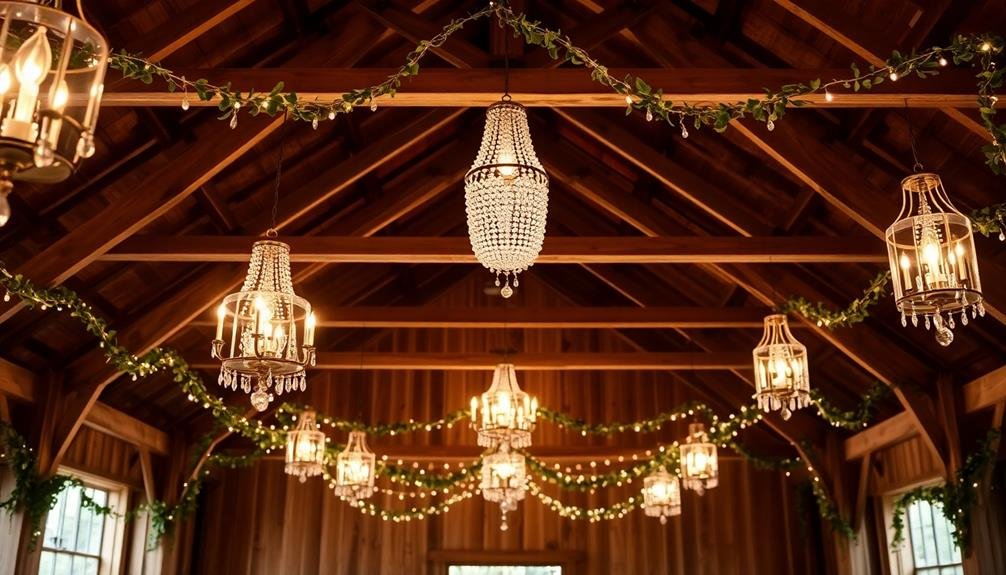
Transform your wedding venue with romantic hanging chandeliers that won't break the bank.
You can create stunning DIY paper lantern chandeliers using inexpensive materials and simple techniques.
Alternatively, scour thrift stores for crystal chandeliers or components to assemble your own unique, budget-friendly lighting centerpieces.
DIY Paper Lantern Chandeliers
Creating romantic ambiance on a budget is easy with DIY paper lantern chandeliers. These eye-catching decorations can transform your wedding venue into a magical space without breaking the bank.
You'll love how simple they're to make and how versatile they can be regarding colors and designs.
To create your own paper lantern chandeliers, you'll need:
- Paper lanterns in various sizes
- Battery-operated LED lights or fairy lights
- Fishing line or clear thread
- Scissors and adhesive tape
Start by assembling the paper lanterns according to the manufacturer's instructions. Insert the LED lights into each lantern, ensuring they're securely fastened.
Next, create clusters of lanterns by tying them together at different heights using fishing line. Hang these clusters from the ceiling or outdoor structures using hooks or sturdy branches.
You can customize your paper lantern chandeliers to match your wedding theme by choosing specific colors or patterns. Mix and match sizes for added visual interest.
For an extra touch of elegance, consider adding ribbons, flowers, or greenery to the lanterns. These DIY chandeliers will create a warm, inviting atmosphere that your guests will adore, all while keeping your lighting budget in check.
Thrift Store Crystal Finds
While paper lanterns offer a whimsical charm, thrift store crystal finds can add a touch of elegance to your wedding lighting. You'll be amazed at the treasures you can uncover in secondhand shops, from vintage crystal chandeliers to delicate glass droplets. These budget-friendly gems can transform your venue into a sparkling wonderland.
Start your hunt early, visiting local thrift stores, flea markets, and online marketplaces. Look for crystal pieces in various sizes and shapes to create visual interest. Don't worry if they're not in perfect condition; minor flaws add character and won't be noticeable once hung.
To create romantic hanging chandeliers, gather your crystal finds and some basic supplies. You'll need wire, pliers, and hooks for hanging. Arrange the crystals in a pleasing pattern, connecting them with wire to form your desired shape. Suspend these DIY chandeliers from the ceiling or tree branches for a magical effect.
For added sparkle, incorporate battery-operated fairy lights into your crystal creations. The soft glow will dance off the facets, creating a mesmerizing ambiance.
With a bit of creativity and patience, you can craft stunning, budget-friendly lighting that rivals expensive rentals.
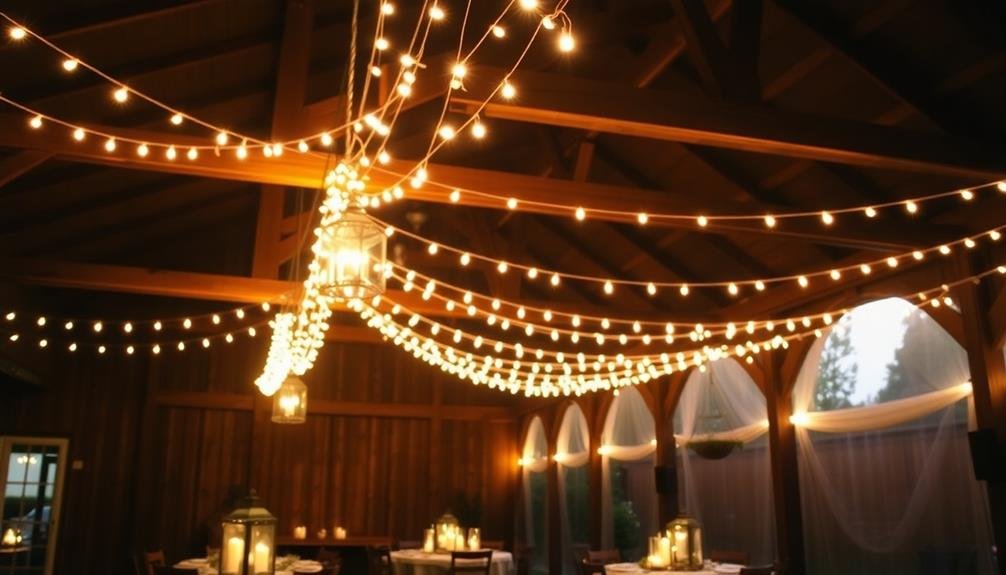
Twinkle Light Curtains
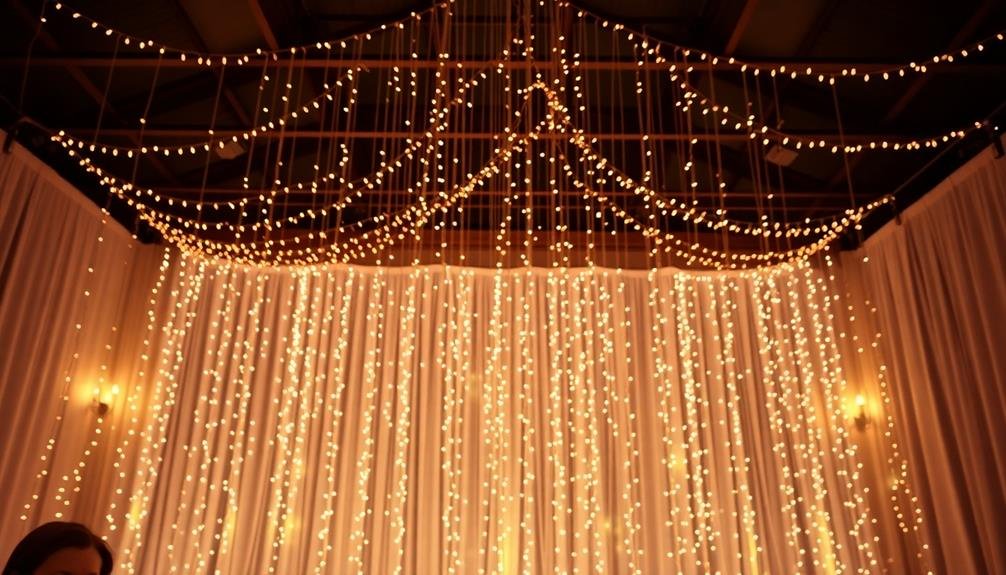
Twinkle light curtains offer a magical backdrop for your budget-friendly wedding. These ethereal displays create a romantic atmosphere without breaking the bank. You can easily create this stunning effect by hanging strands of fairy lights vertically from a rod or wire. The result is a shimmering curtain of light that transforms any space into a dreamy wonderland.
To make the most of your twinkle light curtains, consider these tips:
- Layer multiple strands for a fuller look
- Mix different lengths to add depth and dimension
- Use clear command hooks for easy, damage-free installation
- Opt for battery-operated lights for flexibility in placement
You'll find twinkle lights readily available at most home improvement stores, online retailers, or even dollar stores. Choose warm white lights for a classic, romantic glow, or experiment with different colors to match your wedding theme.
Don't forget to test your lights before the big day to verify they're working properly.
Twinkle light curtains work well behind the head table, as a ceremony backdrop, or to define specific areas of your reception space. They also provide an enchanting backdrop for photos, giving your wedding memories an extra touch of magic.
DIY Light-Up Centerpieces
After illuminating your venue with dreamy light curtains, you can bring that magical glow to your tables with DIY light-up centerpieces. These budget-friendly creations add a warm, intimate atmosphere to your reception while showcasing your creativity.
To craft your own light-up centerpieces, start with clear glass vases or mason jars. Place battery-operated fairy lights or submersible LED lights inside, then fill the containers with your chosen decorative elements. Here are some ideas to inspire you:
| Container | Filler | Topper |
|---|---|---|
| Mason jar | Water beads | Floating candle |
| Wine bottle | Fairy lights | Fresh flowers |
| Lantern | Colored sand | Pillar candle |
| Glass vase | Pebbles | Succulents |
| Hurricane lamp | Artificial snow | Pine cones |
Don't forget to take into account your wedding's color scheme and theme when selecting materials. You can wrap twine or ribbon around the containers for added texture, or spray paint them for a cohesive look. Place these illuminated centerpieces strategically on guest tables, the sweetheart table, and even the gift table to create a enchanting atmosphere throughout your reception space.
Illuminated Balloons
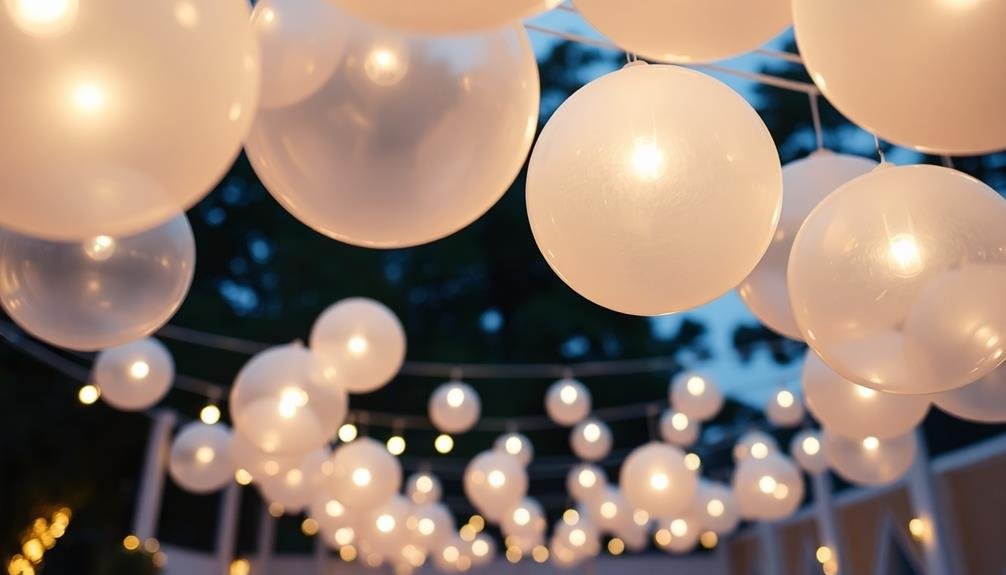
As the night progresses, you can elevate your wedding's ambiance with illuminated balloons. These magical orbs of light add a whimsical touch to your reception space without breaking the bank. You'll find various options to suit your style and budget, from LED-filled latex balloons to larger-than-life light-up spheres.
To make the most of illuminated balloons at your wedding, consider these ideas:
- Create a stunning balloon ceiling by clustering light-up balloons above the dance floor.
- Line the entrance or walkways with illuminated balloon columns for a grand welcome.
- Float giant light-up balloons in a pool or pond for a mesmerizing water feature.
- Use illuminated balloons as table centerpieces for a modern, glowing effect.
When selecting illuminated balloons, opt for battery-operated LED lights for safety and convenience. You can choose warm white lights for a romantic atmosphere or colorful options to match your wedding palette.
Don't forget to test the battery life beforehand to guarantee they last throughout your reception. With careful planning, illuminated balloons can transform your venue into a dreamy, budget-friendly wonderland that your guests won't soon forget.
Frequently Asked Questions
How Can I Ensure My Outdoor Lighting Is Weather-Resistant?
To guarantee weather-resistant outdoor lighting, you'll want to choose fixtures labeled "weatherproof" or "IP-rated." Use sealed LED bulbs, protect connections with waterproof covers, and install lights under eaves when possible. Regular maintenance will also extend their lifespan.
What Power Sources Are Best for Wedding Lighting in Remote Locations?
For remote wedding lighting, you'll want to take into account battery-powered LED lights, solar-powered options, or portable generators. If you're using a generator, make certain it's quiet and placed far from guests. Rechargeable battery packs are also great for flexibility.
How Early Should I Start Setting up the Lighting Arrangements?
You'll want to start setting up your lighting arrangements at least 24 hours before the wedding. Begin with larger fixtures and work your way down to smaller details. Don't rush; give yourself plenty of time for adjustments.
Are There Any Lighting Options That Are Safe Around Children?
You'll find plenty of child-safe lighting options for your event. Consider LED lights, battery-operated candles, and glow sticks. They're cool to the touch, don't have open flames, and are fun for kids to play with safely.
Can I Mix Different Types of Lighting for a Cohesive Look?
You can definitely mix different lighting types for a cohesive look. Combine string lights, candles, and lanterns to create depth and interest. Use a consistent color palette and placement strategy to guarantee everything blends seamlessly throughout your space.
In Summary
You've now got a wealth of budget-friendly lighting ideas to create a magical atmosphere for your special day. Don't be afraid to mix and match these options to suit your venue and style. Remember, lighting can transform any space into a romantic wonderland. With a little creativity and DIY spirit, you'll be able to illuminate your wedding beautifully without breaking the bank. So go ahead, light up your love story and make your celebration truly unforgettable!

I’m Sarah, the creator and writer behind this site. I’m a wife and a mother of two wonderful kids who keep me on my toes and inspire me daily. My passion lies in creating and organizing memorable events and group activities, where people can come together and make lasting memories.

Leave a Reply