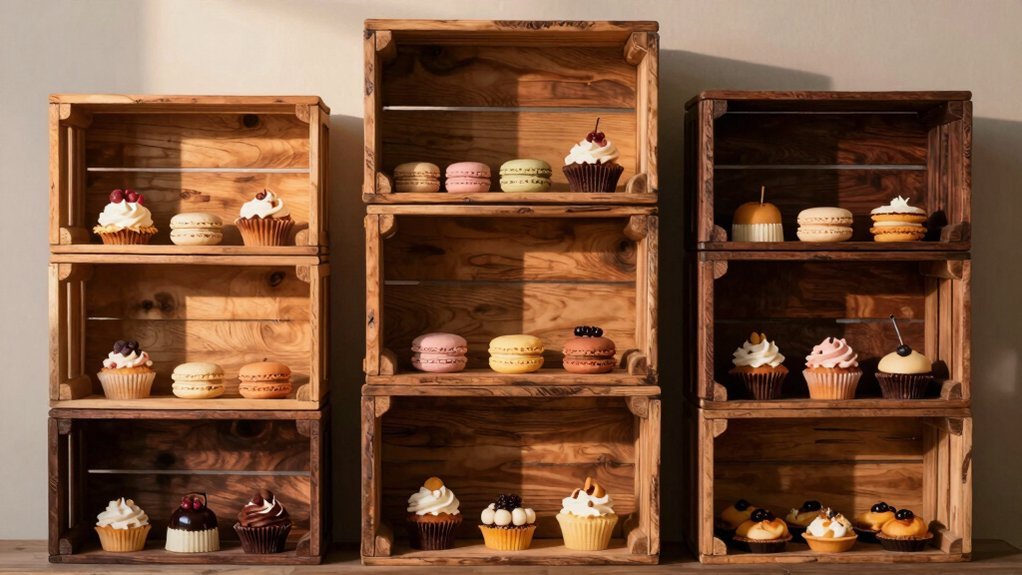
Create a unique wedding album on a budget with these affordable display ideas. Try a DIY photo collage wall using removable adhesive strips, or craft a rustic pallet display from reclaimed wood. For a digital touch, make a slideshow set to meaningful music. Repurpose vintage window frames or hang a charming Polaroid garland for nostalgic flair. Wrap photos around candles for a cozy ambiance, or design an Instagram-inspired magnet board. Host a backyard video projection night for a cinematic experience. You can even fill a memory jar with printed photos and mementos. These creative options will help you cherish your special day without breaking the bank.
Key Takeaways
- Create a DIY photo collage wall using removable adhesive strips for easy updates and rearrangements.
- Repurpose vintage window frames to display wedding photos, creating a charming and cost-effective gallery.
- Design a hanging Polaroid garland with string and mini clothespins for a nostalgic and affordable display.
- Craft a personalized wedding scrapbook using acid-free paper and handwritten notes for a budget-friendly keepsake.
- Develop an Instagram-inspired magnet board with printed photos and captions for an interactive and inexpensive display.
DIY Photo Collage Wall
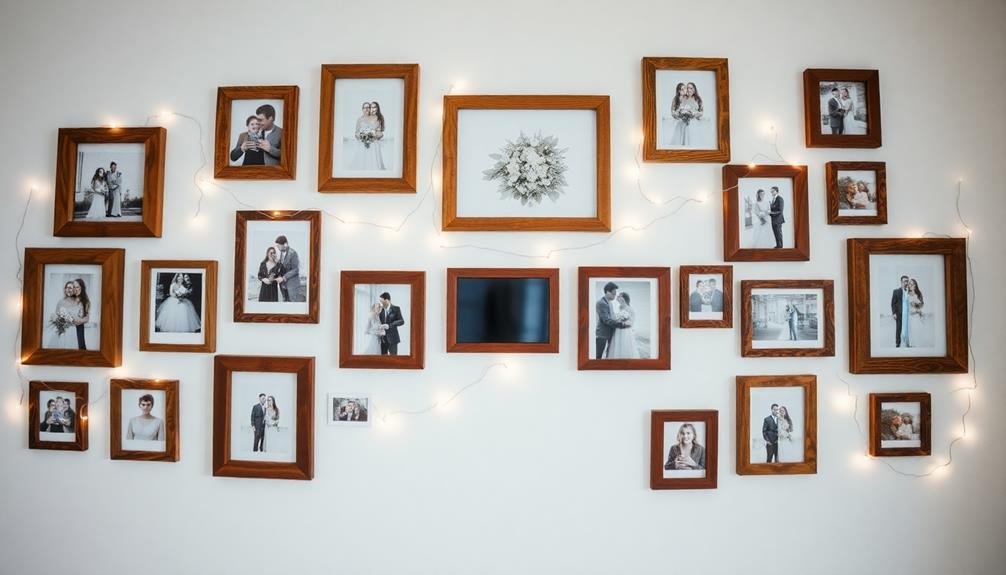
Three simple steps can transform your wedding photos into a stunning DIY photo collage wall.
First, select your favorite images from your special day, including candid shots, portraits, and detail photos. Choose a variety of sizes and orientations to create visual interest.
Next, decide on a layout for your collage. You can opt for a symmetrical grid or a more organic, freeform arrangement. Measure your wall space and plan accordingly, leaving room for growth if you'd like to add more photos later.
Finally, it's time to bring your vision to life. Print your chosen photos on high-quality paper or canvas. For a cohesive look, consider using matching frames or a unified color scheme. Alternatively, embrace an eclectic style with mismatched frames and varied photo finishes.
Use removable adhesive strips or picture-hanging hooks to secure your photos to the wall, ensuring they're level and evenly spaced.
Your DIY photo collage wall will serve as a beautiful, personalized reminder of your wedding day. It's an affordable way to display your memories and can easily be updated or rearranged as your family grows.
Rustic Pallet Photo Display
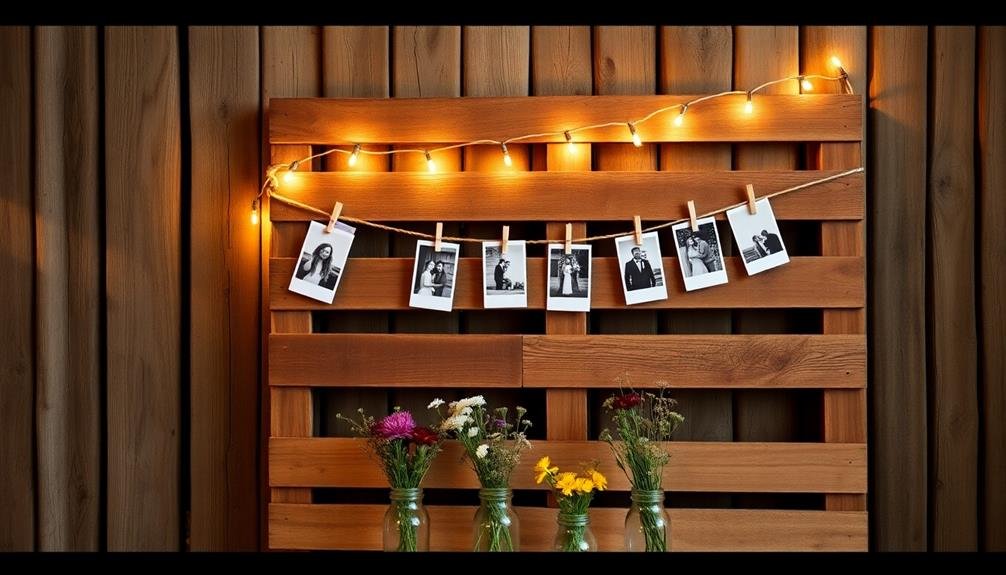
You'll want to start by selecting reclaimed wood pallets for your rustic photo display, focusing on pieces with character and weathered patina.
Next, you can assemble your display using simple DIY techniques like nailing or screwing boards together to create a sturdy frame.
To enhance the rustic appeal, you'll find various finishing and weathering tips useful, such as sanding rough edges or applying a light stain to unify the wood tones.
Reclaimed Wood Material Selection
Authenticity is key when selecting reclaimed wood for your rustic pallet photo display. Look for pieces with character, such as weathered barn wood, old fencing, or dismantled shipping pallets. These materials often bear the marks of time, adding depth and interest to your display.
When sourcing reclaimed wood, consider the following options:
| Source | Pros | Cons |
|---|---|---|
| Salvage yards | Wide variety, bulk options | Can be expensive |
| Online marketplaces | Convenient, diverse selection | Quality may vary |
| Local farms | Authentic, unique pieces | Limited availability |
| Construction sites | Often free or low-cost | May require permission |
Choose wood that's structurally sound and free from rot or insect damage. Sand rough edges to prevent splinters, but don't over-polish – you want to maintain that rustic charm. Consider the wood's color and patina, as it'll affect the overall aesthetic of your display.
Before assembling, treat the wood with a clear sealant to protect it from moisture and preserve its appearance. This step will guarantee your rustic pallet photo display remains a cherished keepsake for years to come.
DIY Assembly Techniques
With a few simple tools and some creativity, assembling your rustic pallet photo display can be a rewarding DIY project.
Start by disassembling the pallet carefully, removing nails and separating the boards. Sand the wood to remove splinters and achieve a smooth surface. You'll need to cut some boards to create a frame and backing for your display.
Arrange the boards in your desired pattern, mixing and matching different wood tones for visual interest. Use wood glue and small nails to secure the pieces together.
Once the frame is assembled, attach picture hanging wire to the back for easy mounting.
To create a unique photo display, consider these ideas:
- Use clothespins to clip photos directly onto the wood
- Install small hooks or nails to hang frames
- Attach wire or twine across the frame for a clothesline effect
- Create pockets using burlap or lace for slipping in photos
- Add small shelves for 3D elements like flowers or mementos
Finishing and Weathering Tips
Achieving an authentic rustic look for your pallet photo display involves careful finishing and weathering techniques. Start by sanding the wood to remove splinters and rough edges. Don't make it too smooth; you want to maintain some texture.
Apply a light coat of wood stain to enhance the natural grain. Choose a color that complements your wedding theme, like a warm honey or weathered gray.
For a weathered appearance, you can use a wire brush to create subtle grooves or distress the wood with a hammer and chain. Apply a mixture of vinegar and steel wool to create dark spots and an aged patina.
To protect your photos and the wood, finish with a clear sealant.
Consider adding rustic embellishments like twine, burlap, or small metal accents. You can also use chalk paint for a shabby chic look, then distress it slightly for added character.
Don't forget to seal any painted areas.
For a truly unique touch, incorporate elements from your wedding venue, such as pressed flowers or small pebbles, into the display. These finishing touches will create a one-of-a-kind, rustic photo display that showcases your wedding memories beautifully.
Digital Slideshow With Music
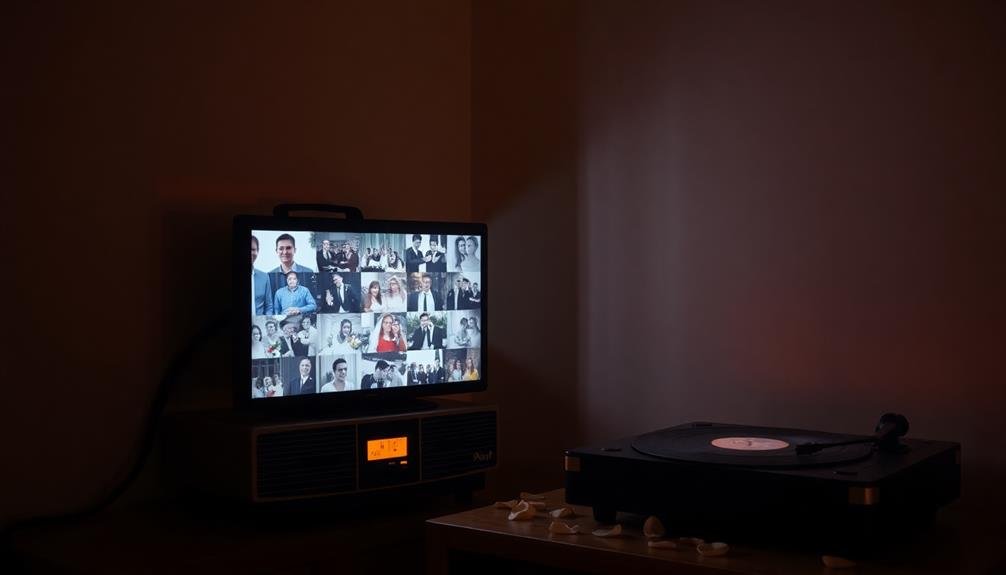
A digital slideshow set to music can transform your wedding photos into an enchanting narrative of your special day. With modern software and online tools, you can easily create a professional-looking presentation that captures the essence of your celebration.
Choose a selection of your favorite images that tell the story of your wedding, from getting ready to the final dance. When selecting music, opt for songs that hold special meaning for you as a couple or that complement the mood of your wedding. Consider using multiple tracks to match different segments of your slideshow, such as a romantic ballad for ceremony photos and an upbeat tune for reception highlights.
Here are some ideas to make your digital slideshow stand out:
- Incorporate short video clips alongside still images
- Use transitions that match your wedding theme (e.g., floral wipes for a garden wedding)
- Add captions or quotes to highlight key moments
- Include candid shots of guests to showcase the atmosphere
- Experiment with creative layouts, such as collages or split-screens
Remember to keep your slideshow length reasonable, aiming for about 3-5 minutes to maintain viewer interest.
You'll create a memorable keepsake that you can easily share with loved ones or display at future anniversary celebrations.
Repurposed Vintage Window Frames
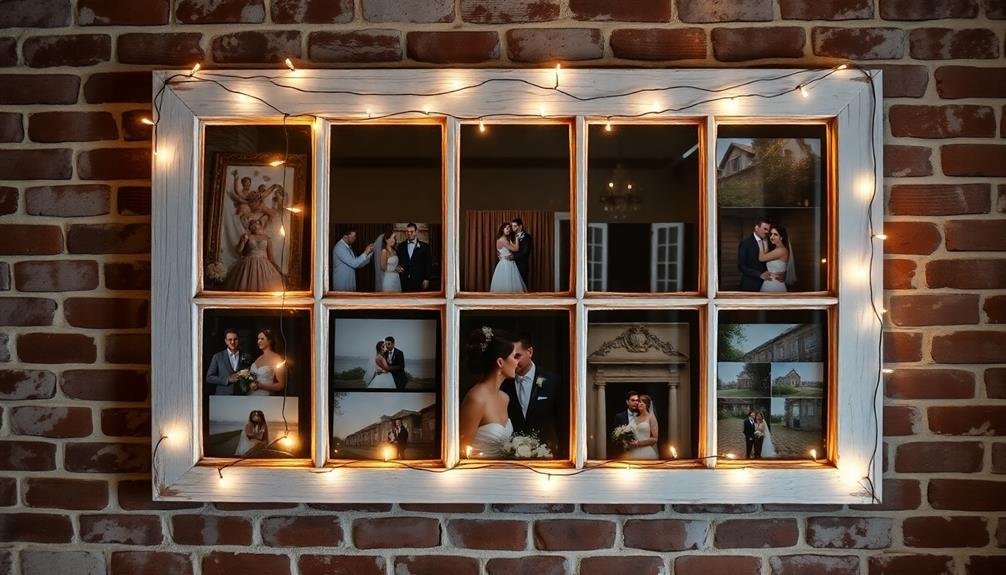
Repurposed vintage window frames offer a charming and creative way to display your wedding photos. This rustic and budget-friendly option allows you to showcase multiple images in a unique, eye-catching arrangement.
To create this display, you'll need to source old window frames from antique stores, flea markets, or salvage yards. Once you've acquired the frames, clean them thoroughly and remove any loose paint or glass. You can leave the frames as-is for a weathered look or repaint them to match your décor.
Next, select your favorite wedding photos and resize them to fit the window panes. Print the images on high-quality photo paper or have them professionally printed.
To attach the photos, you have several options. You can use clear adhesive corners, double-sided tape, or even create a makeshift backing board. For added interest, mix and match color and black-and-white photos within the same frame.
Consider hanging multiple frames together to create a gallery wall effect, or prop them up on a mantel or dresser. This DIY project not only saves money but also results in a one-of-a-kind wedding photo display that doubles as a conversation piece in your home.
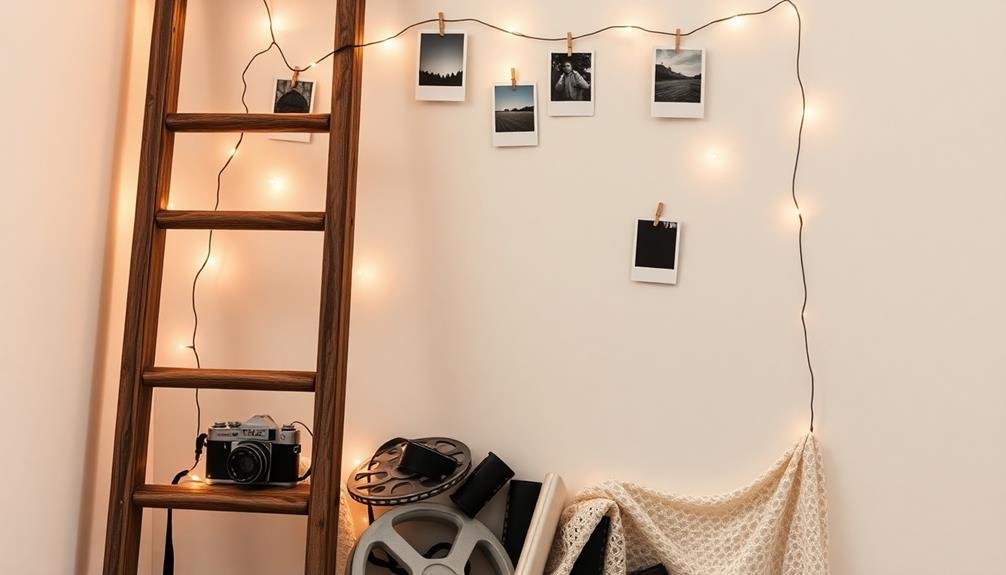
Hanging Polaroid Garland
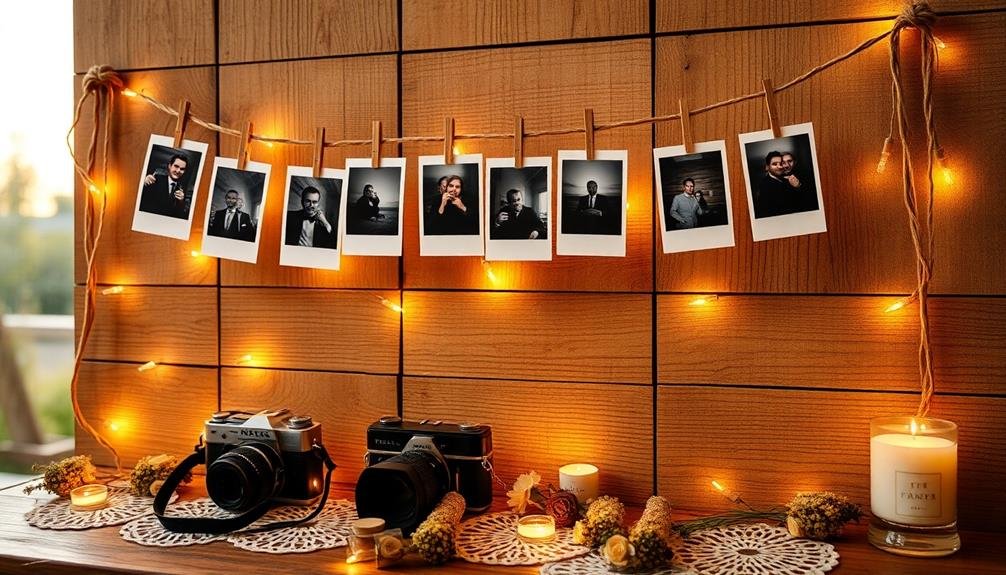
You'll need Polaroid photos, string or twine, and mini clothespins to create a charming hanging Polaroid garland.
Start by gathering your materials and selecting the best Polaroid shots from your wedding day or engagement photoshoot.
Once you've assembled everything, you can begin attaching the photos to the string using the mini clothespins, creating a visually appealing display that showcases your cherished memories.
Materials and Preparation
Creating a hanging Polaroid garland for your wedding requires minimal materials and preparation. You'll need Polaroid-style photos, twine or string, mini clothespins, and scissors.
Start by selecting your favorite photos that capture special moments or showcase your guests. Print these images on Polaroid-style paper or use actual Polaroid cameras for an authentic look.
Next, measure the space where you'll hang the garland and cut the twine accordingly. Allow extra length for securing the ends. Arrange your photos in the desired order before attaching them to the string. Use mini clothespins to clip each photo onto the twine, spacing them evenly.
Here are some creative ideas to enhance your Polaroid garland:
- Alternate photos with small decorative elements like paper flowers or origami shapes
- Use colored twine to match your wedding theme
- Add fairy lights between photos for a magical glow
- Include handwritten notes or quotes on some of the Polaroids
- Incorporate dried flowers or leaves for a rustic touch
Once you've prepared your garland, choose a prominent location to display it. Popular spots include the reception entrance, behind the head table, or near the guest book area.
Secure the ends of the twine to create a stunning visual centerpiece that'll wow your guests and preserve cherished memories.
Assembly and Display
With your materials prepared, it's time to bring your Polaroid garland to life. Begin by laying out your Polaroid photos in the desired order on a flat surface. This will help you visualize the final arrangement before hanging.
Next, cut your twine or string to the desired length, allowing extra for hanging at each end.
Attach the photos to the string using mini clothespins or binder clips. Space them evenly, about 4-6 inches apart, depending on your preference. If you're using decorative elements like paper flowers or fairy lights, intersperse them between the photos for added visual interest.
Once all photos are secured, find the perfect spot to display your garland. You might hang it across a blank wall, drape it over a fireplace mantel, or suspend it between two trees for an outdoor reception. Use removable adhesive hooks or small nails to secure the ends of the string.
Step back and adjust the spacing and alignment of the photos as needed. You can create multiple garlands and hang them at different heights for a more dynamic display.
Don't forget to take photos of your finished creation to remember this unique touch to your wedding day!
Personalized Wedding Scrapbook
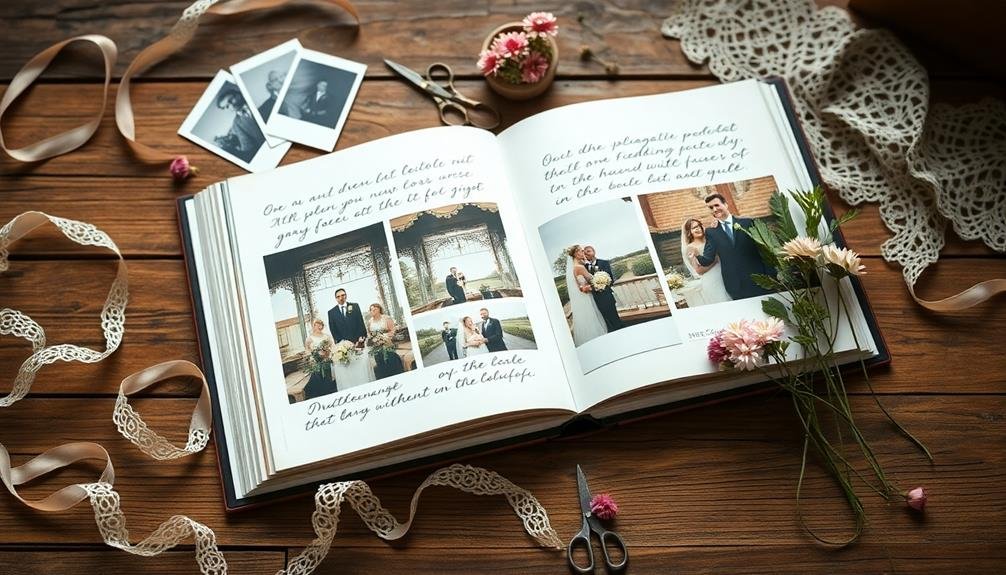
Beyond the digital domain, a personalized wedding scrapbook offers a tangible way to cherish your special day. This hands-on approach allows you to create a unique album that reflects your personality and style.
Start by gathering materials like acid-free paper, decorative elements, and adhesives. Choose a theme that complements your wedding's aesthetic, whether it's rustic, modern, or vintage.
As you design your scrapbook, consider including various elements to bring your wedding memories to life:
- Printed photos of key moments and candid shots
- Handwritten notes and quotes from guests or your vows
- Pressed flowers or fabric swatches from your décor
- Ticket stubs, invitations, or other memorabilia
- Small sketches or doodles to add a personal touch
Organize your pages chronologically or by theme, such as ceremony, reception, and honeymoon. Use creative layouts and mix different textures and materials to add depth and interest.
Don't forget to leave space for journaling, where you can record your thoughts and feelings about each moment. This personalized scrapbook will become a treasured keepsake, allowing you to relive your wedding day for years to come.
Photo-Wrapped Candles
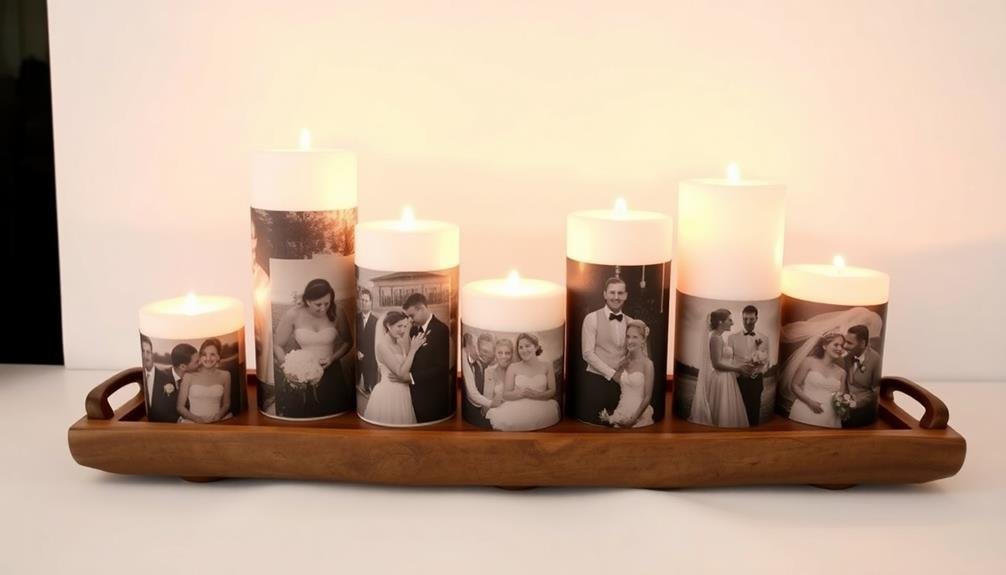
Photo-wrapped candles frequently serve as both elegant decor and sentimental keepsakes for newlyweds. They're an ingenious way to display your favorite wedding photos while creating a warm, romantic ambiance.
To create these personalized candles, you'll need pillar candles, printed photos, and tissue paper.
Start by selecting your favorite wedding photos and printing them on thin tissue paper. Trim the images to fit the candle's circumference, leaving a small overlap. Carefully wrap the photo around the candle, securing it with a low-heat glue gun or double-sided tape.
For a polished look, consider adding decorative ribbons or twine around the top and bottom edges.
You can create a set of photo-wrapped candles featuring different moments from your special day. Place them on tables, mantels, or shelves to add a personal touch to your home decor. They also make thoughtful gifts for parents, grandparents, or members of your wedding party.
When lit, the candle's glow will softly illuminate your cherished memories, creating a warm and intimate atmosphere. Remember to use LED candles if you want to preserve the photos indefinitely, as regular candles will eventually melt away.
Instagram-Inspired Magnet Board
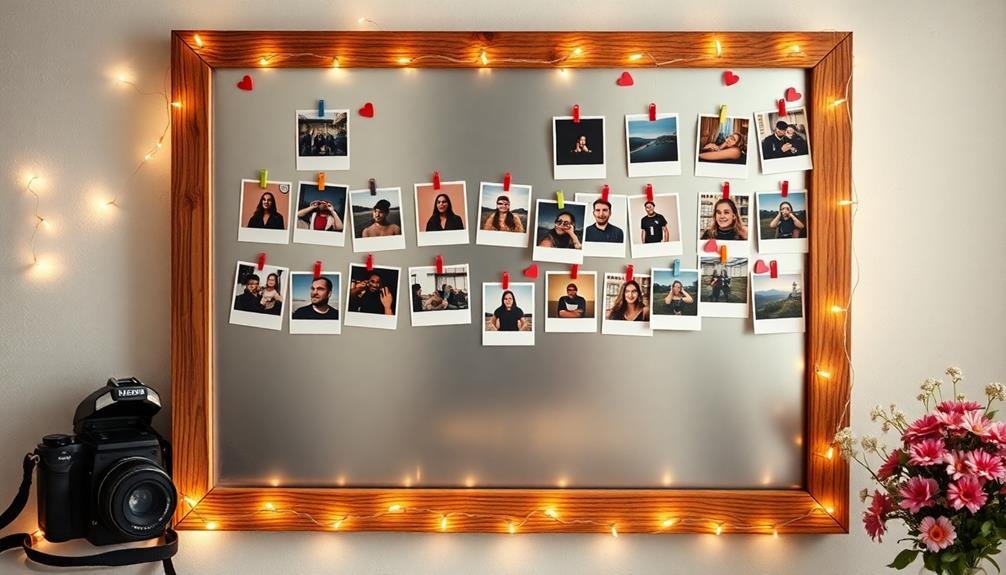
An Instagram-inspired magnet board offers a creative way to display your favorite wedding photos in a format reminiscent of social media. Create a large, customized board that mimics the Instagram interface, complete with a white background and familiar layout. Use small magnets to attach printed versions of your wedding photos, allowing you to easily rearrange and update the display over time.
To enhance the Instagram-inspired theme, consider adding these elements to your magnet board:
- Printed hashtags related to your wedding
- Like and comment icons beneath each photo
- A search bar at the top of the board
- Profile pictures of you and your spouse
- Date stamps on each photo
This DIY project is both cost-effective and versatile. You can use a lightweight material like foam board or a more durable option such as a thin sheet of metal covered in white contact paper.
Print your photos in various sizes to mimic the grid-like appearance of an Instagram feed. Don't forget to include captions for each image, sharing special moments and memories from your big day.
This unique display will surely become a conversation starter and a cherished keepsake of your wedding.
Wedding Video Projection Night
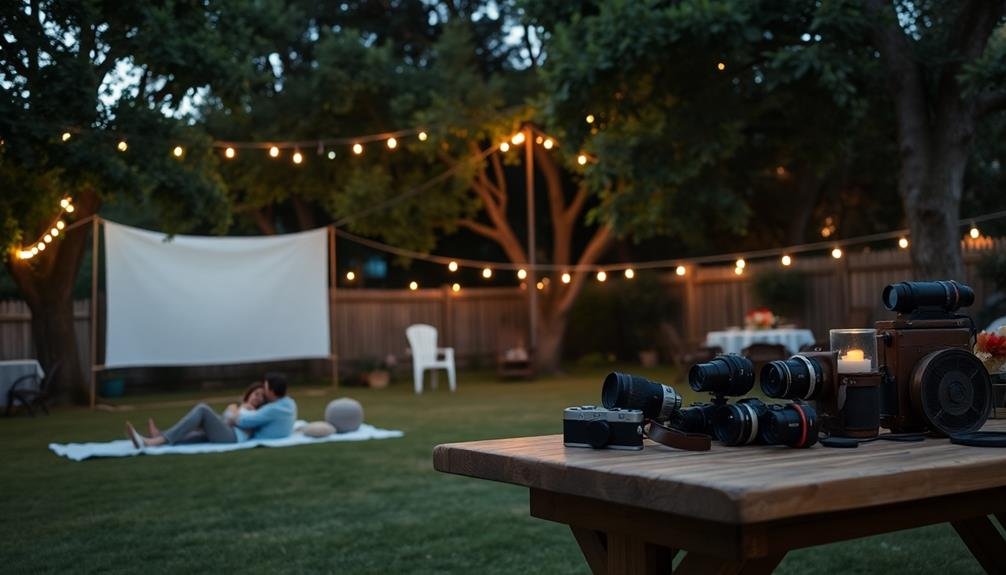
Transform your wedding memories into a cinematic experience with a Wedding Video Projection Night.
You'll need to contemplate outdoor screening setup tips, such as choosing the right location, ensuring proper sound quality, and selecting appropriate equipment for a clear projection.
Enhance the viewing experience by incorporating creative video montage ideas that showcase your favorite moments, blending photos and videos set to meaningful music.
Outdoor Screening Setup Tips
While planning your wedding video projection night, setting up the perfect outdoor screening area is essential for creating a magical atmosphere. Choose a flat, open space with minimal light pollution to guarantee the best viewing experience.
Consider the weather forecast and have a backup indoor location or rain date in case of inclement weather.
For the screen, you can use a large white sheet, a portable projector screen, or even the side of a building. Make sure your projector is powerful enough for outdoor use and position it at the correct distance for ideal image size and clarity.
Don't forget to test your setup before the event to address any technical issues.
Here are some additional tips for a successful outdoor screening:
- Set up comfortable seating with blankets and pillows
- Use string lights or lanterns to create ambiance
- Provide bug spray and citronella candles for pest control
- Offer warm beverages and snacks
- Have a sound system for clear audio
Creative Video Montage Ideas
Now that you've set up the perfect outdoor screening area, it's time to focus on the content of your wedding video projection night. Consider creating an enchanting montage that tells your love story. Start with childhood photos of both partners, gradually progressing to your first meeting, dating milestones, and the proposal.
Intersperse these images with short video clips of special moments and well-wishes from friends and family. For a unique twist, include a "day in the life" segment showcasing your everyday routines and interactions. This adds a personal touch and gives guests insight into your relationship.
Don't forget to highlight your shared interests and hobbies through themed segments. Consider incorporating a timeline of your relationship using animated text and graphics. This can serve as a visual guide throughout the montage.
For added impact, synchronize the footage with meaningful songs that represent different stages of your journey together. Lastly, include behind-the-scenes footage from your wedding day preparations. This gives viewers a glimpse into the excitement and anticipation leading up to your big day.
End the montage with your favorite moments from the ceremony and reception, creating a beautiful recap of your wedding celebration.
Memory Jar With Printed Photos
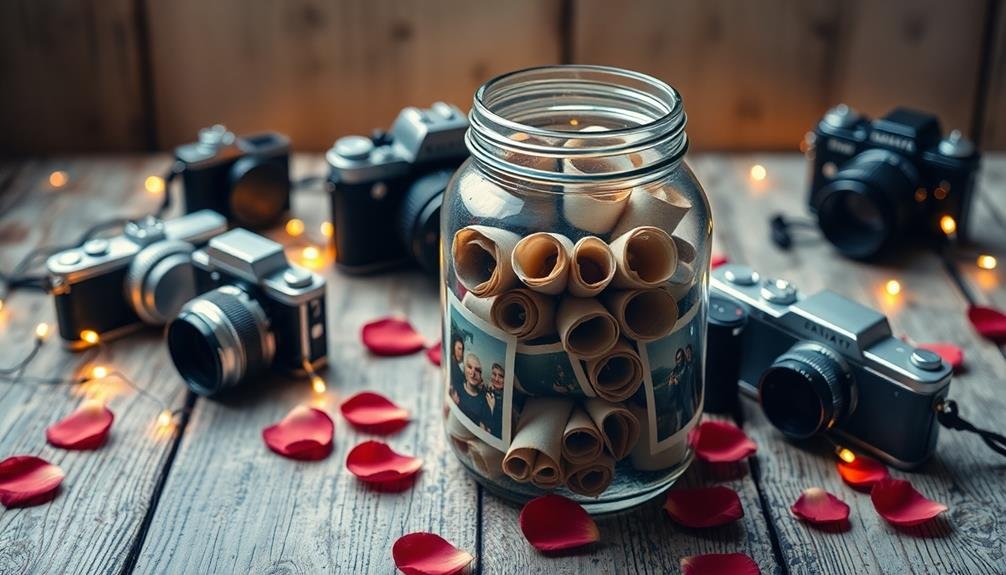
For a sentimental and interactive wedding keepsake, consider creating a memory jar with printed photos. This DIY project allows you to showcase cherished moments in a unique and decorative way. Choose a large, clear glass jar or mason jar as your canvas. Print out a selection of your favorite wedding photos in various sizes, ranging from wallet-sized to 4×6 inches.
To add depth and texture to your memory jar, include other mementos from your special day. You can incorporate:
- Dried flower petals from your bouquet
- Small trinkets or charms
- Handwritten notes or vows
- Pieces of ribbon or lace from your attire
- Confetti or glitter for a festive touch
Carefully arrange the photos and items inside the jar, layering them to create a visually appealing display. You can use clear fishing line to suspend some photos, creating a floating effect.
Seal the jar with a decorative lid or tie a ribbon around the neck for a finishing touch. Place your memory jar on a shelf, mantle, or side table as a constant reminder of your wedding day.
This personalized keepsake will spark conversations and allow you to relive precious moments for years to come.
Frequently Asked Questions
How Can I Protect Displayed Photos From Sun Damage or Fading?
You can protect your displayed photos from sun damage by using UV-protective glass or acrylic frames. Hang them away from direct sunlight, apply UV-filtering window film, or rotate photos periodically. Consider displaying copies and storing originals safely.
What's the Best Way to Secure Photos Without Damaging the Prints?
To secure photos without damage, you'll want to use acid-free photo corners or clear sleeves. Don't use adhesives directly on prints. Magnetic albums are another option. Always handle photos by their edges to avoid fingerprints and smudges.
Are There Eco-Friendly Alternatives for Photo Display Materials?
You'll find plenty of eco-friendly options for photo displays. Try using recycled wood frames, bamboo stands, or upcycled materials. You can also opt for digital frames, which save paper. Don't forget about plantable seed paper for printed photos.
How Do I Create a Cohesive Look With Different Photo Sizes?
You can create a cohesive look with different photo sizes by using a consistent color scheme or theme. Try arranging them in a grid pattern, using matching frames, or creating a collage. Don't forget to balance larger and smaller images.
What Lighting Options Enhance Photo Displays Without Causing Glare?
You'll want to use soft, diffused lighting to enhance your photo displays. Try LED strips behind frames, battery-operated spotlights, or adjustable desk lamps. Angle lights carefully to avoid glare, and consider using frosted bulbs or light diffusers.
In Summary
You've now got a wealth of creative and budget-friendly ideas to showcase your wedding memories. Whether you're crafting a DIY photo wall or hosting a video projection night, these unique displays will keep your special day alive. Don't be afraid to mix and match or add your own personal touch. Remember, it's not about how much you spend, but how you choose to celebrate and relive those precious moments. Get creative and enjoy the process!

I’m Sarah, the creator and writer behind this site. I’m a wife and a mother of two wonderful kids who keep me on my toes and inspire me daily. My passion lies in creating and organizing memorable events and group activities, where people can come together and make lasting memories.
Leave a Reply