You can create stunning DIY wedding photography backdrops on a budget with simple techniques and affordable materials. Consider fabric drapes for a romantic atmosphere, or craft a floral wall using artificial flowers. For a rustic look, build wooden panels or repurpose vintage doors. Paper flower arrangements offer a budget-friendly alternative to fresh blooms. Balloon arches provide a versatile and colorful option, while chalkboard backdrops allow for customizable designs. Fairy light curtains add a magical touch, and natural foliage walls bring an organic feel. With creativity and planning, you'll transform your wedding photos without breaking the bank. Explore these ideas to discover the perfect backdrop for your special day.
Key Takeaways
- Fabric drape backdrops using tulle or chiffon create a romantic atmosphere and can be easily made with PVC pipes or tension rods.
- Fairy light curtains offer a magical ambiance and require only sheer curtains, a sturdy frame, and battery-operated LED lights.
- Paper flower arrangements provide a budget-friendly alternative to real flowers and can be customized to match wedding colors.
- Rustic wooden panels can be assembled quickly using reclaimed wood planks and customized with various finishing techniques.
- Balloon arches are versatile, customizable, and can be created using balloons, an arch kit or PVC pipes, and a balloon pump.
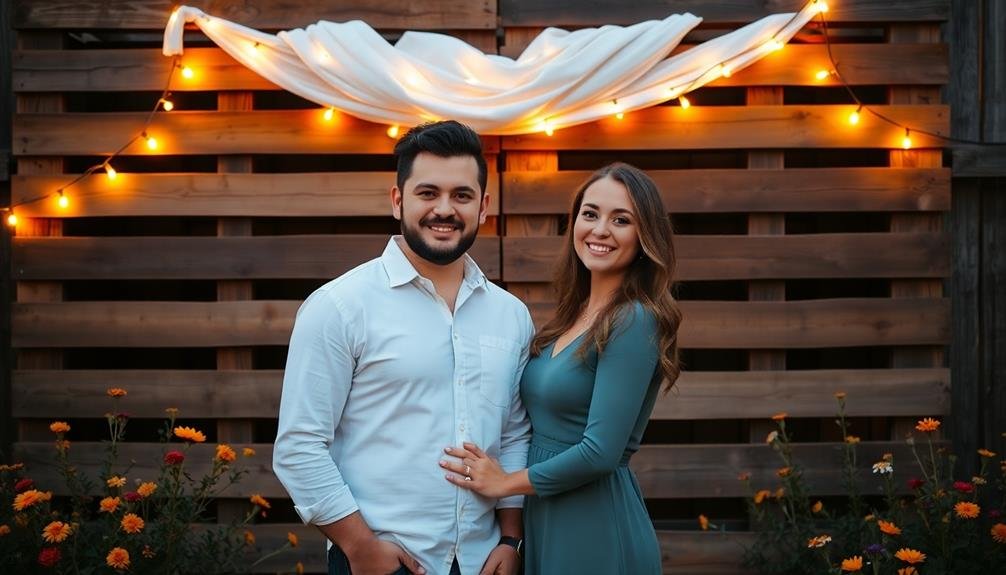
Fabric Drape Backdrops
Fabric drape backdrops offer a simple yet elegant solution for DIY wedding photography. You'll find these versatile options easy to create and customize for your special day.
Start by choosing a lightweight fabric like tulle, chiffon, or organza in your desired color. These materials drape beautifully and create a soft, romantic atmosphere.
To set up your backdrop, you'll need a sturdy frame or support system. Use PVC pipes, tension rods, or even a clothesline strung between two posts. Secure your fabric to the top of the frame, allowing it to fall naturally. For added dimension, layer multiple fabrics or create gentle gathers.
Don't forget to take into account your venue's layout when planning your backdrop. Confirm you have enough space for the frame and fabric, as well as room for the couple and photographer to move around.
You can enhance your fabric drape with fairy lights, floral arrangements, or even a personalized monogram sign.
Remember to steam or iron your fabric before the event to remove any wrinkles. With careful planning and execution, your DIY fabric drape backdrop will provide a stunning setting for unforgettable wedding photos.
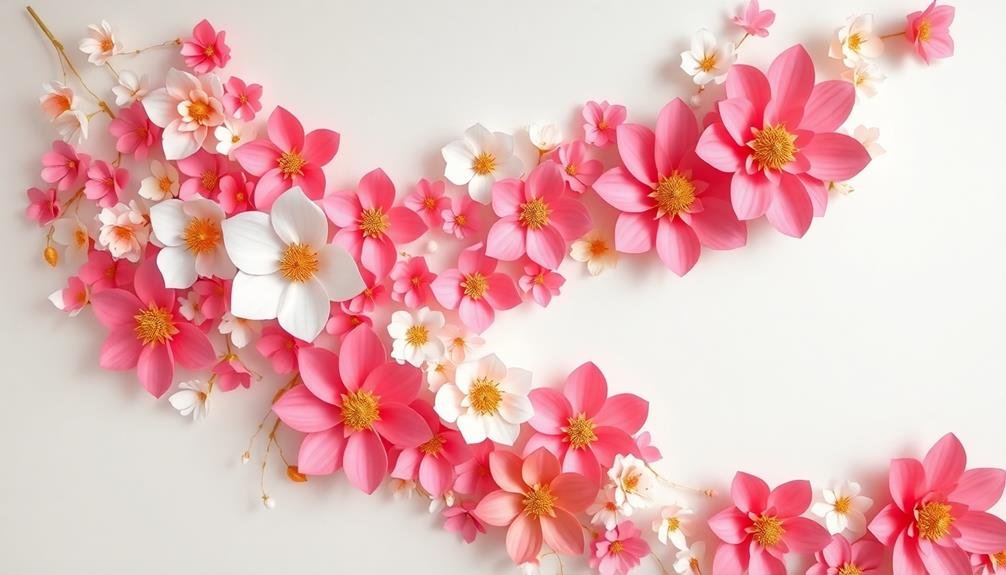
Floral Wall Designs
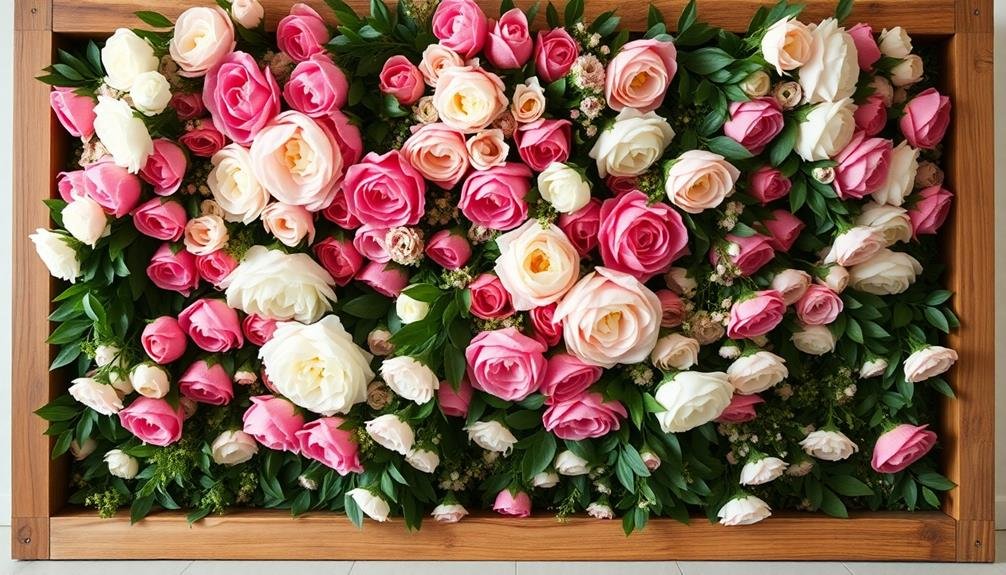
A stunning floral wall can transform your wedding photos into a botanical wonderland. To create this eye-catching backdrop, start by choosing a base material like plywood or foam board. Secure artificial flowers to the base using a hot glue gun, working in sections to guarantee even coverage. Opt for a mix of flower sizes and types to add depth and texture.
For a budget-friendly option, contemplate using paper flowers. You can make these yourself or purchase pre-made ones in bulk. Arrange them in a gradient pattern or create a specific shape, like a heart or your initials. To add dimension, incorporate greenery or vines between the flowers.
If you're aiming for a more natural look, use preserved or dried flowers. These will last longer than fresh flowers and won't wilt during your photo session. Mix in some fairy lights for a magical touch, especially for evening photos.
Remember to contemplate the overall color scheme of your wedding when selecting flowers. You can create a monochromatic design or a vibrant rainbow effect.
Don't forget to leave some space for the couple to stand in front of the wall, guaranteeing you're the focal point of your photos.
Rustic Wooden Panels
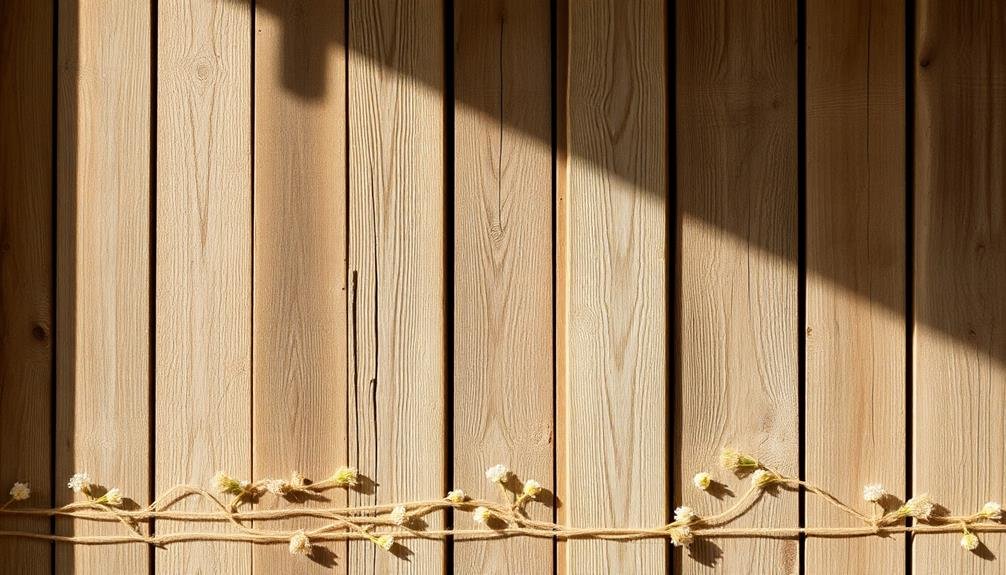
Rustic wooden panels offer a charming backdrop for your wedding photos.
You'll find these panels easy to assemble with simple instructions, allowing for quick setup on your big day.
To achieve that perfect weathered look, you can apply various finishing techniques that'll give your backdrop an authentic, aged appearance.
Easy Assembly Instructions
Ready to create your rustic wooden panel backdrop? Follow these easy assembly instructions to bring your vision to life. Start by gathering your materials: reclaimed wood planks, a sturdy frame, wood screws, and a drill. Measure and cut your planks to fit the frame, ensuring a snug fit.
Lay out your planks in the desired pattern, mixing different wood tones for a more authentic rustic look. Attach the planks to the frame using wood screws, spacing them evenly for a polished appearance. Sand any rough edges to prevent snags on clothing or decorations.
Here's a quick guide to help you choose the right wood types for your backdrop:
| Wood Type | Appearance | Durability | Cost |
|---|---|---|---|
| Pine | Light, knotty | Moderate | Low |
| Oak | Rich grain | High | High |
| Barn wood | Weathered | Varies | Moderate |
| Pallet wood | Rustic | Low | Very low |
Once assembled, you can customize your backdrop with stains, paints, or decorative elements like fairy lights or hanging greenery. Remember to reinforce the structure if you plan to hang heavy items. With these simple steps, you'll have a stunning, personalized backdrop for your wedding photos.
Weathered Finish Techniques
Creating a weathered finish on your rustic wooden panel backdrop adds depth and character to your wedding photos. To achieve this look, you'll need sandpaper, wood stain, and a wire brush.
Start by sanding the surface of your wooden panels to remove any rough spots or splinters. Next, apply a coat of wood stain in your chosen color, wiping off excess with a cloth for a more natural appearance.
For an authentic weathered look, try these techniques:
- Distressing: Use various tools like chains, hammers, or screwdrivers to create dents and marks on the wood surface.
- Dry brushing: Apply a lighter paint color over the stained surface using a dry brush, focusing on raised areas and edges.
- Wax resist: Apply wax to certain areas before staining to create a patchy, worn effect.
Once you've achieved your desired weathered look, seal the wood with a clear matte finish to protect it from moisture and preserve the effect.
Paper Flower Arrangements
You'll find paper flower arrangements to be a versatile and budget-friendly backdrop option for your wedding photos.
Start by mastering simple DIY paper flower techniques, such as crafting roses, peonies, or dahlias from various types of paper.
When arranging your paper blooms, consider creating an ombré effect or mixing different sizes and styles for a more dynamic and visually appealing backdrop.
DIY Paper Flower Techniques
Once you've mastered the basics of paper flower creation, it's time to explore more advanced techniques for stunning arrangements. Try combining different paper types, like crepe paper for delicate petals and cardstock for sturdy leaves.
Experiment with ombre effects by gradually blending colors on a single flower. You can achieve this by using watercolors or chalk pastels on white paper.
For more intricate designs, consider quilling techniques. This involves rolling thin strips of paper into coils and shaping them into various forms. It's perfect for creating detailed flower centers or adding texture to your arrangements.
To elevate your paper flower skills further, focus on:
- Realistic petal shaping using curling tools or your fingers
- Adding wire stems for flexibility and natural movement
- Incorporating faux stamens and pistils for botanical accuracy
Don't forget to play with scale. Mix large statement flowers with smaller, more delicate blooms to create depth and visual interest.
You can also experiment with unconventional materials like coffee filters or tissue paper for unique textures. Remember, practice makes perfect, so don't be afraid to try new techniques and push your creative boundaries.
Backdrop Arrangement Tips
Now that you've honed your paper flower crafting skills, it's time to put them to use in a stunning backdrop arrangement. Start by planning your design on paper, considering the overall shape and color scheme you want to achieve. Choose a focal point, typically at eye level, where you'll place your largest or most intricate flowers.
Create depth by varying the sizes of your paper flowers, with larger blooms in the foreground and smaller ones in the background. Use a mix of fully open flowers, buds, and leaves to add visual interest and texture.
When arranging, work from the center outward, securing each flower to your backdrop material with strong adhesive or wire. Don't forget to incorporate negative space to prevent your arrangement from looking cluttered.
Balance is key, so step back frequently to assess your progress and make adjustments. Consider adding non-floral elements like ribbons, fairy lights, or fabric swags to enhance the overall design.
For a cohesive look, echo your paper flower colors in other wedding decorations. Finally, verify your backdrop is securely fastened and stable to withstand the excitement of your big day.
Balloon Arch Installations
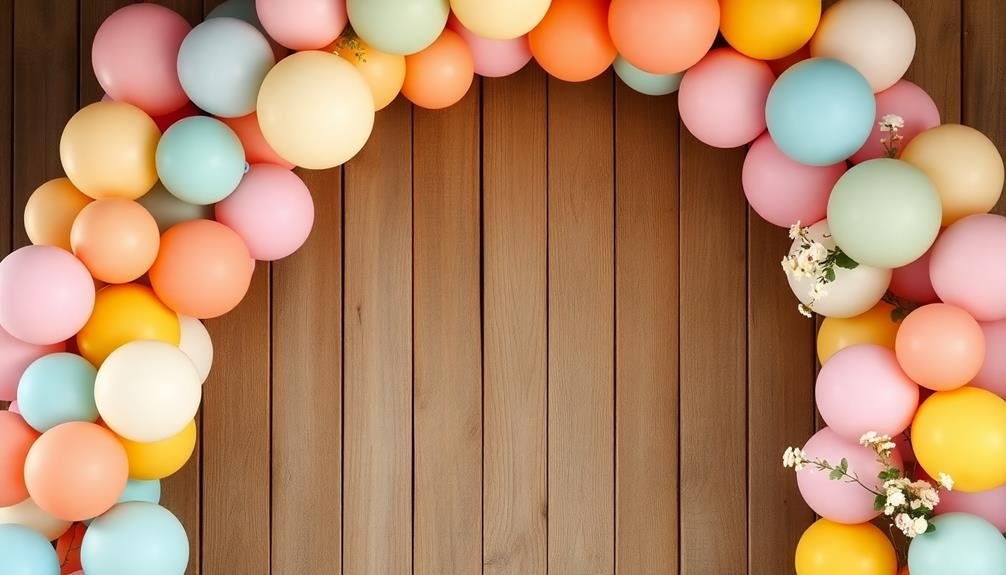
Balloon arch installations have become a popular and eye-catching backdrop option for DIY wedding photography. They're versatile, affordable, and can be customized to match your wedding colors and theme.
To create a stunning balloon arch, you'll need balloons in various sizes, a balloon arch kit or PVC pipes, and a balloon pump.
Start by planning your design and color scheme. You can opt for a traditional rounded arch or experiment with unique shapes like hearts or asymmetrical designs. When inflating the balloons, vary their sizes to add depth and interest to your arch. Attach the balloons to your frame using balloon tape or by tying them directly to the structure.
For a professional-looking finish, follow these tips:
- Create a balanced color gradient by alternating balloon colors
- Add floral elements or greenery to soften the look
- Use clear fishing line to hang additional balloons or decorations
Remember to secure your balloon arch properly to prevent it from toppling over during the photoshoot.
With a little patience and creativity, you can craft a stunning balloon arch backdrop that'll make your wedding photos truly memorable.
Geometric Shapes Display
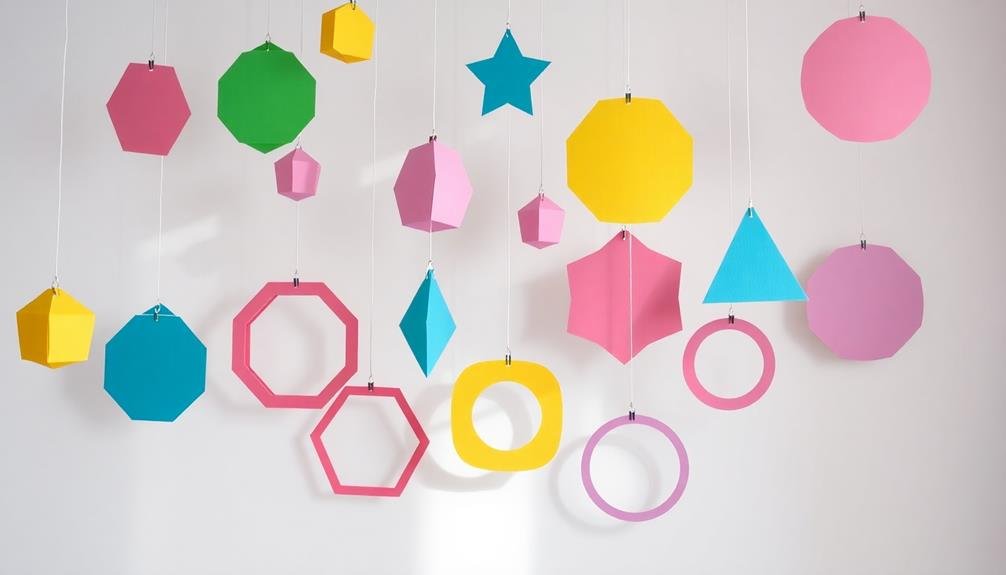
You'll need cardboard, paint, scissors, and string to create a stunning geometric shapes display for your wedding backdrop.
Start by cutting various geometric shapes from cardboard, painting them in your chosen colors, and attaching string to hang them.
Arrange the shapes in a visually appealing pattern, experimenting with different heights and angles to achieve the perfect look for your photos.
Materials and Tools Needed
To create a stunning geometric shapes display for your DIY wedding photography backdrop, you'll need a variety of materials and tools. Start with a selection of lightweight wooden dowels or PVC pipes in various lengths, which will form the frame of your geometric shapes.
You'll also need connectors or joints to secure the pieces together. For the covering, choose fabrics in your wedding colors or opt for sheer materials to create a layered effect.
Essential tools include:
- A saw or pipe cutter for sizing the dowels or pipes
- A measuring tape to guarantee precise dimensions
- A hot glue gun or strong adhesive for securing fabric
Don't forget to gather safety equipment like work gloves and protective eyewear.
You'll also need scissors for cutting fabric and wire cutters if you're using metal connectors. Consider adding embellishments like fairy lights, artificial flowers, or metallic spray paint to enhance your backdrop's visual appeal.
Step-By-Step Assembly Guide
Now that you've gathered all the necessary materials and tools, let's begin assembling your geometric shapes display.
Start by cutting your wooden dowels into various lengths, ranging from 1 to 3 feet. Sand the ends smooth to prevent splinters.
Next, use your hot glue gun to connect the dowels, forming triangles, squares, and hexagons of different sizes.
Once you've created a variety of shapes, spray paint them in your chosen color scheme. Allow them to dry completely before handling.
While they're drying, prepare your backdrop stand by extending it to its full height and width. Attach a plain white or neutral-colored fabric to the stand using clamps or pins.
Now, it's time to arrange your geometric shapes. Use fishing line to hang the shapes at varying heights from the top of the backdrop stand. Secure each shape with a small knot, adjusting the lengths to create depth and visual interest.
For added stability, you can hot glue some shapes together where they intersect.
Creative Arrangement Ideas
Creative arrangements for your geometric shapes display can transform your wedding backdrop from ordinary to extraordinary. Consider grouping shapes in asymmetrical clusters for a modern, artistic look. Mix and match different sizes and colors to create visual interest and depth.
You can also experiment with hanging shapes at varying heights to add dimension to your backdrop. For a cohesive look, try arranging your shapes in a gradient pattern. Start with larger shapes at the bottom and gradually decrease the size as you move upward. This creates a sense of movement and draws the eye across the entire backdrop.
Alternatively, create a focal point by clustering shapes densely in the center and spacing them out towards the edges. To make your geometric shapes display truly unique, incorporate these creative ideas:
- Intersperse fairy lights or small LED bulbs within the shapes for a magical glow
- Add greenery or flowers to soften the angular lines of the shapes
- Use metallic paint or glitter to create eye-catching accents on select shapes
Repurposed Window Frames

Vintage window frames offer a charming and versatile backdrop option for DIY wedding photography. You'll find these frames at flea markets, antique stores, or even in your grandparents' attic. They're perfect for creating a rustic or shabby chic atmosphere in your wedding photos.
To use window frames as backdrops, you can paint them in colors that complement your wedding theme. Hang them from trees or create a freestanding structure using wooden posts. You can also add elements like curtains, flowers, or fairy lights to enhance the overall look.
Here's a table to inspire your window frame backdrop designs:
| Style | Frame Color | Added Elements | Background | Mood |
|---|---|---|---|---|
| Rustic | Weathered white | Burlap curtains | Barn wood | Cozy |
| Romantic | Soft pink | Roses and vines | Sheer fabric | Dreamy |
| Modern | Matte black | Geometric shapes | White wall | Sleek |
| Bohemian | Turquoise | Macramé and feathers | Natural greenery | Free-spirited |
| Vintage | Antique gold | Lace doilies | Floral wallpaper | Nostalgic |
Remember to secure the frames properly to guarantee safety during your photoshoot. With a little creativity, you'll transform simple window frames into stunning backdrops that'll make your wedding photos truly unforgettable.
Macramé Hanging Designs
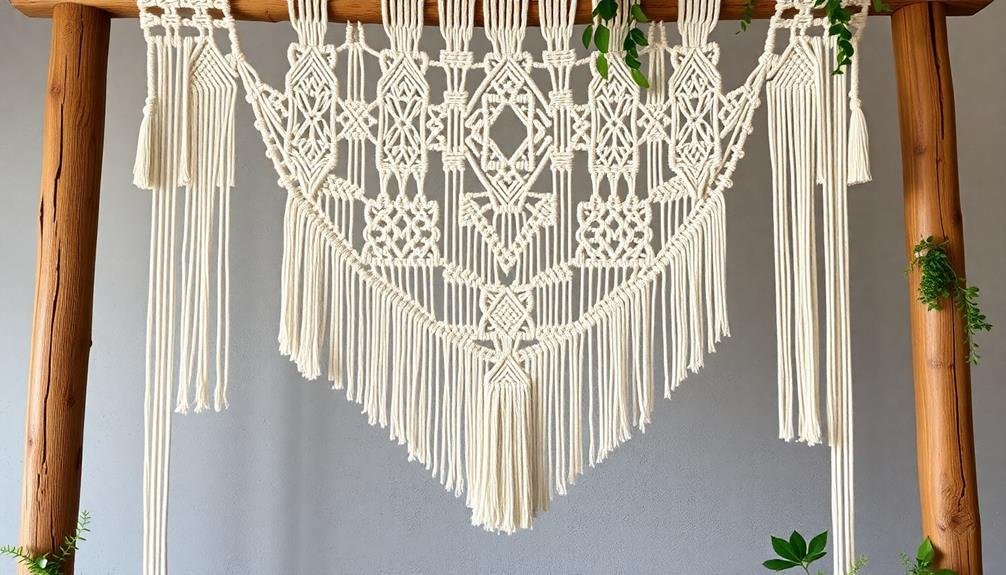
Intricate knots and flowing designs characterize macramé hanging backdrops, offering a bohemian and textured aesthetic for your wedding photos.
You can create a stunning DIY macramé backdrop with just a few materials and some basic knotting techniques. Start by selecting a sturdy rod or branch to serve as the base for your hanging design. Choose natural cotton rope in various thicknesses to add depth and visual interest to your backdrop.
To create your macramé design, you'll need to master a few essential knots:
- Square knot: The foundation of most macramé patterns
- Spiral knot: Adds a twisting, rope-like effect
- Lark's head knot: Used to attach cords to the base rod
Begin by attaching your cords to the rod using lark's head knots, then work your way down, incorporating different knots and patterns. Mix in wooden beads, crystals, or dried flowers for added charm.
As you progress, vary the lengths of your cords to create an asymmetrical, organic shape. Once complete, hang your macramé backdrop using sturdy hooks or a portable frame for a whimsical, nature-inspired photo setting.
Chalkboard Art Backdrops
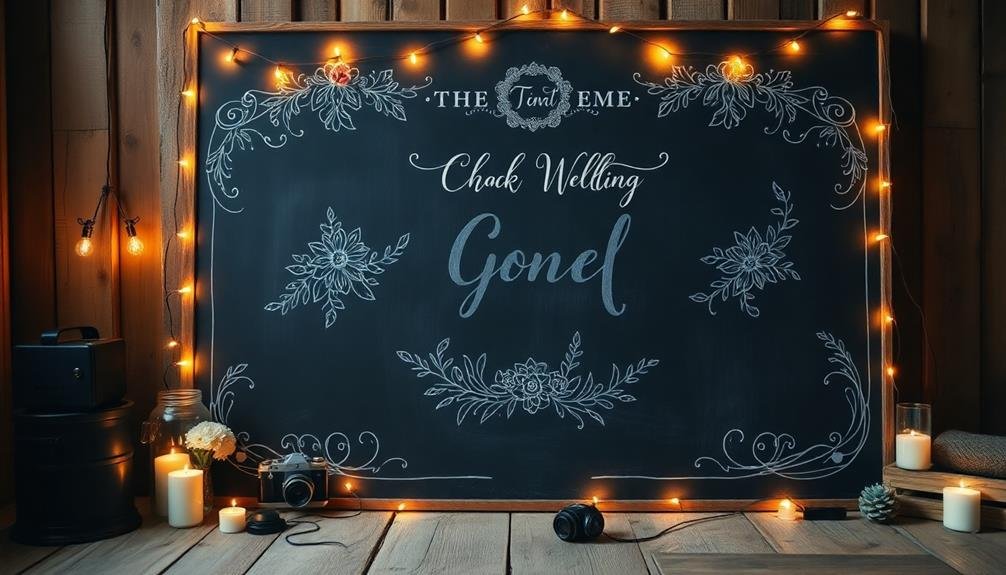
While macramé offers a bohemian touch, chalkboard art backdrops bring a customizable and rustic charm to your wedding photos. You'll love how versatile and budget-friendly this option is.
Start by purchasing a large chalkboard or creating one using plywood and chalkboard paint. Make sure it's big enough to serve as a backdrop for your photos.
Next, release your creativity or enlist a friend with good handwriting to design your chalkboard. You can write your names, wedding date, a meaningful quote, or even draw intricate designs. Use chalk markers for a cleaner look and more vibrant colors. If you're not confident in your artistic skills, stencils can help achieve professional-looking results.
Consider incorporating floral elements or fairy lights around the chalkboard for added visual interest. You can also use multiple smaller chalkboards to create a unique collage effect.
Don't forget to seal your artwork with hairspray to prevent smudging during the event.
Chalkboard backdrops are perfect for both indoor and outdoor weddings. They're easy to transport and set up, making them ideal for DIY couples. Plus, you can repurpose the chalkboard after the wedding as a memento in your home.
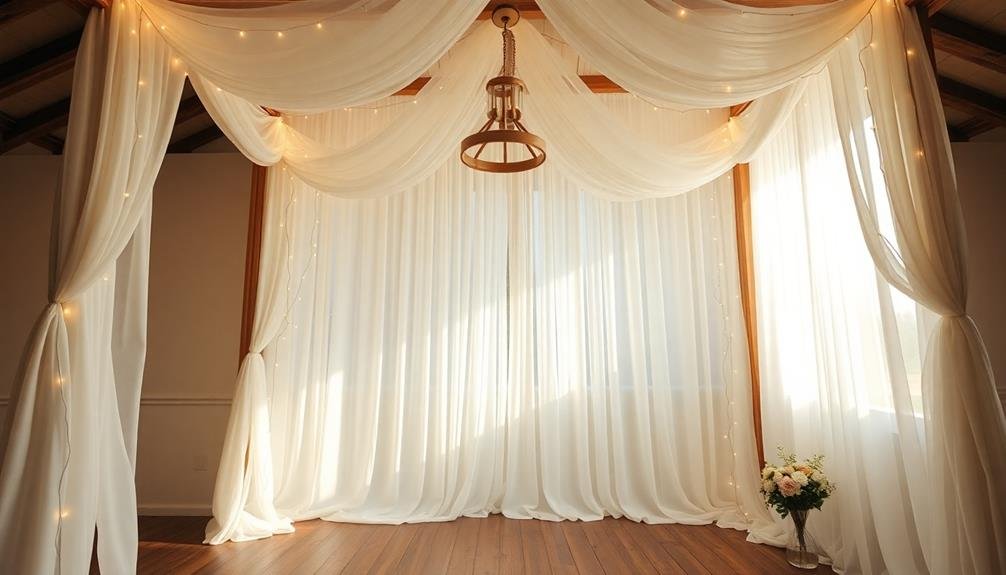
Fairy Light Curtains
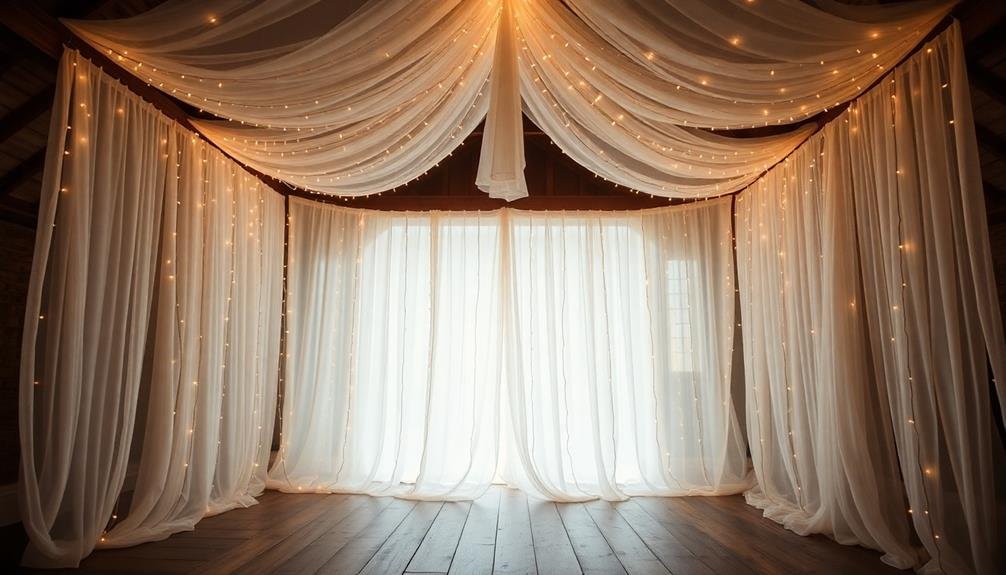
Enchantment awaits with fairy light curtains as your next DIY wedding photography backdrop. These ethereal curtains create a magical ambiance that'll make your wedding photos truly unforgettable.
To craft your own fairy light curtain, you'll need sheer curtains, a sturdy rod or frame, and several strands of battery-operated LED fairy lights.
Begin by hanging your sheer curtains on the rod or frame. Next, carefully weave the fairy lights through the curtain fabric, guaranteeing even distribution. For added depth, consider using multiple layers of curtains with lights sandwiched between them. You can customize the look by choosing different curtain colors or light colors to match your wedding theme.
When setting up your fairy light curtain backdrop, keep these tips in mind:
- Use a dimmer switch to adjust the light intensity for different photo effects
- Experiment with various curtain fabrics for unique textures and light diffusion
- Add floral elements or greenery to enhance the romantic atmosphere
Remember to test your backdrop before the big day to guarantee it photographs well.
With a fairy light curtain, you'll create a dreamy, romantic setting that'll make your wedding photos shine.
Vintage Door Setups
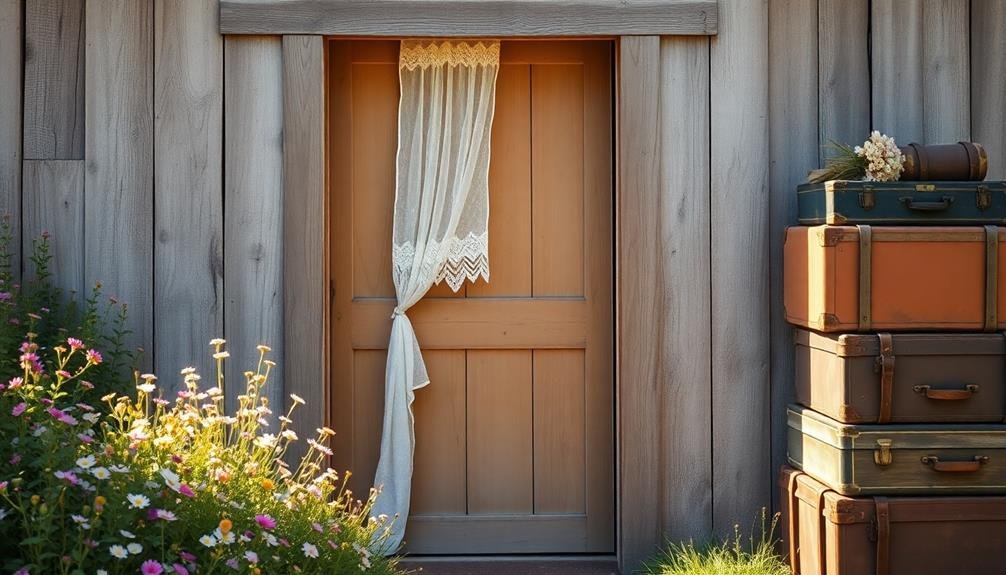
Rustic charm meets timeless elegance with vintage door setups as your DIY wedding photography backdrop. You'll find that old doors can transform your wedding photos, adding depth and character to each shot.
Start by scouring flea markets, antique shops, or salvage yards for doors with interesting textures, colors, or designs. Once you've found your perfect doors, clean them thoroughly and make any necessary repairs.
You can leave them as-is for an authentic weathered look or paint them to match your wedding colors. Consider using multiple doors to create a more elaborate setup. Arrange them side by side or at angles to add visual interest.
To enhance your vintage door backdrop, add decorative elements like wreaths, garlands, or floral arrangements. Hang frames or chalkboards with personalized messages on the doors.
You can also incorporate props like vintage suitcases, wooden crates, or antique chairs to complete the scene. For added versatility, mount your doors on sturdy stands or hinges, allowing you to easily adjust their positioning throughout the day.
This flexibility guarantees you'll capture a variety of stunning shots with your DIY vintage door backdrop.
Natural Foliage Walls
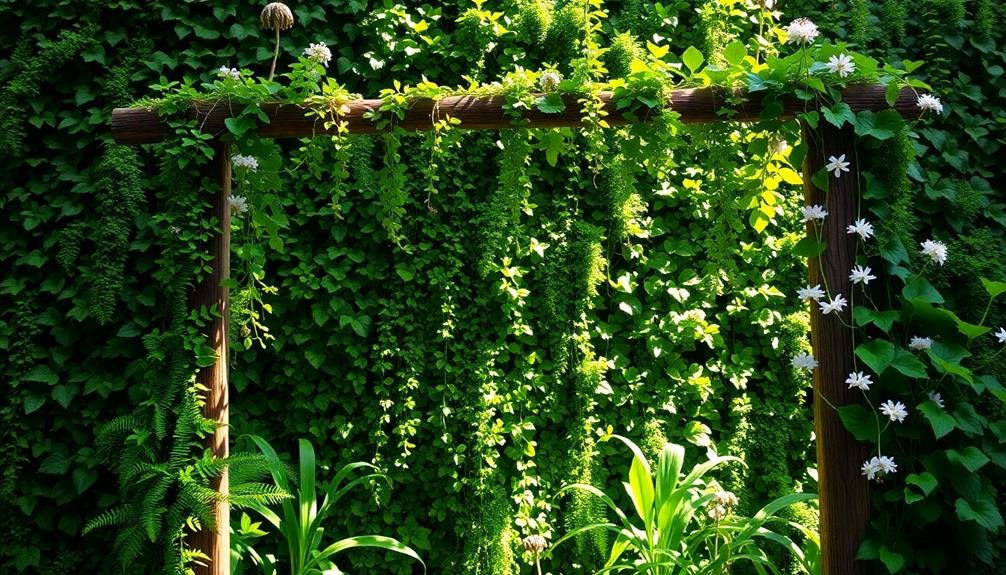
Why settle for artificial backdrops when nature offers a stunning alternative?
Natural foliage walls provide a lush, organic backdrop for your wedding photos that's both budget-friendly and visually striking. You can create these green walls using locally sourced plants, vines, and flowers, which will add a touch of natural beauty to your special day.
To build your natural foliage wall, start by constructing a simple frame using PVC pipes or wooden pallets. Attach chicken wire or a similar mesh material to the frame, creating a surface for securing the foliage.
Next, gather a variety of greenery and flowers from your garden or local florist. Mix textures and shades for a more dynamic look.
When arranging your foliage wall, keep these tips in mind:
- Start with a base layer of larger leaves or ferns
- Fill in gaps with smaller plants and flowers
- Use floral wire to secure delicate blooms
Remember to mist the foliage regularly to keep it fresh throughout the day.
With careful planning and execution, your DIY natural foliage wall will create a breathtaking backdrop for unforgettable wedding photos, all while staying within your budget.
Frequently Asked Questions
How Do I Transport and Set up DIY Backdrops at the Wedding Venue?
You'll want to roll or fold your backdrops carefully for transport. At the venue, use portable stands or attach them to walls. Bring necessary tools and arrive early to set up. Don't forget weights for outdoor use.
What Lighting Equipment Works Best With Homemade Photography Backdrops?
You'll want soft, diffused lighting for homemade backdrops. Use LED panels or softboxes for even illumination. Don't forget reflectors to fill shadows. Avoid harsh direct light. Experiment with placement to find what works best for your setup.
How Far in Advance Should I Start Creating DIY Wedding Backdrops?
You'll want to start creating DIY wedding backdrops at least 2-3 months before the big day. It'll give you time to plan, gather materials, experiment with designs, and make adjustments. Don't rush the process; quality takes time.
Are There Any Safety Considerations When Installing DIY Photography Backdrops?
When installing DIY photography backdrops, you'll need to guarantee they're securely fastened to prevent falling. Avoid trip hazards with cords or props. Be cautious with electrical equipment near fabric. Always prioritize guest safety above aesthetics.
How Do I Ensure My DIY Backdrop Complements the Overall Wedding Theme?
To guarantee your DIY backdrop complements the wedding theme, you'll want to match colors, textures, and materials. Consider the venue's style, the couple's preferences, and the season. Don't forget to test it with sample photos beforehand.
In Summary
You've now got a treasure trove of budget-friendly DIY wedding photography backdrop ideas. Whether you choose fabric drapes, floral walls, or rustic panels, you'll create a stunning setting for your special day. Don't be afraid to mix and match or add personal touches. Remember, your backdrop is more than just a photo prop—it's a reflection of your style and love story. With creativity and effort, you'll craft a memorable backdrop without breaking the bank.

I’m Sarah, the creator and writer behind this site. I’m a wife and a mother of two wonderful kids who keep me on my toes and inspire me daily. My passion lies in creating and organizing memorable events and group activities, where people can come together and make lasting memories.

Leave a Reply