Transform your wedding reception with these budget-friendly DIY bar ideas that'll impress your guests. Create a rustic barrel bar, set up a vintage suitcase cocktail station, or display drinks on an upcycled ladder. Roll out a mobile bar cart, construct a pallet wood beverage stand, or repurpose a wheelbarrow as a unique beer tub. Turn an old door into a charming cocktail counter, serve drinks from mason jar dispensers, and showcase your menu on a stylish chalkboard. These creative options not only save money but also add a personal touch to your special day. Discover how you can mix style and savings for an unforgettable celebration.
Rustic Barrel Bar
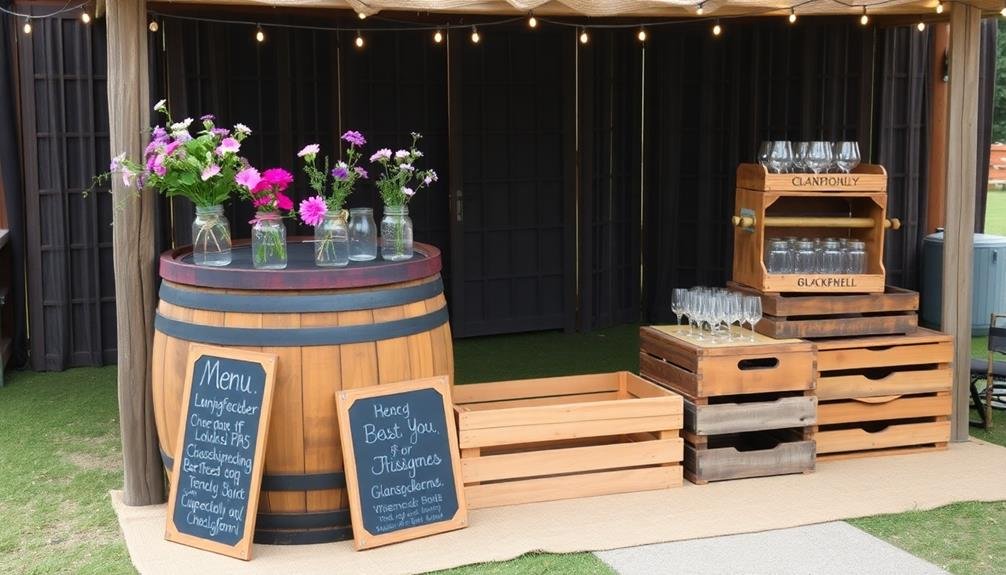
A rustic barrel bar adds charm and character to any wedding reception. To create this eye-catching focal point, you'll need to source a few oak barrels from a local winery or brewery. Stand them upright and place a sturdy wooden plank across the top to form your bar surface. Sand and stain the wood to match your wedding's color scheme.
Decorate the barrels with fairy lights, greenery, or floral garlands to enhance their rustic appeal. Add a chalkboard menu listing your signature cocktails and drink options. Don't forget to include vintage-inspired bar accessories like copper mugs, mason jars, and antique bottle openers to complete the look.
For seating, consider using smaller barrels as stools or high-top tables. You can also incorporate wine crates as shelving units behind the bar to display bottles and glassware. To keep drinks cold, fill a galvanized tub with ice and nestle it between the barrels.
Remember to provide ample space for your bartender to work comfortably.
With a little creativity, your rustic barrel bar will become a memorable centerpiece that reflects your unique style and keeps guests coming back for refills.
Vintage Suitcase Cocktail Station
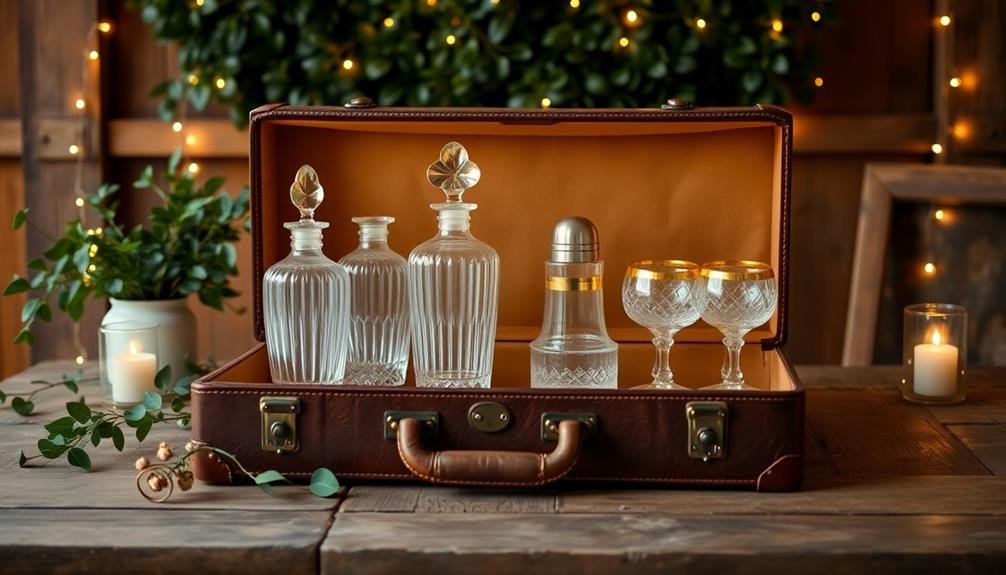
Transform your wedding bar into a conversation piece with a vintage suitcase cocktail station. This charming setup adds a touch of nostalgia and whimsy to your special day. Start by sourcing a large, vintage suitcase from thrift stores or antique shops. Clean it thoroughly and line the interior with waterproof material to protect it from spills.
Use the suitcase's built-in compartments to organize glasses, mixers, and garnishes. Add a small shelf or tiered stand inside to create levels for better visibility and easy access. Don't forget to include essential bar tools like shakers, jiggers, and muddlers.
To enhance the vintage theme, incorporate these elements:
| Decor | Glassware | Accessories |
|---|---|---|
| Old books | Coupe glasses | Antique bottle openers |
| Postcard garland | Mason jars | Vintage ice buckets |
| Travel-themed prints | Crystal tumblers | Retro cocktail picks |
| Lace doilies | Champagne flutes | Old-fashioned straws |
| Vintage luggage tags | Etched highballs | Antique serving trays |
Remember to include a menu of signature cocktails that complement your wedding theme. Consider naming drinks after significant places or moments in your relationship for a personal touch. With careful planning and attention to detail, your vintage suitcase cocktail station will be a hit among guests and create lasting memories.
Upcycled Ladder Drink Display
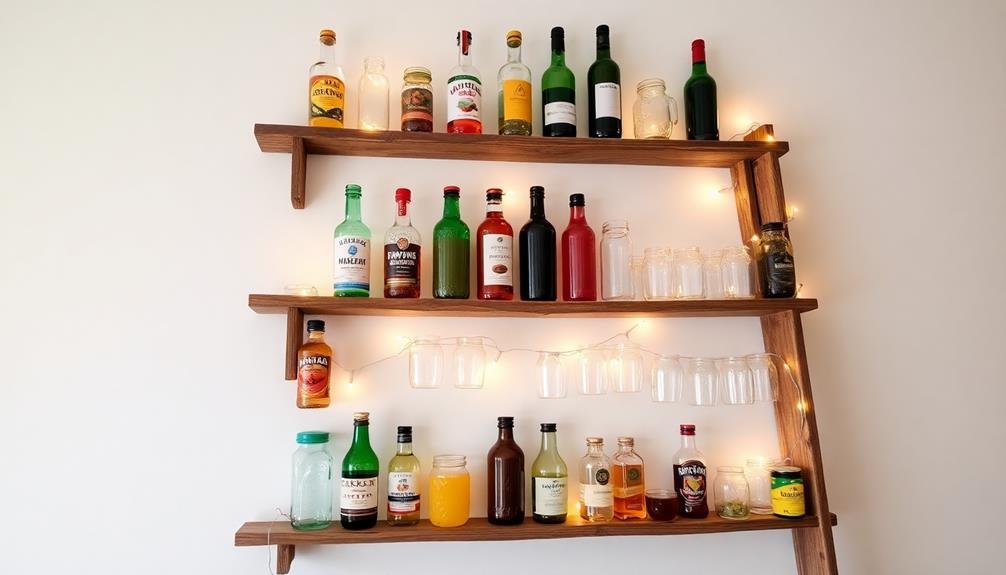
While repurposing old items for your wedding can be challenging, an upcycled ladder drink display offers a unique and eye-catching solution for your bar setup. Transform an old wooden ladder into a stylish and functional drink station that'll wow your guests.
Start by sanding and painting the ladder to match your wedding's color scheme. Then, secure sturdy wooden planks across the rungs to create shelves for glasses, bottles, and decorative elements.
To make your ladder drink display stand out, consider these creative touches:
- Hang fairy lights or Edison bulbs around the ladder for a warm, inviting glow
- Attach small chalkboards to each shelf to label different drink options
- Use vintage crates or wooden boxes on the shelves for added storage and charm
- Incorporate greenery or flowers to soften the look and tie it into your wedding decor
Don't forget to verify the ladder is stable and secure before use. Place heavier items on lower shelves for balance, and consider anchoring the ladder to a wall or sturdy surface if needed.
With a little creativity and effort, you'll have a stunning focal point for your wedding bar that's both practical and visually appealing.
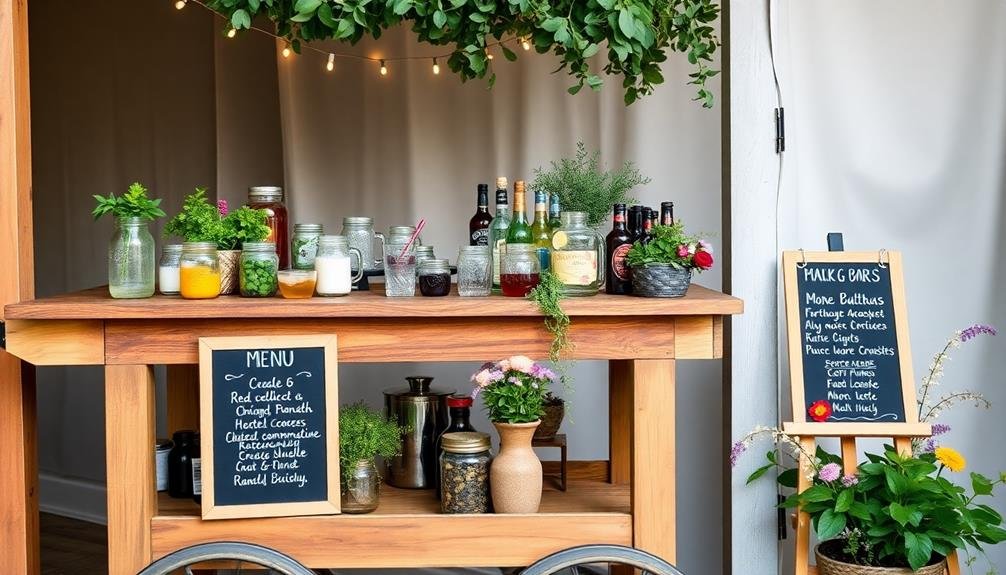
Mobile Bar Cart

Bar cart versatility makes it a perfect choice for DIY wedding bars. You can easily transform a basic cart into a stylish mobile bar that'll impress your guests and keep the drinks flowing. Start by selecting a cart with sturdy wheels and multiple tiers for ample storage space.
Customize your cart to match your wedding theme. Paint it in your chosen colors or add decorative elements like floral arrangements, ribbons, or fairy lights. Install a small chalkboard to display the drink menu or a cute wedding quote.
Don't forget to add essential bar tools like a cocktail shaker, jigger, and bottle opener. Stock the cart with a curated selection of spirits, mixers, and garnishes. Include signature cocktails that reflect your taste as a couple.
For a personal touch, add vintage glassware or custom coasters. Consider creating themed carts for different drink stations, such as a "His & Hers" setup or a "Bubbly Bar" for champagne.
Remember to designate a responsible bartender to manage the cart throughout the reception. With a well-designed mobile bar cart, you'll create a fun, interactive drinking experience that keeps the party rolling.
Pallet Wood Beverage Stand

Transform your wedding bar with a charming pallet wood beverage stand that adds rustic appeal to your celebration.
You'll find assembly straightforward with readily available materials and simple tools, making it an achievable DIY project.
Customize your stand with paint, stains, or decorative elements to match your wedding theme and create a unique focal point for your drink service.
Rustic Charm and Appeal
Rustic weddings have become increasingly popular, and nothing embodies that charm quite like a pallet wood beverage stand. This DIY project not only saves you money but also adds a unique, personal touch to your special day. By repurposing wooden pallets, you're creating a conversation piece that perfectly complements your rustic theme.
To achieve the ideal rustic look, consider these elements:
- Weathered wood with visible grain and knots
- Vintage metal accents like hooks, handles, or signage
- Mason jars or other glass containers for drinks and decorations
- Burlap or lace accents to soften the rough wood edges
When building your pallet wood beverage stand, focus on functionality as well as aesthetics. Ascertain it's sturdy enough to hold drinks, ice buckets, and glassware.
You can add shelves for storage, a built-in ice trough, or even a chalkboard panel for displaying your signature cocktails. Don't forget to sand down any rough edges to prevent snags on delicate wedding attire.
With a little creativity and elbow grease, you'll have a stunning focal point for your wedding bar that captures the essence of rustic charm and saves you money in the process.
Easy Assembly Instructions
Creating your own pallet wood beverage stand doesn't have to be complicated. With a few simple steps, you'll have a rustic and functional bar for your wedding in no time.
Start by sourcing two wooden pallets in good condition. Clean them thoroughly and sand any rough edges for safety.
Next, stack the pallets on top of each other, guaranteeing they're securely fastened with screws or nails.
To create shelving, remove a few planks from the top pallet and reattach them horizontally between the two pallets. This'll provide space for storing drinks and glasses.
For added stability, attach four sturdy legs to the bottom corners of the lower pallet. You can use wooden posts or metal pipes, depending on your preferred aesthetic.
Once the structure is secure, add a smooth surface on top using plywood or reclaimed wood planks.
Sand and stain or paint the entire stand to match your wedding theme.
Finally, accessorize with decorative elements like fairy lights, greenery, or signage.
Don't forget to add a protective coating to guard against spills and guarantee your DIY pallet wood beverage stand lasts well beyond your special day.
Customization and Decoration Tips
Your pallet wood beverage stand offers countless opportunities for personalization. Start by sanding the wood for a smooth finish, then choose a stain or paint color that complements your wedding theme.
Consider adding a custom sign with your names or wedding date using stencils or vinyl lettering. Enhance the stand's functionality by attaching hooks for hanging glasses or installing a small chalkboard to display drink options.
To create a cohesive look, incorporate decorative elements that match your overall wedding aesthetic. Use fairy lights, greenery, or floral arrangements to soften the rustic appearance of the pallet wood.
Don't forget to add personal touches that reflect your style as a couple.
Here are some ideas to spark your creativity:
- Wrap twine or ribbon around the stand's posts
- Hang vintage frames with photos or drink menus
- Attach antique bottle openers or corkscrews
- Place potted herbs or succulents on the shelves
Remember to keep the decor practical and uncluttered, allowing easy access to drinks and supplies.
With these customization tips, your pallet wood beverage stand will become a unique focal point at your wedding reception, impressing guests while staying within budget.
Converted Canoe Cooler
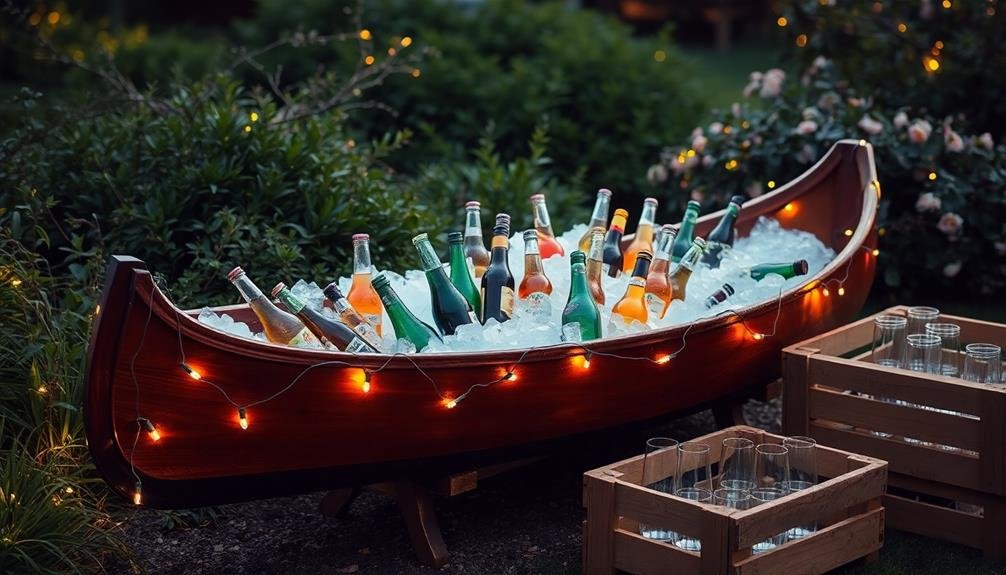
With a splash of creativity, transform an old canoe into a unique and eye-catching drink cooler for your wedding reception. This DIY project not only serves a practical purpose but also adds a rustic, outdoorsy charm to your venue.
Start by thoroughly cleaning and waterproofing the canoe's interior. Next, line it with a thick plastic sheet to prevent leaks and guarantee proper insulation.
Fill the canoe with ice and nestle your beverages within, creating an inviting display that'll keep drinks cold throughout the celebration. You can organize different sections for various types of drinks, using dividers made from wood or sturdy cardboard. Don't forget to add labels or signs to guide guests to their preferred beverages.
To enhance the canoe cooler's appeal, decorate it with fairy lights, flowers, or greenery that complement your wedding theme. You can also attach a custom-made wooden sign with your names or wedding date.
Place the canoe on sturdy sawhorses or create a custom stand to elevate it to a comfortable serving height. This converted canoe cooler will surely become a conversation starter and a memorable feature of your special day.
Wheelbarrow Beer Tub
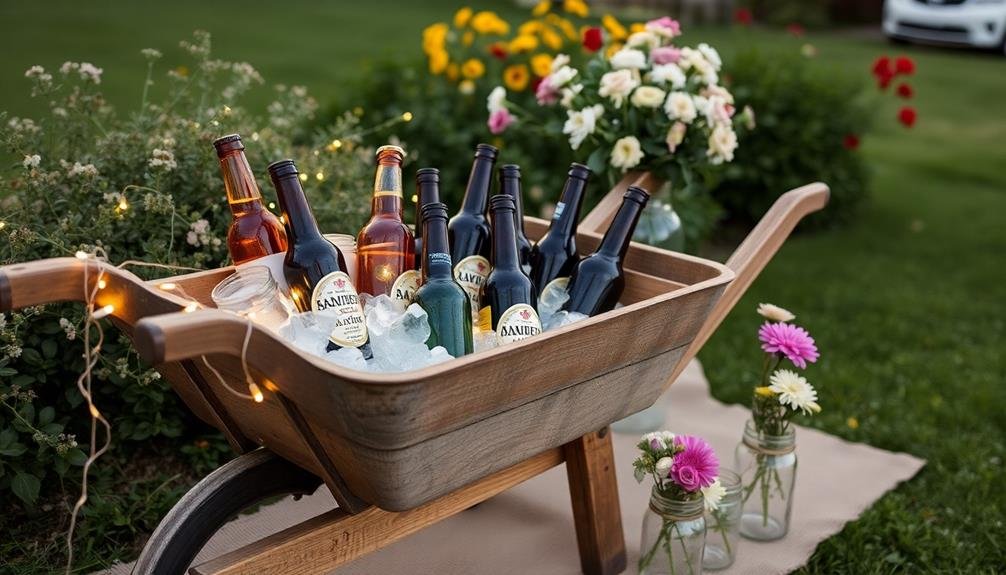
From nautical to agricultural, another rustic and functional DIY bar idea is the wheelbarrow beer tub. This creative approach transforms a humble garden tool into a mobile beverage station that's perfect for outdoor weddings.
You'll need to clean and sanitize an old wheelbarrow, then fill it with ice to keep your drinks cool. It's a versatile option that can be easily moved around your venue as needed.
To create your wheelbarrow beer tub, follow these steps:
- Clean the wheelbarrow thoroughly, removing any rust or dirt
- Line the inside with a waterproof material to prevent leaks
- Add a drain plug for easy water removal
- Decorate the exterior to match your wedding theme
Your guests will love the unique presentation and easy access to cold drinks.
Consider adding a small chalkboard sign to list the available beverages or display a clever message. You can also enhance the rustic charm by surrounding the wheelbarrow with hay bales, flowers, or lanterns.
This DIY bar solution not only saves money but also adds a touch of whimsy and personality to your special day.
Repurposed Door Cocktail Counter
Turning an old door into a stylish cocktail counter is a creative way to upcycle and add character to your wedding bar.
Begin by sourcing a vintage door from a salvage yard or thrift store. Clean it thoroughly and sand any rough spots. Apply a fresh coat of paint or stain to match your wedding theme.
To create the counter, attach sturdy legs or sawhorses to the door's underside. Confirm it's stable and at a comfortable height for serving drinks. You can add a glass top for a smooth surface or leave the door's natural texture for a rustic feel.
Decorate your repurposed door bar with hanging planters, fairy lights, or vintage signage. Install hooks underneath to hang glasses or mugs. Consider adding a small shelf on one end for storing bar tools and garnishes.
For a personal touch, engrave your names or wedding date on the door. You can also use chalkboard paint on sections to write drink menus or love quotes.
Don't forget to seal the surface to protect it from spills and make cleanup easier after the celebration.
Mason Jar Dispensers
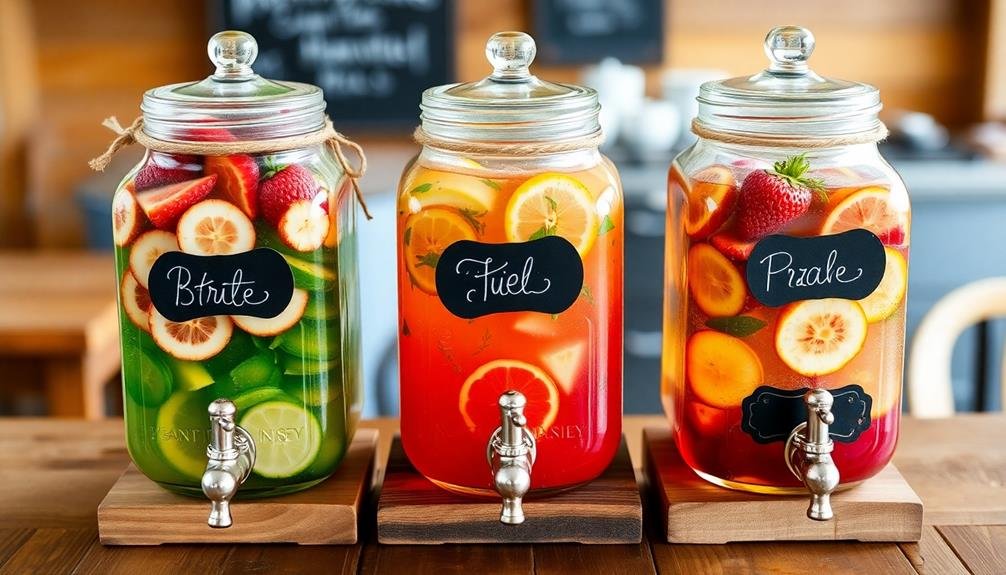
Mason jar dispensers offer a perfect blend of rustic charm and practicality for your wedding bar.
You'll create an eye-catching display by filling these glass containers with various beverages and arranging them on tiered stands or wooden crates.
Your guests will appreciate the convenience of easy-pour drink stations, allowing them to serve themselves quickly and keep the party flowing.
Rustic Charm Display
When it comes to adding rustic charm to your DIY wedding bar, mason jar dispensers are an absolute must-have. These versatile containers can transform your drink station into a picturesque focal point that'll have your guests swooning.
You'll love how easy they're to set up and customize to match your wedding theme.
To create a stunning rustic charm display, consider incorporating these elements:
- Wooden crates or barrels to elevate and showcase your mason jar dispensers
- Chalkboard signs with drink names and ingredients
- Burlap runners or doilies to add texture to your bar surface
- Mason jars of varying sizes filled with wildflowers or fairy lights
Don't forget to fill your dispensers with a variety of invigorating beverages, from classic lemonade to signature cocktails.
You can even create a DIY infusion station, allowing guests to customize their drinks with fresh fruits and herbs.
To keep things organized, provide labels for each dispenser and place drink cards nearby with suggested mix-ins and garnishes.
Remember to include plenty of ice and glasses in various sizes to accommodate different drink preferences.
With these rustic touches, your wedding bar will be a hit with guests and provide countless photo opportunities.
Easy-Pour Drink Stations
While rustic charm sets the stage, easy-pour drink stations take center stage in your DIY wedding bar. Mason jar dispensers are the perfect solution for a hassle-free beverage service that'll wow your guests. You'll love how these charming containers effortlessly blend functionality with style.
To create your own easy-pour stations, start by selecting large mason jars with spigots. Fill them with revitalizing drinks like lemonade, iced tea, or fruit-infused water. Don't forget to label each dispenser clearly so guests know what they're pouring.
Arrange the jars on a sturdy table or tiered stand for easy access. Enhance the setup by adding colorful straws, fresh fruit slices, and herb sprigs nearby. This allows guests to customize their drinks and adds a pop of color to your display.
You can also include small chalkboard signs with drink recipes or fun facts about each beverage. Remember to keep ice buckets and glasses within reach. Consider using mason jars as drinking glasses to maintain the theme.
With these easy-pour drink stations, you'll guarantee your guests stay revitalized and entertained throughout your special day.
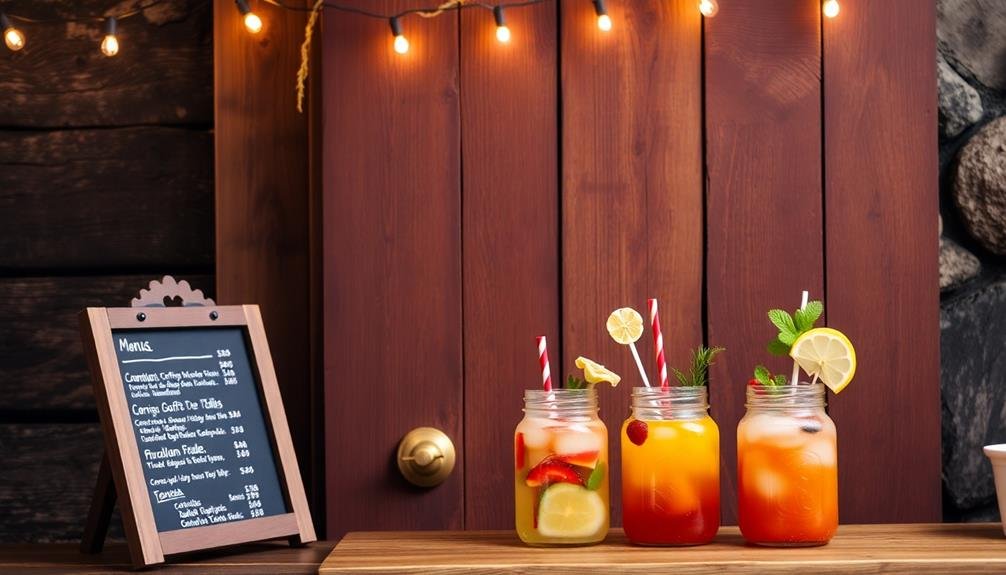
Chalkboard Menu Bar
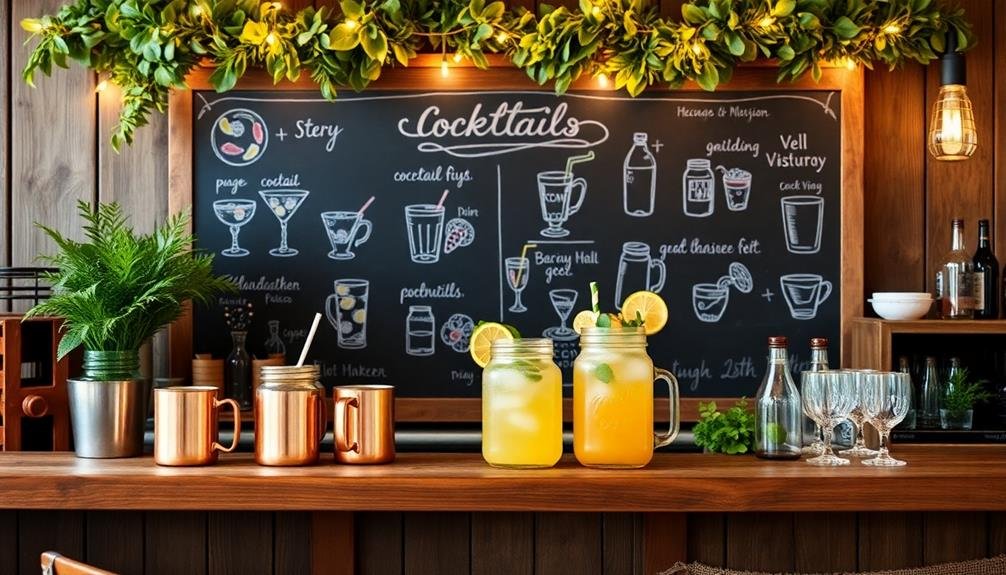
A chalkboard menu bar adds a rustic-chic touch to your DIY wedding bar setup. It's not only functional but also serves as a decorative element that'll impress your guests. You can easily create this focal point using a large chalkboard or by painting a wooden board with chalkboard paint. List your signature cocktails, beer and wine options, and any special drinks you're offering.
To make your chalkboard menu bar stand out, consider these ideas:
- Use colored chalk or chalk markers for a vibrant, eye-catching display
- Incorporate beautiful calligraphy or hand-lettering for a personalized touch
- Add small illustrations or icons next to each drink option
- Frame the chalkboard with fairy lights or greenery for extra ambiance
Don't forget to include essential information like drink prices (if applicable) and any custom drink names you've created for your big day.
Position the chalkboard menu in a prominent spot near your bar area, ensuring it's easily visible to guests. You can also create smaller chalkboard signs for individual drink stations or to highlight specific beverages.
This versatile DIY element will help guide your guests through their drink options while adding charm to your wedding decor.
Frequently Asked Questions
How Much Alcohol Should I Provide per Guest at My Wedding?
You'll want to provide about 1 drink per guest per hour. Plan for 5-6 drinks per person for a 5-hour reception. Include a mix of beer, wine, and spirits to cater to different preferences.
What Are the Legal Requirements for Serving Alcohol at a Wedding?
You'll need to check local laws and obtain necessary permits. You're often required to have licensed bartenders, follow serving hour restrictions, and guarantee guests are of legal drinking age. Don't forget liability insurance for added protection.
Should I Hire Professional Bartenders or Use Volunteer Friends?
You'll want to hire professional bartenders for your wedding. They're trained, insured, and experienced in managing crowds. While friends can help, professionals guarantee smooth service, proper pouring, and responsible alcohol management, reducing your stress on the big day.
How Can I Prevent Underage Drinking at My DIY Wedding Bar?
You'll want to check IDs at the bar. Use wristbands for legal drinkers, assign a responsible monitor, and inform your bartenders to be vigilant. Don't place alcohol in easily accessible areas, and offer plenty of non-alcoholic options.
What Non-Alcoholic Options Should I Include in My Wedding Bar Setup?
You'll want to offer a variety of non-alcoholic options at your wedding bar. Include mocktails, flavored sparkling waters, fruit-infused beverages, iced teas, lemonades, and sodas. Don't forget about coffee and hot tea for non-drinkers, too.
In Summary
You've now got a treasure trove of DIY wedding bar ideas that'll wow your guests without breaking the bank. From rustic barrels to vintage suitcases, you're sure to find a style that fits your vision. Remember, it's all about creativity and personal touches. Don't be afraid to mix and match elements or add your own unique spin. With these budget-friendly options, you'll create a memorable drinking experience that reflects your personality and keeps the party flowing.

I’m Sarah, the creator and writer behind this site. I’m a wife and a mother of two wonderful kids who keep me on my toes and inspire me daily. My passion lies in creating and organizing memorable events and group activities, where people can come together and make lasting memories.
Leave a Reply