When creating DIY wedding signs for rustic photography and videography, choose materials like wood slices or chalkboards for an authentic feel. Use consistent fonts and colors that complement your theme, ensuring signs are legible from a distance. Incorporate personal touches with unique table numbers, such as vintage books or meaningful locations. For backdrops, combine wood, burlap, and greenery to enhance the rustic aesthetic. Don't forget to craft fun photo booth props using cardstock and wooden dowels to encourage guest interaction. By following these tips, you'll create stunning visual elements that'll elevate your wedding photos and videos. Discover more ways to bring your rustic wedding vision to life through DIY signage.
Key Takeaways
- Choose rustic materials like wood slices or chalkboards for sign bases to match the wedding theme.
- Use consistent fonts and limit colors to 2-3 for a cohesive aesthetic across all wedding signs.
- Incorporate hand-lettering techniques with chalk markers or paint pens for a personalized, rustic feel.
- Create clear, legible directional signs using reclaimed wood or tree stumps to guide guests effectively.
- Design unique table numbers using vintage items, meaningful locations, or significant dates for storytelling elements.
Choosing the Right Materials

Selecting the right equipment is vital for successful DIY wedding photography and videography. You'll need a high-quality camera capable of shooting both photos and videos. Look for a DSLR or mirrorless camera with manual controls and good low-light performance. Don't forget extra batteries and memory cards.
For video, consider a stabilizer or gimbal to guarantee smooth footage. A shotgun microphone will improve audio quality, while a set of LED lights can enhance your shots in dimly lit venues. Invest in a sturdy tripod for stable shots and time-lapses.
Lenses are essential. A versatile zoom lens (24-70mm) is great for capturing various scenes, while a prime lens (50mm or 85mm) excels in low light and creates beautiful portraits. For wide shots of the venue or group photos, a wide-angle lens (16-35mm) is invaluable.
Post-processing is equally important. Make certain you have editing software like Adobe Lightroom and Premiere Pro, or more budget-friendly alternatives.
A laptop with sufficient processing power and storage is necessary for on-site editing and backups.
Essential Tools and Supplies
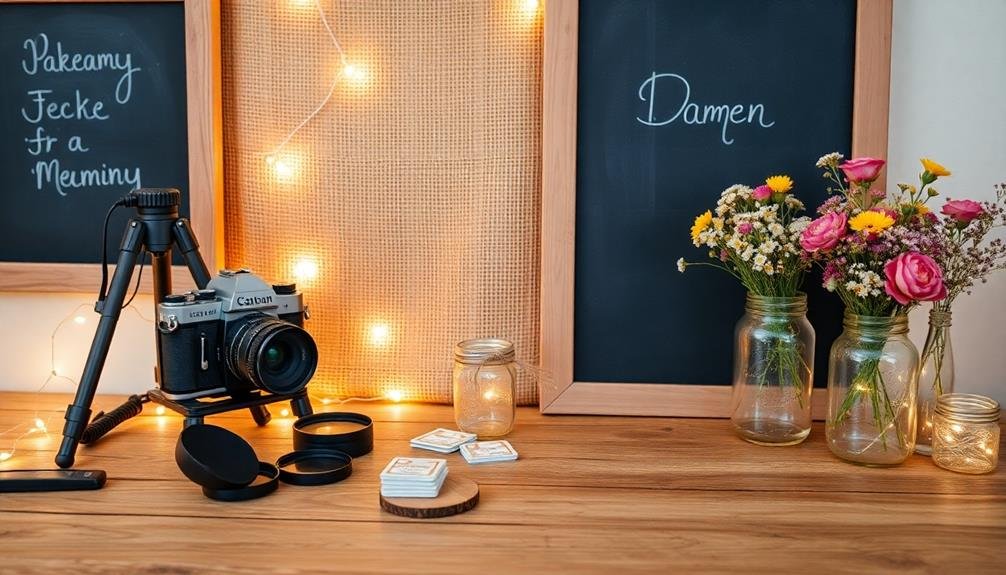
Beyond the main equipment, you'll need several tools and supplies to guarantee smooth DIY wedding photography and videography. Start with memory cards and extra batteries for your camera and other devices.
Invest in a sturdy tripod for stable shots and a monopod for quick, mobile setups. Don't forget lens cleaning supplies to keep your optics spotless throughout the day.
For audio, pack a shotgun microphone and lavalier mics with windscreens to capture clear sound in various conditions. Bring a portable LED light panel and reflectors to enhance lighting in challenging situations.
Include a variety of lenses to capture different perspectives, from wide-angle for group shots to telephoto for intimate moments.
Pack gaffer tape, zip ties, and a multi-tool for quick fixes and equipment adjustments. A laptop or portable hard drive is essential for backing up footage on-site.
Bring a shot list and timeline to stay organized. Finally, don't forget comfortable shoes, water, and snacks to keep yourself energized throughout the long day of shooting.
With these tools and supplies, you'll be well-prepared to capture every special moment of the wedding.
Planning Your Sign Designs
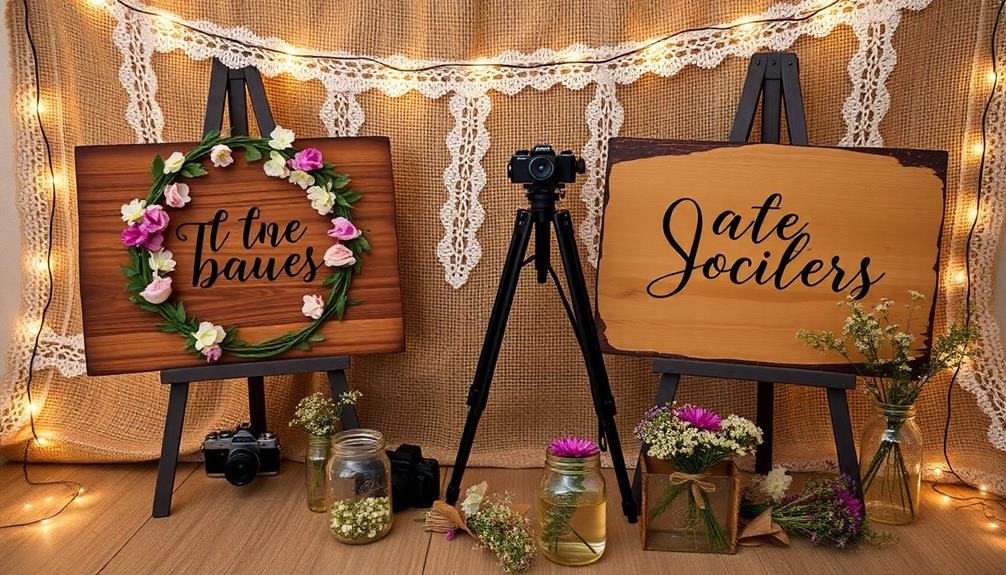
A well-designed sign can elevate your DIY wedding photography and videography. When planning your sign designs, consider the overall aesthetic of your rustic wedding. Start by choosing a consistent font style that complements your theme, such as a handwritten script or a simple serif typeface. Stick to two or three colors that match your wedding palette to create a cohesive look.
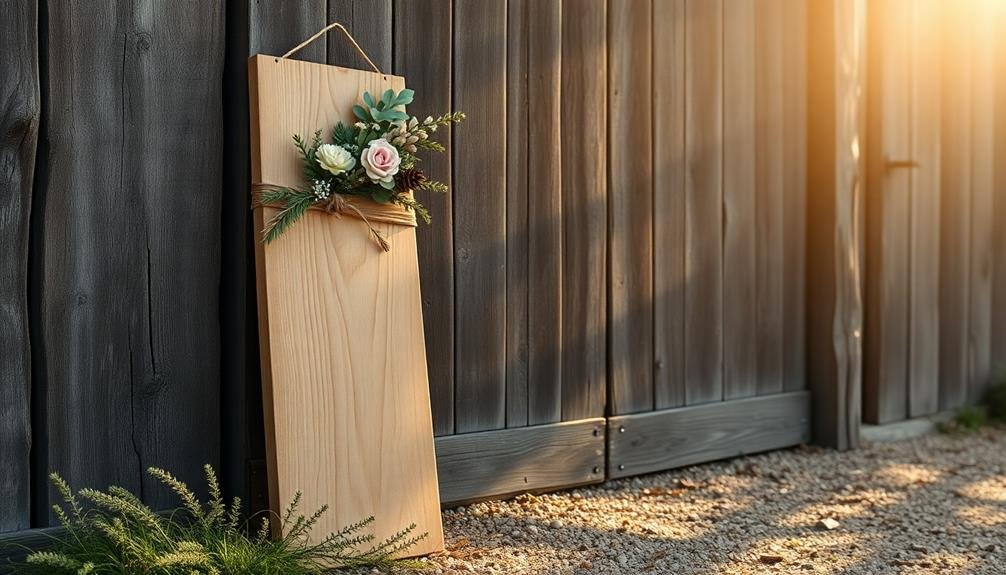
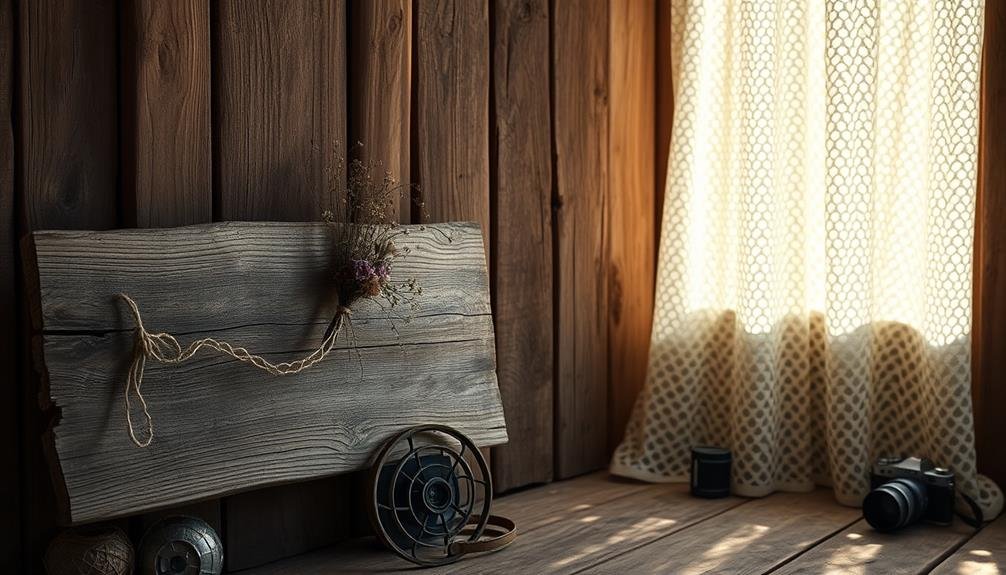
Next, decide on the content for each sign. Include essential information like directions, schedules, and menu options. Don't forget to create signs for photo opportunities, such as "Just Married" or "Mr. & Mrs." props. For a rustic touch, use materials like wood slices, chalkboards, or burlap as your sign base.
Sketch out your designs before committing to the final product. This will help you visualize the layout and make any necessary adjustments. Consider incorporating natural elements like leaves, twine, or dried flowers to enhance the rustic feel.
Remember to keep your signs legible from a distance, especially if they'll be captured in photos or videos. By carefully planning your sign designs, you'll create beautiful, functional additions to your wedding decor that will look great in your DIY photography and videography.
Typography and Lettering Techniques
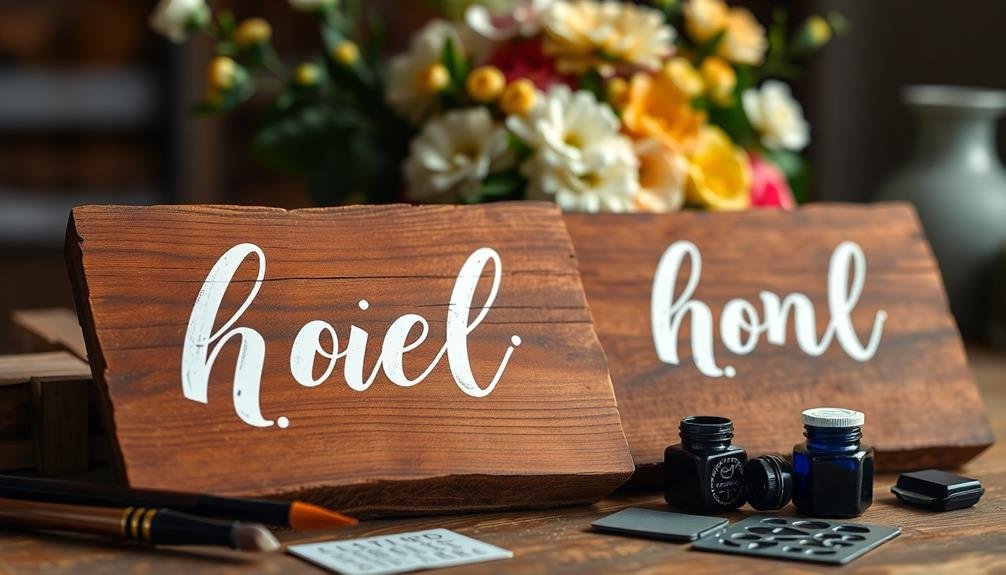
Typography and lettering techniques play an essential role in creating eye-catching signs for your DIY wedding photography and videography. When designing your signs, consider using a mix of fonts to add visual interest. Pair a script font with a clean sans-serif for a balanced look. Experiment with different font sizes to emphasize key information and create hierarchy.
For a rustic feel, try hand-lettering your signs using chalk markers on blackboards or paint pens on wood. Practice your lettering skills beforehand to guarantee consistency and readability. If you're not confident in your handwriting, use stencils or transfer methods to achieve a polished look.
Don't forget about spacing and alignment. Use guidelines to keep your text straight and evenly spaced. Consider the overall composition of your sign, leaving enough white space to prevent a cluttered appearance. For added dimension, try incorporating shadows or outlines around your letters.
Remember to choose colors that complement your wedding palette and contrast well with the background material. Test your signs in different lighting conditions to guarantee they're easily readable from a distance.
Incorporating Natural Elements
Nature's beauty can elevate your DIY wedding photography and videography to new heights. By incorporating natural elements into your shots, you'll create a rustic and romantic atmosphere that perfectly complements your wedding theme. Use the surrounding landscape as a backdrop, positioning the couple among trees, flowers, or rolling hills. Don't forget to capture close-ups of natural textures like bark, leaves, and petals to add depth to your visual storytelling.
Consider using these natural elements in your photography and videography:
| Element | Photography Use | Videography Use | Prop Ideas |
|---|---|---|---|
| Flowers | Bouquet close-ups | Slow-motion petals | Flower crowns |
| Wood | Texture backgrounds | Panning shots of trees | Wooden signs |
| Water | Reflections in lakes | Flowing river sequences | Seashells for beach weddings |
| Rocks | Unique framing elements | Time-lapse of sunset | Stone centerpieces |
When shooting, pay attention to natural lighting. Golden hour provides warm, soft light that's perfect for romantic shots. Experiment with shadows and sunbursts to add drama to your images. Remember, nature's unpredictability can lead to unexpected and beautiful moments, so stay alert and ready to capture them.
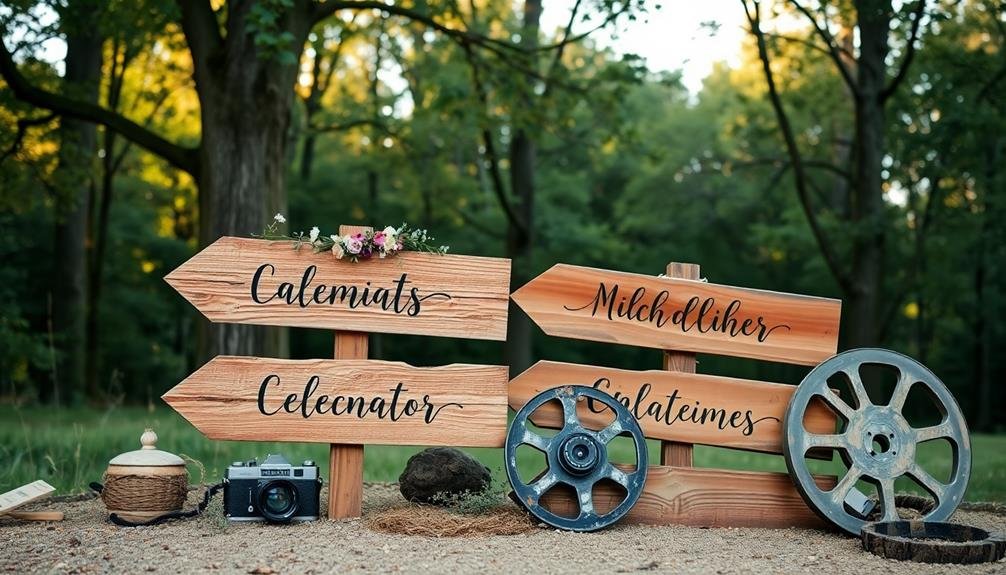
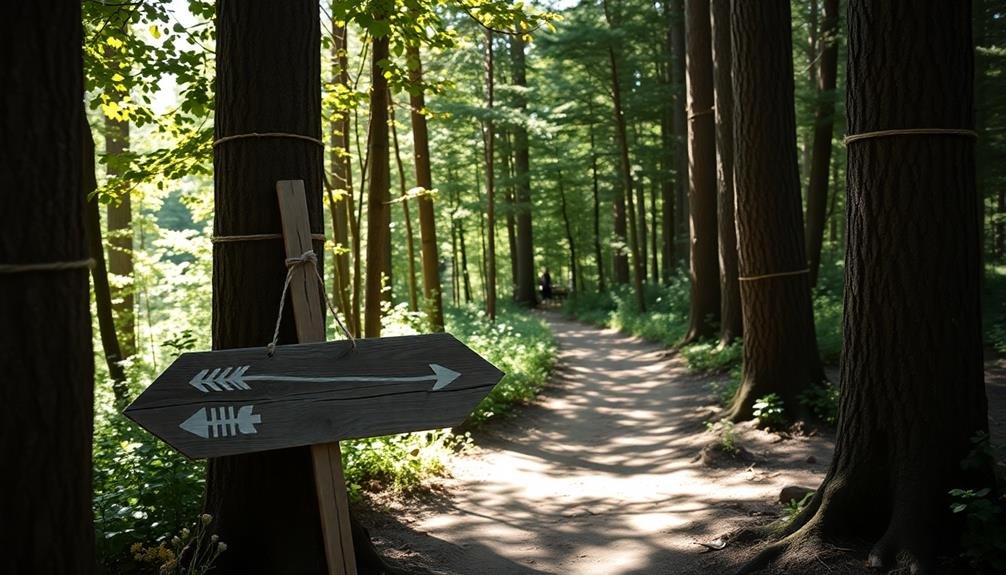
Creating Directional Signs
Directional signs play an essential role in guiding guests and creating a cohesive aesthetic for your DIY wedding photography and videography. They're not only functional but also provide excellent photo opportunities.
To create rustic directional signs, start by selecting materials that complement your theme, such as reclaimed wood, old pallets, or even tree stumps.
Use a stencil or freehand lettering to paint clear, legible directions on your signs. Include key locations like the ceremony site, reception area, parking, and restrooms. Don't forget to add personal touches, such as your names or wedding date, to make the signs unique to your special day.
Consider the placement of your signs carefully. Position them at strategic points where guests might need guidance, ensuring they're visible and well-lit for evening events. For added charm, incorporate decorative elements like flowers, ribbons, or fairy lights around the signs.
When photographing or filming, capture guests interacting with the signs and use them as backdrops for couple shots. These DIY directional signs won't only help your guests navigate but also serve as memorable props in your wedding photos and videos.
Crafting Photo Booth Props
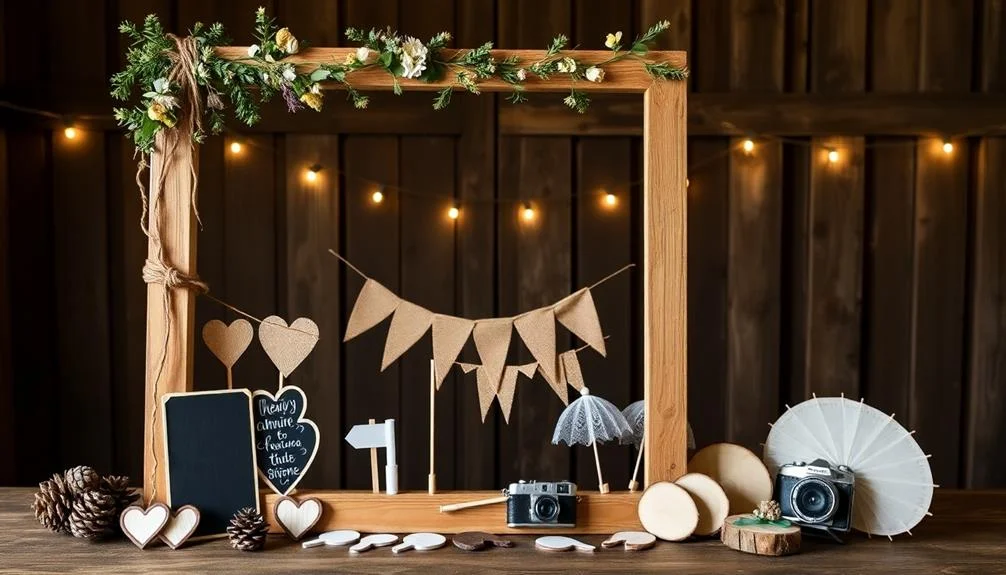
Creativity flourishes in the domain of DIY photo booth props, adding a fun and personalized touch to your wedding photography. You'll want to craft props that reflect your theme and personalities while encouraging guests to let loose and capture memorable moments.
Start by gathering materials like cardstock, wooden dowels, glitter, and adhesives. Cut out shapes for mustaches, lips, hats, and glasses using templates or freehand. Don't forget to include speech bubbles for witty quotes or personalized messages. Attach the props to dowels for easy handling.
Consider these ideas for unique and engaging photo booth props:
| Prop Type | Ideas |
|---|---|
| Headwear | Flower crowns, top hats, tiaras |
| Facial | Oversized glasses, mustaches, beards |
| Accessories | Bow ties, feather boas, fans |
| Signs | "Just Married," "Team Bride," "Love" |
| Themed | Vintage cameras, musical instruments |
Remember to create a variety of sizes and styles to accommodate different preferences. Set up a prop station near your photo booth area, arranging items neatly for easy access. By crafting these props yourself, you'll add a personal touch that'll make your wedding photos truly one-of-a-kind.
Personalizing Table Numbers
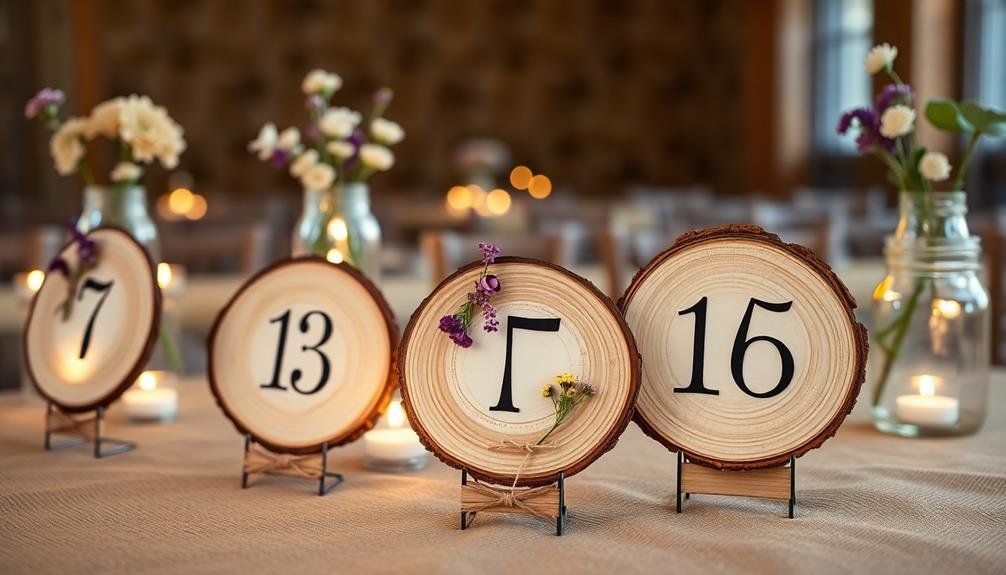
When it comes to personalizing table numbers, you'll find endless possibilities to express your creativity and match your wedding theme.
Consider unique numbering ideas like using vintage book pages, wine bottles, or even small potted plants to display your table designations.
You can enhance these with various materials and techniques, such as calligraphy, embossing, or incorporating photos that tell your love story.
Creative Numbering Ideas
Numerous couples are opting to personalize their wedding table numbers, transforming them from mere functional elements into unique conversation starters. You can infuse your personality and style into these essential details, making them memorable for your guests.
Consider using significant dates in your relationship as table numbers. Display them in a creative format, such as "05.12.18: Our First Date" or "07.22.20: The Proposal." This approach not only numbers the tables but also shares your love story with guests.
Another idea is to use locations that are meaningful to you both. Name tables after cities you've visited together, favorite local spots, or places you dream of exploring. You could even include small photos or illustrations of these locations.
For literature lovers, book titles or famous literary quotes can serve as unique table identifiers. Music enthusiasts might opt for song titles or lyrics that hold special meaning.
Don't shy away from unconventional materials. Use wine bottles, vintage clocks, or even plants as number holders.
Materials and Techniques
Personalizing your wedding table numbers opens up a world of creative possibilities when it comes to materials and techniques. You can use a variety of mediums to craft unique identifiers for each table. Consider using wood slices as a base, which you can easily paint or burn numbers into for a rustic touch.
Alternatively, opt for small chalkboards or vintage picture frames to display your table numbers. For a more elegant approach, try using wine bottles as table number holders. Simply print your numbers on decorative paper and attach them to the bottles with twine or ribbon.
If you're handy with calligraphy, write the numbers directly on glass or mirror surfaces using metallic markers. Don't forget about unconventional materials like vintage books, antique keys, or even potted plants. You can tie number tags to these items or incorporate them into your centerpieces.
For a personal touch, use photos of you and your partner at different ages corresponding to the table numbers. Whatever technique you choose, make certain it aligns with your overall wedding theme and complements your décor. With a little creativity, your table numbers can become a memorable part of your special day.
Designing Ceremony Backdrops
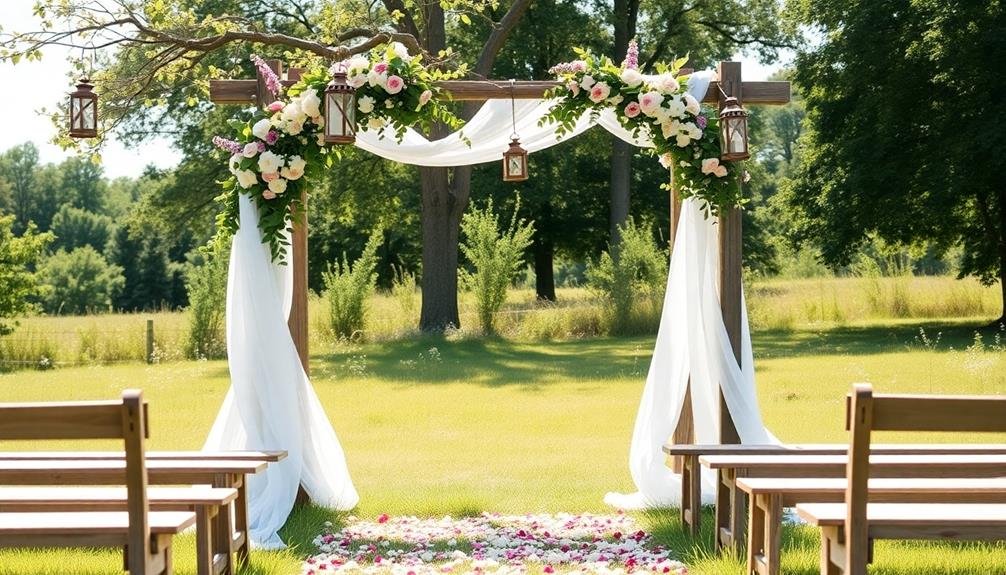
A stunning backdrop sets the stage for your ceremony and creates a focal point for your wedding photos. To design a rustic ceremony backdrop, consider using natural materials like wood, burlap, and greenery.
Start with a sturdy frame, such as a wooden arch or repurposed barn door. You can drape fabric or macramé across the structure for added texture.
Incorporate floral elements by creating asymmetrical arrangements or hanging individual stems. Use locally sourced wildflowers or dried flowers for a rustic touch.
Add visual interest with hanging elements like mason jars filled with candles, vintage picture frames, or wooden signs with meaningful quotes.
For a personalized touch, create a monogram using wooden letters or laser-cut designs. Illuminate your backdrop with string lights or lanterns to create a warm ambiance.
Consider the season and your venue when choosing colors and materials.
Don't forget to test your backdrop's stability, especially if you're planning an outdoor ceremony. Verify it can withstand wind and won't topple over.
Upcycling Vintage Items

Incorporating vintage items into your wedding photography and videography can add character and charm to your special day. Look for old picture frames, mirrors, or windows to use as unique props for photo sessions. You can paint them in colors that match your wedding theme or leave them with a distressed look for a rustic feel.
Consider using vintage suitcases or trunks as interesting backdrops or to display wedding favors. These can also serve as creative storage for photography equipment. Antique books, typewriters, or cameras make excellent accents for detail shots of rings, invitations, or other small items.
Don't overlook the potential of old doors or shutters. They can create beautiful frames for couples' portraits or serve as interesting backdrops for group shots. Vintage bicycles, chairs, or even cars can provide eye-catching focal points for outdoor photography sessions.
For videography, incorporate vintage items into your wedding decor to create visually appealing scenes. Use old lanterns, candelabras, or chandeliers to add warm lighting and ambiance to your reception footage.
Preserving Your DIY Signs
After your wedding day, you'll want to preserve those beautiful DIY signs you've created. Start by gently cleaning each sign with a soft, dry cloth to remove dust and debris.
For wooden signs, apply a thin coat of clear polyurethane to protect the surface from moisture and fading. If you've used chalkboard paint, seal the design with hairspray to prevent smudging.
Store your signs in a cool, dry place away from direct sunlight to prevent warping and color fading. Wrap each sign in acid-free tissue paper and place them in sturdy boxes or plastic containers.
For larger signs, consider using padded storage bags designed for artwork.
If you plan to display your signs at home, rotate their locations periodically to avoid uneven fading. Use proper hanging hardware to avoid damaging the signs, and consider adding UV-protective glass or acrylic if framing them.
For fabric banners, roll them gently instead of folding to avoid creases. Store them in acid-free tubes or hang them using padded hangers in a closet.
Frequently Asked Questions
How Far in Advance Should I Start Making DIY Wedding Signs?
You should start making DIY wedding signs 2-3 months before your big day. This gives you ample time to plan, gather materials, and create without rushing. It's also wise to factor in some extra time for unexpected challenges.
Can I Hire Someone to Create Custom Designs for My DIY Signs?
Yes, you can hire a graphic designer or artist to create custom designs for your DIY signs. They'll work with you to capture your vision and provide digital files or templates you can use for your sign-making project.
What Lighting Options Work Best for Showcasing DIY Wedding Signs at Night?
You'll want to use warm, soft lighting to highlight your DIY signs at night. Consider string lights, lanterns, or spotlights. LED candles offer a safe, flickering glow. Uplighting can create dramatic effects. Don't forget battery-powered options for flexibility.
How Do I Transport Fragile DIY Signs to My Wedding Venue Safely?
To transport fragile DIY signs safely, you'll want to wrap them in bubble wrap or foam padding. Place them in sturdy boxes, filling empty spaces with packing peanuts. Use "Fragile" labels and transport them yourself if possible.
Are There Any Weather-Resistant Finishes for Outdoor DIY Wedding Signs?
You can protect your outdoor DIY wedding signs with weather-resistant finishes. Try polyurethane, marine varnish, or exterior sealants. They'll guard against moisture and UV damage. For added durability, consider using waterproof paints or vinyl lettering on your signs.
In Summary
You've now got all the tools and inspiration to create stunning DIY wedding signs for your rustic celebration. Remember, it's your day, so let your creativity shine through! Don't be afraid to experiment with different materials and techniques. As you craft your unique signs, you'll be adding personal touches that'll make your wedding truly memorable. Embrace the process, and you'll have beautiful keepsakes to cherish long after the big day.

I’m Sarah, the creator and writer behind this site. I’m a wife and a mother of two wonderful kids who keep me on my toes and inspire me daily. My passion lies in creating and organizing memorable events and group activities, where people can come together and make lasting memories.

Leave a Reply