You can create budget-friendly DIY wedding photography and videography booth props with simple materials and creativity. Start with quirky signs and speech bubbles using cardstock and wooden dowels. Craft custom photo frames from cardboard, paint, and decorative elements. Add themed accessories like vintage frames, colorful wigs, or paper flowers. Design eye-catching backdrops using fabric, artificial flowers, or repurposed pallets. Set up affordable lighting with string lights or LED panels, and position your camera for flattering angles. Finally, enhance your photos with free mobile apps for filters and effects. With these tips, you'll be on your way to a memorable and personalized photo booth experience.
Key Takeaways
- Create quirky signs and speech bubbles using cardstock and wooden dowels for personalized, budget-friendly photo props.
- Craft custom photo frames from cardboard and paint, incorporating the wedding theme and colors.
- Design DIY backdrops using affordable materials like tulle, artificial flowers, or repurposed wooden pallets.
- Utilize affordable lighting solutions such as string lights, clip-on LED panels, or ring lights for optimal booth illumination.
- Enhance photos with free mobile apps like VSCO or Snapseed for professional-looking edits and filters.
Quirky Signs and Speech Bubbles
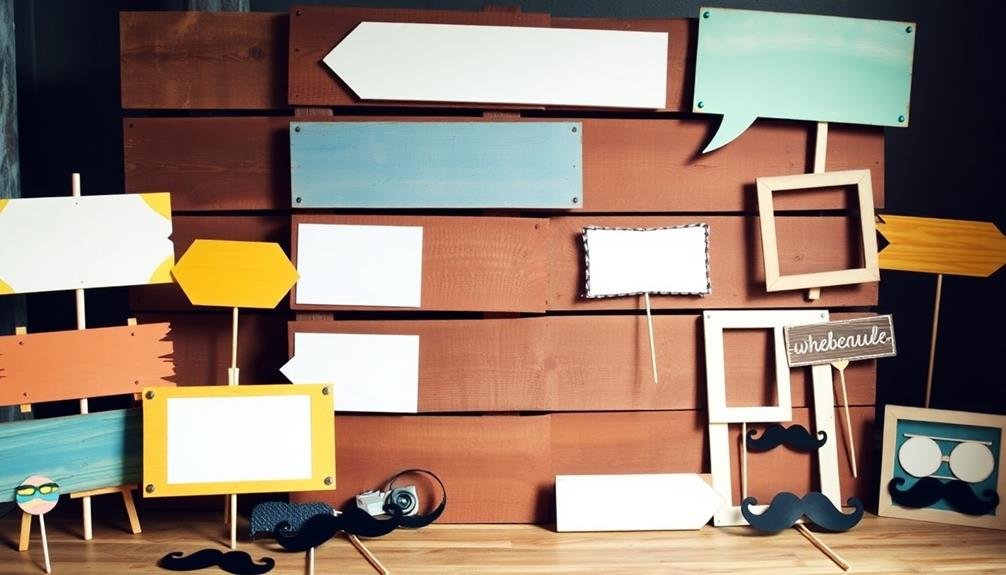
When it comes to creating memorable wedding photo booth props, quirky signs and speech bubbles are a must-have. These playful accessories add personality and humor to your photos, encouraging guests to let loose and have fun. You can easily make these props using materials from your local craft store or items you already have at home.
Start by gathering cardstock, wooden dowels, and adhesive. Cut out various shapes for your signs and speech bubbles, then attach them to the dowels. For a rustic look, use kraft paper or wood slices instead. Write witty phrases, inside jokes, or wedding-related puns on your props using markers or paint.
Don't forget to include some blank speech bubbles so guests can write their own messages. Consider creating double-sided props for added versatility. Mix in some themed signs that reflect your wedding style or shared interests as a couple.
To save time, you can find free printable templates online. Print them on cardstock, cut them out, and attach them to sticks. Remember to make enough props for multiple guests to use simultaneously, ensuring everyone gets a chance to join in the photo booth fun.
Custom Photo Frames
You'll need simple materials like cardboard, paint, and decorative elements to create custom photo frames for your wedding booth.
Consider incorporating your wedding theme, colors, or personal touches into the frame designs, such as floral patterns, metallic accents, or meaningful quotes.
When assembling and displaying your frames, guarantee they're sturdy enough to withstand frequent use and position them at various heights to accommodate different guests.
Materials and Tools Needed
To create custom photo frames for your DIY wedding photography booth, you'll need a few essential materials and tools. Start with large sheets of cardboard or foam board, which will serve as the base for your frames.
You'll also need scissors or a craft knife for cutting, and a ruler or measuring tape for accurate sizing.
For decorating, gather acrylic paint, brushes, and markers in colors that match your wedding theme. Glitter, sequins, and decorative tape can add sparkle and texture.
Don't forget adhesives like glue sticks or double-sided tape for attaching embellishments.
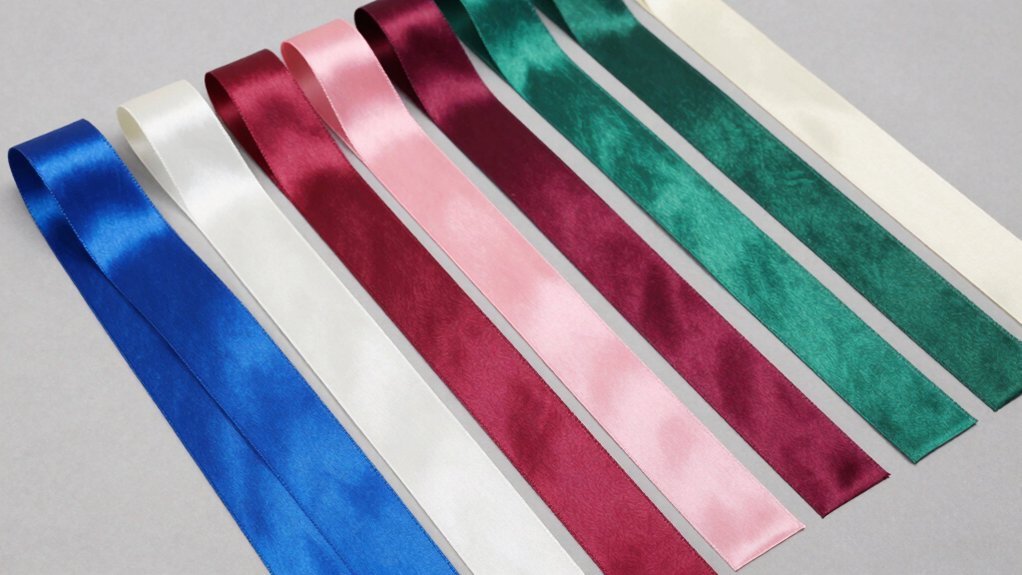
Consider using stencils or printed designs for more intricate patterns. You might want to incorporate lace, ribbon, or fabric scraps for a softer touch.
For a rustic look, twine or burlap can be great additions.
Tools like a hot glue gun can be helpful for securing heavier decorations. If you're planning to make frames guests can hold, wooden dowels or plastic handles will be necessary.
Design and Decoration Ideas
Now that you've gathered your materials, it's time to let your creativity shine with custom photo frame designs. Consider your wedding theme and color scheme when crafting these frames. Use paint, glitter, ribbons, and other decorative elements to create eye-catching borders that complement your overall aesthetic.
For a rustic wedding, try distressing wooden frames with sandpaper and adding twine or burlap accents. If you're going for a glamorous look, opt for metallic spray paint and rhinestone embellishments. Don't forget to incorporate your wedding date or initials for a personalized touch.
To elevate your photo frame designs, consider these ideas:
- Create multi-aperture frames for group shots or photo strips.
- Design themed frames that reflect your shared interests or hobbies.
- Craft oversized frames for full-body poses or dramatic backdrops.
Remember to keep your designs practical for quick and easy use during the event. Make sure the frames are lightweight enough for guests to hold comfortably and sturdy enough to withstand repeated use throughout the reception.
Assembly and Display Tips
Three key steps guarantee your custom photo frames are properly assembled and displayed for your DIY wedding photography booth.
First, verify all materials are cut to size and prepped before assembly. Sand rough edges, apply paint or decorations, and let everything dry completely. This prevents last-minute rushing and guarantees a polished look.
Second, use strong adhesives or secure fastening methods to assemble your frames. Wood glue, heavy-duty tape, or small screws work well, depending on your frame material. Test the stability of each frame before the big day to avoid accidents during use.
Lastly, consider your display strategy. Create a varied arrangement by mixing frame sizes and orientations. Use easels, hooks, or a backdrop stand to showcase your frames at different heights. Verify they're easily accessible for guests and well-lit for ideal photo quality.
Don't forget to include props that complement your frames, like signs or themed decorations. Place a small table nearby with extra supplies, such as markers or adhesive letters, allowing guests to personalize their photo experiences.
With these assembly and display tips, your custom photo frames will be a hit at your DIY wedding photography booth.
Themed Accessories and Props
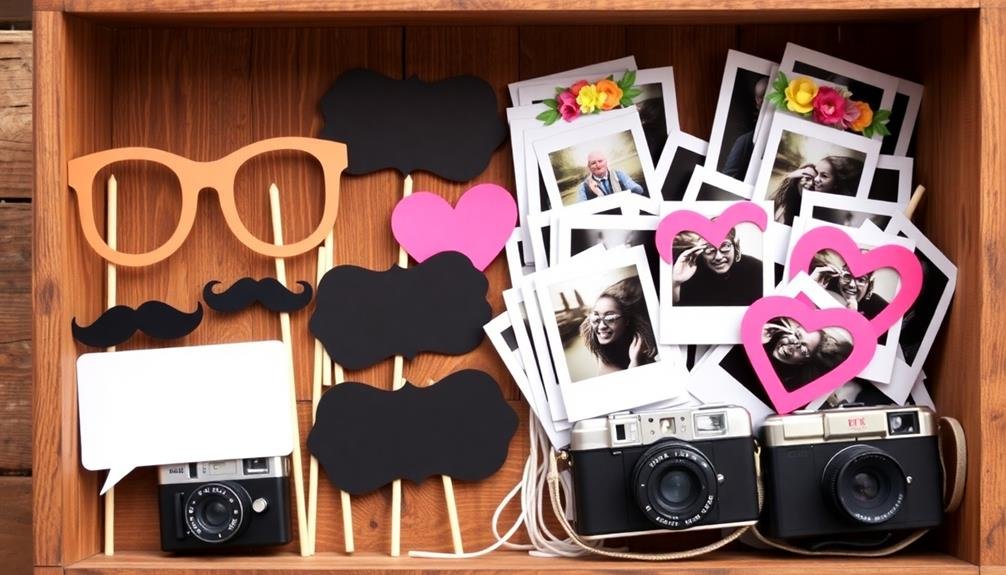
Countless themed accessories and props can transform your DIY wedding photography booth into an enchanting wonderland. Choose items that reflect your wedding's style and personality.
For a vintage-inspired booth, consider antique frames, lace parasols, and old-fashioned hats. If you're going for a whimsical look, opt for colorful wigs, oversized glasses, and silly mustaches on sticks.
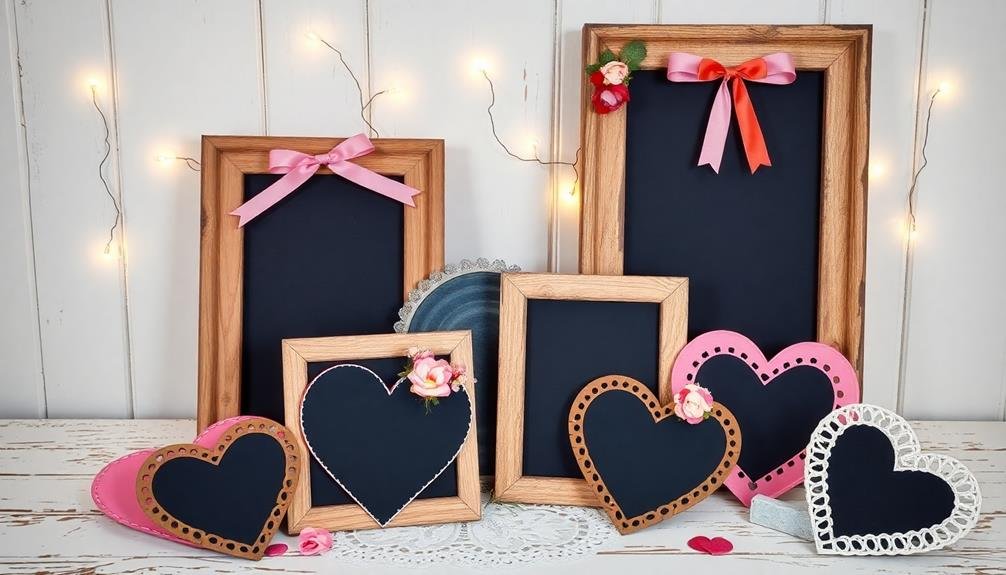
Create a cohesive theme by selecting props that match your wedding colors. You can easily DIY many accessories using affordable materials from craft stores. For example, make paper flowers, create custom signs with clever sayings, or craft miniature chalkboards for guests to write messages.
To elevate your prop selection, consider these sophisticated options:
- Ornate masquerade masks
- Elegant feather boas in muted tones
- Vintage-style opera glasses
Don't forget to include practical items like hand-held mirrors and combs for quick touch-ups.
Arrange your props on a stylish display table or in decorative baskets for easy access. Remember, the key is to provide a variety of options that will encourage guests to get creative and have fun with their photos.
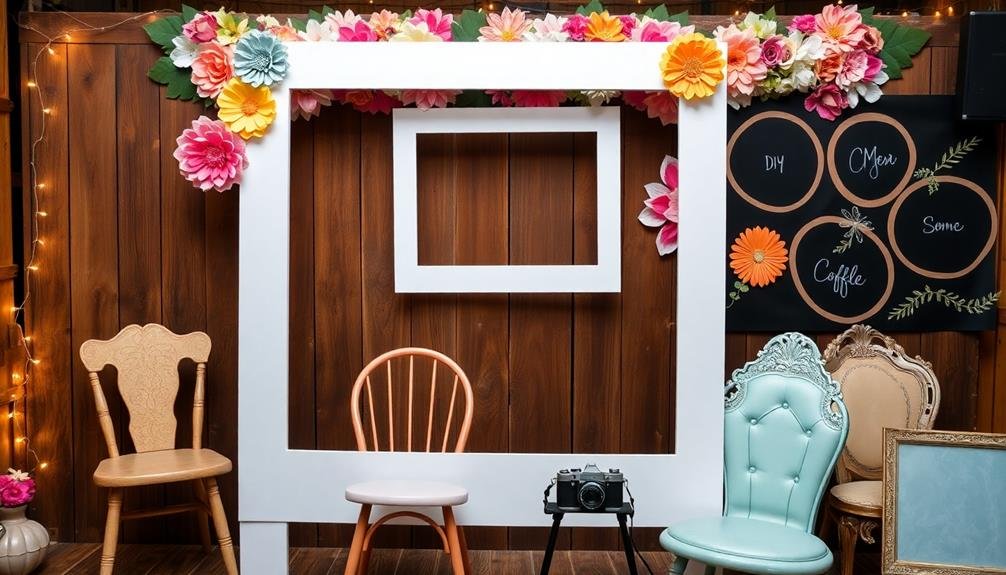
DIY Backdrop Ideas
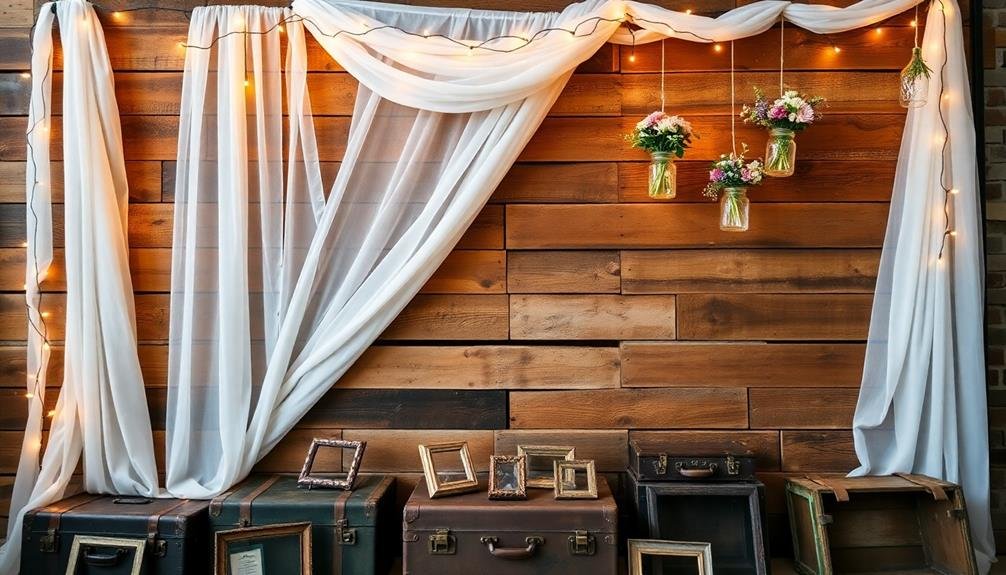
Creating a stunning backdrop is essential for your DIY wedding photography booth. You don't need to spend a fortune to achieve a beautiful setting. Consider using a large piece of fabric, such as tulle or organza, draped elegantly across a frame or wall. You can easily create texture by bunching or pleating the material.
Alternatively, craft a floral wall using artificial flowers attached to a mesh grid or foam board. This option allows you to customize colors and create intricate patterns.
For a more rustic look, repurpose old wooden pallets by painting them and arranging them vertically. Add string lights or greenery for extra charm.
If you're feeling creative, design a custom backdrop using oversized paper flowers or geometric shapes cut from colorful cardstock. Another budget-friendly idea is to use streamers or ribbons hung vertically to create a textured curtain effect.
Don't forget about nature-inspired backdrops – gather branches, leaves, or dried flowers to create a bohemian-style setting. Remember, your backdrop should complement your wedding theme and provide a visually appealing canvas for memorable photos.
Lighting and Camera Setup
When setting up your DIY wedding photo booth, lighting and camera placement are essential for capturing great shots.
You'll find affordable lighting solutions ranging from string lights to clip-on LED panels that can enhance your booth's ambiance and photo quality.
For the best results, position your camera at eye level and make certain it's angled to capture the entire backdrop while leaving enough room for guests to pose comfortably.
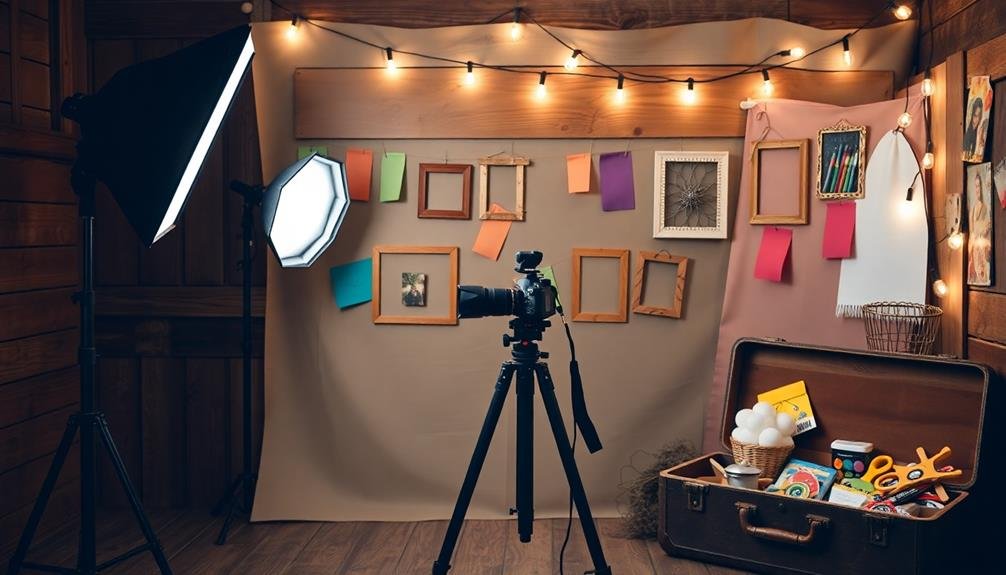
Affordable Lighting Solutions
For a successful DIY wedding photography booth, proper lighting is essential and doesn't have to break the bank. You can achieve professional-looking results with affordable options that are easy to set up and use.
Consider these budget-friendly lighting solutions:
- LED panel lights: These versatile lights are lightweight, portable, and offer adjustable brightness and color temperature. You can mount them on stands or attach them to surfaces for ideal positioning.
- Ring lights: Perfect for creating flattering, even lighting on faces, ring lights are ideal for portrait-style photos. They're available in various sizes and can be mounted on tripods or handheld.
- Softbox lights: These diffuse light sources create a soft, natural-looking illumination. You can find affordable softbox kits that include stands and bulbs for a complete setup.
When setting up your lighting, aim for a three-point lighting system: key light, fill light, and backlight.
Position the key light at a 45-degree angle to the subject, use the fill light to reduce shadows, and place the backlight behind the subject for depth.
Experiment with different combinations and intensities to find the perfect balance for your booth's aesthetic.
Camera Positioning Tips
The art of camera positioning can make or break your DIY wedding photography booth. To capture the best shots, you'll want to place your camera at eye level or slightly above. This angle is flattering for most people and creates a natural, engaging look. Set up your camera about 5-6 feet away from where your guests will stand, allowing enough space for group shots.
Use a tripod to keep your camera steady and guarantee consistent framing. If you're using a smartphone, invest in an affordable phone tripod adapter. Position your camera so that it's centered on your backdrop, creating a balanced composition. Consider using a wide-angle lens to fit more people into each shot, especially for larger groups.
For videography, place your camera slightly off-center to create a more dynamic frame. You can also set up a second camera at a different angle for varied footage. Remember to leave enough headroom in your frame, but avoid too much empty space above your subjects.
Test your setup with different group sizes to confirm it works for various scenarios. Finally, mark the floor with tape to indicate where guests should stand for ideal framing.
Digital Enhancements and Filters

Spice up your DIY wedding photo booth with digital enhancements and filters. These digital tools can transform ordinary snapshots into memorable keepsakes. You don't need expensive software; many free or low-cost mobile apps offer a wide range of effects. Consider using apps like VSCO, Snapseed, or Adobe Lightroom Mobile for quick edits and filters.
When selecting filters, aim for timeless looks that won't appear dated in years to come. Subtle adjustments to brightness, contrast, and saturation can make a significant difference without overpowering the original image.
Don't forget to create a cohesive look across all your booth photos by using consistent editing styles.
For added interactivity, consider incorporating augmented reality (AR) filters. Many social media platforms offer wedding-themed AR effects that can be used directly in your photo booth setup.
To elevate your digital enhancements:
- Create custom overlays with the couple's names or wedding date
- Design digital props like hats, mustaches, or speech bubbles
- Implement animated backgrounds that match your wedding theme
Remember to test your chosen digital enhancements before the big day to guarantee they work seamlessly with your photo booth setup. With these digital touches, you'll create a unique and engaging experience for your guests.
Frequently Asked Questions
How Can I Prevent Prop Damage or Loss During the Event?
You can prevent prop damage or loss by assigning a dedicated attendant to oversee the booth. They'll guarantee props are handled carefully and returned after use. Consider using durable materials and attaching props to strings or stands for added security.
What's the Best Way to Store and Transport DIY Booth Props?
You'll want to store your DIY booth props in sturdy, labeled containers. Use bubble wrap or tissue paper for delicate items. When transporting, pack them securely in your vehicle and avoid stacking heavy items on top.
How Many Props Should I Prepare for a Typical Wedding Guest Count?
You'll want to prepare about 2-3 props per guest. For a wedding with 100 guests, aim for 200-300 props. Don't forget to include a variety of sizes and types to keep things interesting and fun.
Are There Any Props or Themes to Avoid for Cultural Sensitivity Reasons?
You'll want to avoid props or themes that could be seen as culturally insensitive or offensive. Steer clear of religious symbols, stereotypical costumes, or anything that might mock specific cultures. When in doubt, stick to neutral, celebratory themes.
How Can I Encourage Shy Guests to Participate in the Photo Booth?
You can encourage shy guests by creating a welcoming atmosphere. Use fun props, offer gentle encouragement, and have outgoing guests demonstrate. Consider group photos, provide clear instructions, and guarantee the booth's location isn't too exposed or intimidating.
In Summary
You've now got all the tools to create an amazing DIY wedding photo and video booth on a budget. Remember, it's all about creativity and personalizing the experience for your guests. Don't be afraid to mix and match ideas or come up with your own unique props. With your custom setup, you'll capture priceless memories that'll last a lifetime. So go ahead, release your inner artist, and watch as your guests have a blast in your one-of-a-kind booth!

I’m Sarah, the creator and writer behind this site. I’m a wife and a mother of two wonderful kids who keep me on my toes and inspire me daily. My passion lies in creating and organizing memorable events and group activities, where people can come together and make lasting memories.
Leave a Reply