
You'll create stunning DIY wedding decorations with this step-by-step guide. Start with rustic Mason jar centerpieces, elegant table runners, and romantic candle displays for ambiance. Craft floral hoop wreaths and paper flower backdrops for eye-catching focal points. Add personalized touches with custom signage and vintage-inspired photo displays. For a whimsical touch, construct balloon arches in your wedding colors. These projects allow you to infuse your personality into every aspect of your venue while saving money. By mixing and matching these ideas, you'll transform your space into a unique reflection of your love story. Explore each project to bring your dream wedding to life.
Key Takeaways
- Create rustic Mason jar centerpieces with wildflowers, twine, and battery-operated lights for a charming table display.
- Design elegant table runners using carefully selected fabric, precise measurements, and optional embellishments for a personalized touch.
- Assemble floral hoop wreaths with artificial or fresh flowers for versatile decor as backdrops or suspended elements.
- Craft romantic candle displays using various sizes and types, grouped aesthetically and placed strategically for ambiance.
- Develop personalized wedding signage with cohesive design elements, weather protection, and strategic placement for guest guidance.
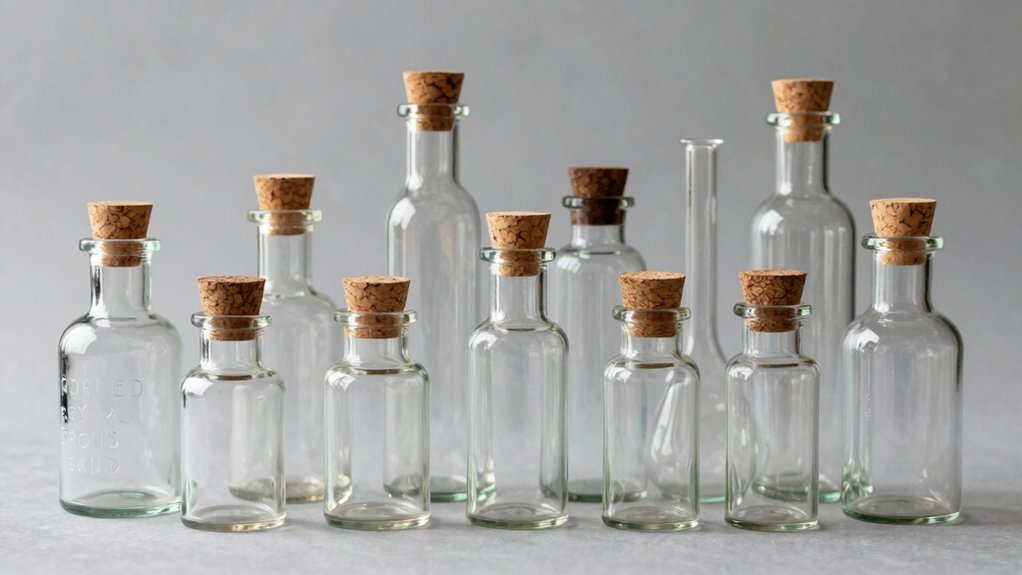
Rustic Mason Jar Centerpieces
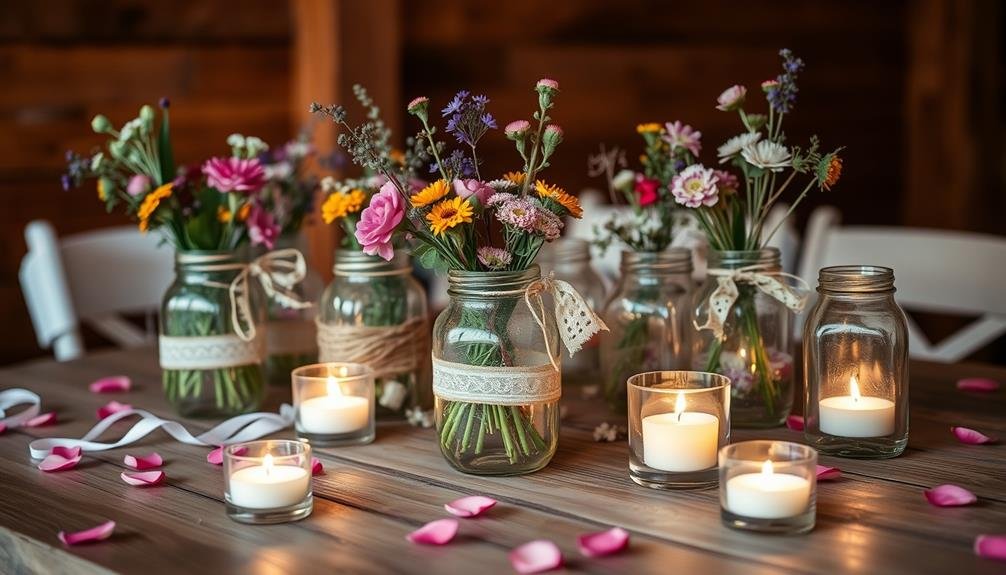
Three simple elements come together to create stunning rustic Mason jar centerpieces: jars, flowers, and twine.
Start by selecting wide-mouth Mason jars in varying sizes for visual interest. Clean them thoroughly and remove any labels.
Next, choose your flowers. Wildflowers, baby's breath, and rustic blooms like sunflowers or daisies work well. Mix and match colors and textures for a natural look. Trim the stems at an angle, removing any leaves that'll be below the water line.
To add a rustic touch, wrap twine or burlap ribbon around the jar's neck. Tie it in a simple bow or create intricate patterns for added flair. You can also attach small decorative elements like miniature pinecones or wooden tags with table numbers.
Fill the jars with water and arrange your flowers. Vary the heights and densities for a more organic appearance. Place these centerpieces on wood slices or burlap table runners to enhance the rustic theme.
For added ambiance, consider placing battery-operated tea lights or fairy lights inside some jars. This soft lighting will create a warm, inviting glow as evening falls on your reception.
Floral Hoop Wreaths
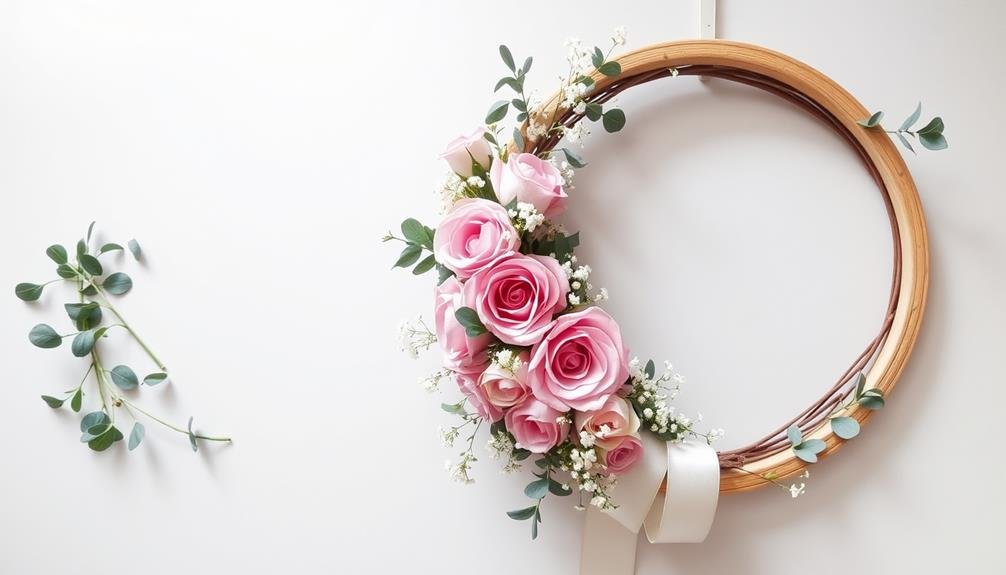
While Mason jar centerpieces offer a charming rustic touch, floral hoop wreaths bring a modern, airy elegance to your wedding decor.
These versatile decorations can be used as backdrops, table centerpieces, or suspended from ceilings to create a magical atmosphere.
To create your own floral hoop wreaths, you'll need:
- Metal or wooden hoops
- Floral wire
- Wire cutters
- Artificial or fresh flowers
- Greenery or foliage
Start by attaching greenery to the hoop using floral wire, creating a base layer.
Next, add your chosen flowers, securing them with wire and alternating colors and sizes for a balanced look.
Don't be afraid to let some stems hang loose for a more organic feel.
For a cohesive look, match your floral hoop wreaths to your wedding's color scheme and overall theme.
You can also personalize them by incorporating meaningful elements like family heirlooms or sentimental trinkets.
Consider using different hoop sizes throughout your venue to add visual interest and depth to your decor.
With a little creativity, these stunning DIY floral hoop wreaths will elevate your wedding's aesthetic and create unforgettable focal points for your special day.
Elegant Table Runners
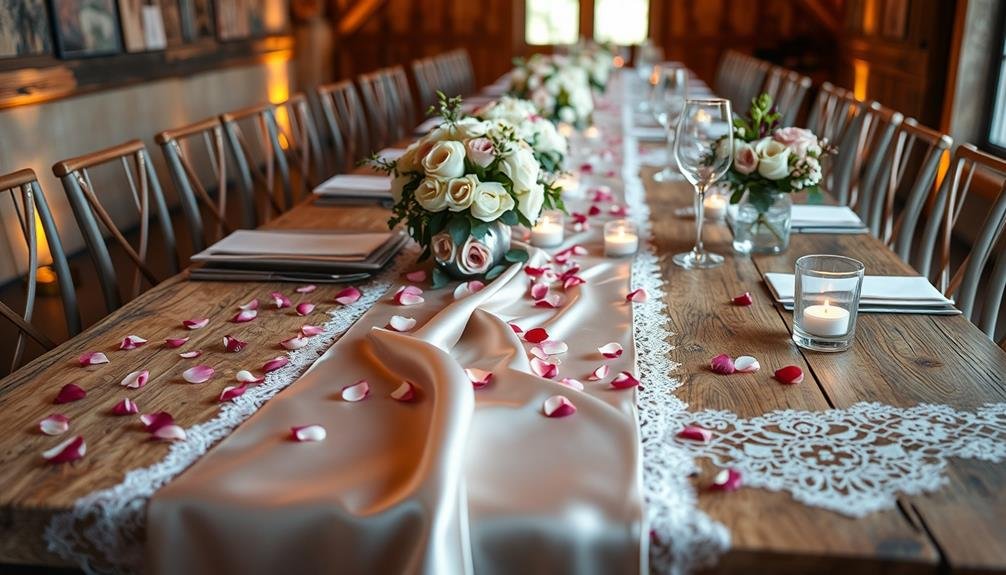
Creating elegant table runners for your wedding can elevate your reception's ambiance.
You'll need to choose the right fabric that complements your wedding theme, master measuring and cutting techniques for a polished look, and add personal touches through embellishments.
These custom table runners won't only save you money but also infuse your personality into the decor.
Choosing the Right Fabric
For elegant table runners, choosing the right fabric can make or break your DIY wedding décor. Reflect on factors like texture, durability, and how well the material drapes across your tables. Opt for fabrics that complement your overall wedding theme and color scheme.
When selecting fabric for your table runners, keep these key points in mind:
- Weight: Heavier fabrics like velvet or brocade add luxury, while lighter options like organza create an airy feel.
- Sheen: Satin and silk offer a glossy finish, whereas linen and cotton provide a matte look.
- Pattern: Solid colors are versatile, but don't shy away from subtle patterns or lace for added interest.
- Care: Choose fabrics that are easy to clean and maintain, especially if you plan to reuse them.
- Cost: Balance your budget with the fabric quality to achieve the best results.
You'll want to test different fabrics before making a final decision. Drape samples over a table to see how they fall and interact with your other decorations.
Don't forget to reflect on the season and venue when making your choice. Indoor weddings allow for more delicate fabrics, while outdoor events may require sturdier options to withstand the elements.
Measuring and Cutting Techniques
Once you've chosen the perfect fabric, it's time to tackle the measuring and cutting process for your elegant table runners. Start by measuring your tables' lengths and adding an extra 12-18 inches for overhang on each end. For width, aim for 12-14 inches to guarantee proper coverage without overcrowding.
Gather your supplies: fabric, measuring tape, fabric scissors, and a straight edge. Lay your fabric on a clean, flat surface and use chalk to mark your measurements. Double-check these marks before cutting to avoid costly mistakes.
When cutting, use sharp fabric scissors and make long, smooth cuts along your marked lines. If you're working with delicate fabrics, consider using a rotary cutter for cleaner edges. For patterned fabrics, pay attention to pattern alignment when cutting multiple runners.
To create a polished look, fold and press the edges of your runners. Use an iron to create crisp folds, then secure them with fabric glue or discreet stitching.
If you're adding embellishments like lace or ribbons, attach them now for a cohesive finish.
Embellishing With Personal Touches
Numerous opportunities exist to add personal touches to your elegant table runners, transforming them from simple fabric strips into unique wedding decor.
Consider incorporating elements that reflect your personality, relationship, or wedding theme. You'll create memorable centerpieces that guests will admire throughout the reception.
Embellish your table runners with these creative ideas:
- Embroider meaningful quotes, dates, or your initials
- Attach vintage lace, ribbons, or beaded trim along the edges
- Sew on small crystals or sequins for a touch of sparkle
- Appliqué fabric flowers or leaves in coordinating colors
- Stamp or stencil patterns using fabric paint
To guarantee a polished look, practice your chosen embellishment technique on scrap fabric first.
When you're ready to work on the actual runners, use fabric glue for quick applications or hand-sewing for a more durable finish.
Don't forget to iron your runners after adding embellishments to create a crisp, professional appearance.
Romantic Candle Displays
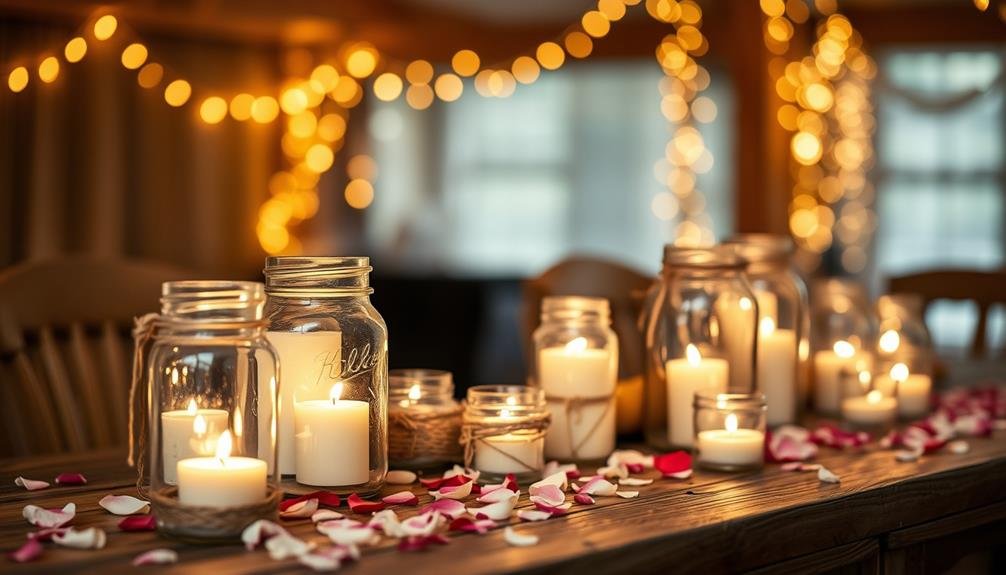
Candlelight magic can transform your wedding venue into a romantic paradise. To create stunning candle displays, start by selecting various candle types, including pillar, taper, and votive candles.
Mix and match heights and sizes for visual interest. Choose holders that complement your wedding theme, such as crystal votives for a glamorous look or rustic lanterns for a country-chic vibe.
Group candles in odd numbers for a balanced aesthetic. Create centerpieces by surrounding a tall pillar candle with smaller votives, or arrange floating candles in clear bowls filled with water and flower petals.
For added sparkle, place candles on mirrored trays or surround them with metallic accents. Safety is essential, so opt for flameless LED candles in areas with high foot traffic or near flammable materials.
Use hurricane lamps or glass cylinders to protect real flames from drafts. Don't forget to incorporate candles in unexpected places, like lining staircases or illuminating outdoor pathways.
With careful planning and creative arrangement, your DIY candle displays will cast a warm, enchanting glow throughout your wedding celebration.
Paper Flower Backdrops
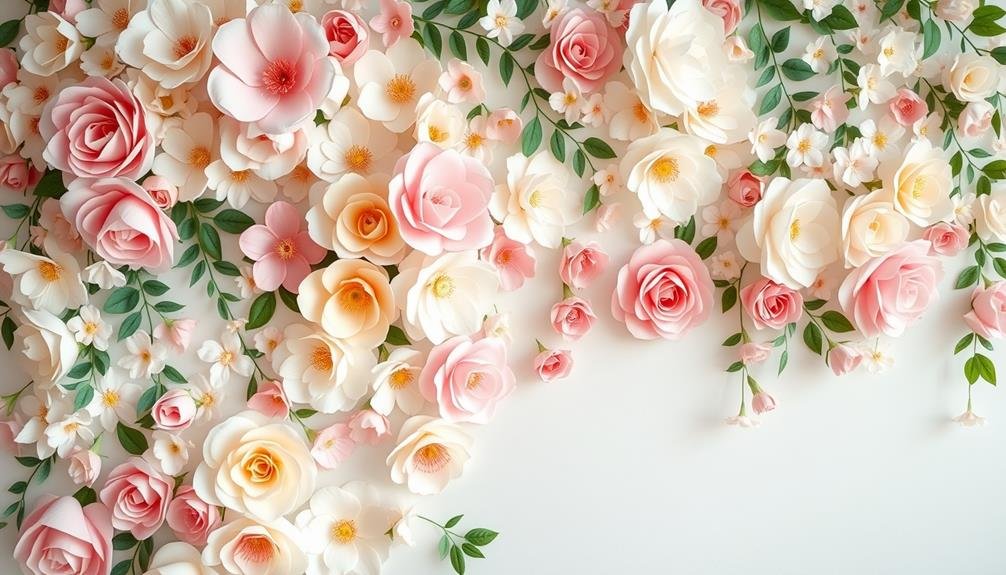
Creating a stunning paper flower backdrop for your wedding starts with selecting the perfect color palette.
You'll need to carefully choose paper shades that complement your overall wedding theme and venue.
Once you've gathered your materials, focus on assembling the flowers and planning the installation process to guarantee a seamless and eye-catching display on your big day.
Choosing Paper Colors
The art of selecting paper colors for your DIY flower backdrop can transform your wedding venue into a breathtaking scene. When choosing paper colors, consider your overall wedding palette and theme.
Don't be afraid to mix and match hues to create depth and visual interest. Opt for a combination of light and dark shades to add dimension to your backdrop.
Here are some tips to help you choose the perfect paper colors:
- Consider the season: Use warm tones for fall, pastels for spring
- Match your flowers: Coordinate with your bouquet and centerpieces
- Think about lighting: Some colors may look different under various light conditions
- Use neutrals: White, cream, or gray can balance bold colors
- Incorporate metallic accents: Gold or silver can add a touch of elegance
Remember that your paper flower backdrop will be a focal point, so choose colors that complement rather than overwhelm your space.
If you're unsure, start with a neutral base and add pops of color gradually. You can also create a mock-up using small paper samples to visualize the final result before committing to larger quantities.
Assembly and Installation
Once you've crafted your paper flowers, it's time to bring your backdrop vision to life. Begin by laying out your flowers on the floor, arranging them in the desired pattern. This will help you visualize the final design before installation.
Next, choose your mounting surface. For a freestanding backdrop, use a sturdy frame or PVC pipes. If you're attaching it to a wall, consider using removable adhesive hooks or a tension rod. Verify your surface can support the weight of your flowers.
Start assembling from the bottom up, working in rows. Use a hot glue gun to attach flowers to each other and the mounting surface. For added stability, reinforce larger flowers with floral wire. As you progress, step back occasionally to check the overall composition and make adjustments.
For a cascading effect, vary the flower sizes and densities. Incorporate greenery or smaller blooms to fill gaps and add texture. If you're using a frame, consider draping fabric behind the flowers for a softer look.
Personalized Wedding Signage
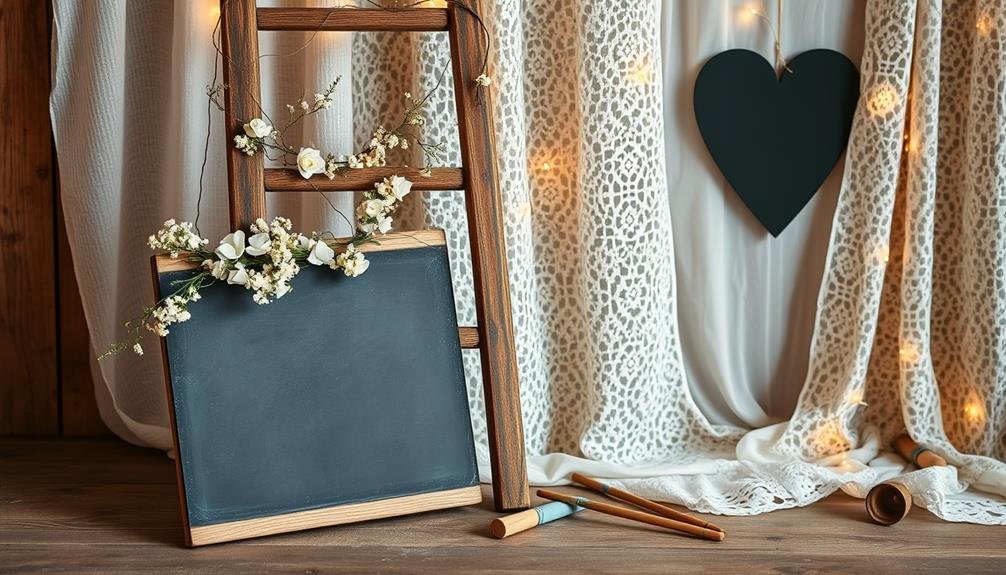
Personalized wedding signage adds a unique touch to your special day, guiding guests and enhancing your venue's atmosphere. You'll find numerous options for creating custom signs that reflect your style and theme. Consider using materials like wood, acrylic, or chalkboards to craft eye-catching displays.
Start by deciding on the messages you want to convey. Common wedding signs include:
- Welcome messages
- Ceremony and reception directions
- Seating charts
- Bar menus
- Photo booth instructions
Once you've chosen your content, select fonts and colors that complement your wedding palette. Use stencils, paint pens, or vinyl lettering to create professional-looking text. For wooden signs, sand the surface before painting to guarantee a smooth finish.
Don't forget to factor in size and placement when designing your signs. Larger signs work well for key information, while smaller ones can add charm to specific areas. Consider using easels or stakes to display freestanding signs, or hang them using decorative ribbon or twine.
Remember to weatherproof outdoor signs to protect them from the elements. A clear sealant will help preserve your hard work and guarantee your personalized wedding signage looks perfect throughout your celebration.
Whimsical Balloon Arches

Moving from signs to sky-high decor, whimsical balloon arches offer a playful and eye-catching addition to your DIY wedding decorations.
These versatile structures can frame entryways, accent photo booths, or serve as stunning backdrops for your ceremony or reception.
To create a balloon arch, you'll need an arch frame, balloons in various sizes and colors, a balloon pump, and fishing line.
Start by inflating the balloons to different sizes for a more organic look. Attach them to the frame using the fishing line, starting from the bottom and working your way up.
Layer the balloons, alternating colors and sizes to achieve depth and texture.
For added whimsy, incorporate unexpected elements like faux flowers, greenery, or even small props that reflect your wedding theme.
Don't forget to secure the arch properly, especially if it's outdoors. You can anchor it to the ground using stakes or weighted bases.
Vintage-Inspired Photo Displays
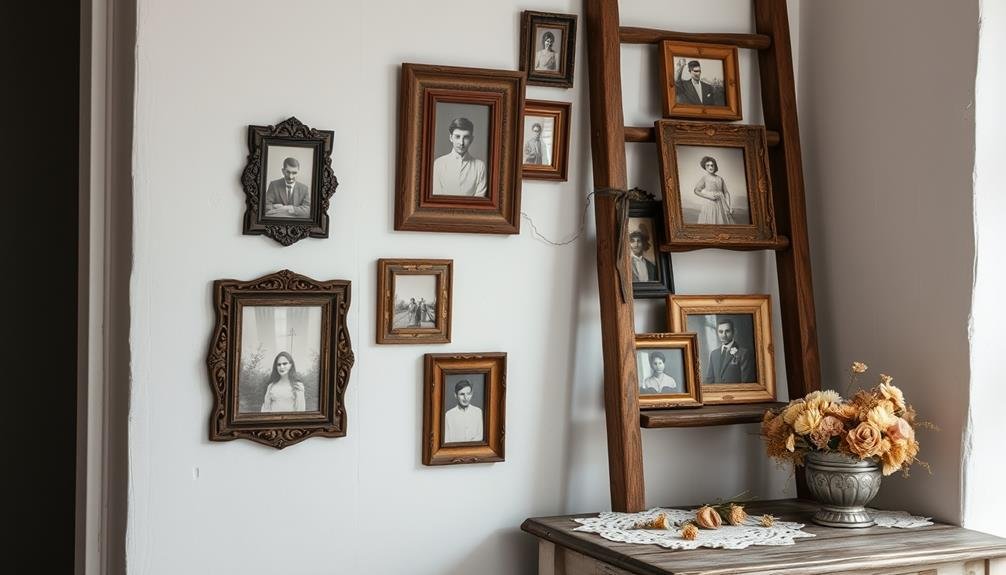
Why not take a trip down memory lane with vintage-inspired photo displays at your wedding? These charming arrangements add a personal touch to your decor while showcasing cherished memories.
Create a nostalgic ambiance by using antique frames, weathered wood, or rustic elements to display your photos.
To craft your vintage-inspired photo display, consider these ideas:
- Repurpose an old ladder as a unique photo stand
- Use vintage suitcases to create tiered photo displays
- Hang photos from twine using antique clothespins
- Display images in mismatched antique picture frames
- Create a photo timeline using an old window frame
Start by selecting a mix of family photos, engagement shots, and childhood memories. Print your chosen images in sepia or black and white for an authentic vintage look.
Next, gather your display materials from thrift stores, flea markets, or your own attic. Arrange your photos creatively, mixing different sizes and orientations for visual interest.
Don't forget to include captions or small tags to identify the people and moments in each picture. Finally, place your vintage-inspired photo displays strategically throughout your venue, such as near the guest book, on cocktail tables, or as part of your reception centerpieces.
Frequently Asked Questions
How Far in Advance Should I Start Making DIY Wedding Decorations?
You should start making DIY wedding decorations 6-12 months before your big day. This gives you plenty of time to plan, gather materials, and create without feeling rushed. You'll also have time for any necessary adjustments.
What Tools Are Essential for Creating Various DIY Wedding Decorations?
Like a painter's palette, your toolkit should be diverse. You'll need scissors, glue guns, wire cutters, and pliers. Don't forget measuring tape, craft knives, and a sewing machine. These tools will help you bring your wedding visions to life.
How Can I Estimate the Cost of Materials for DIY Decorations?
To estimate material costs for DIY decorations, you'll need to create a detailed list of supplies. Research prices online and at local stores, factor in quantity needed, and don't forget to include shipping costs if ordering online.
Are There Any DIY Decorations That Are Better Left to Professionals?
Did you know that 40% of couples regret DIY wedding projects? You're better off leaving complex lighting setups, large floral installations, and custom-printed materials to professionals. They'll save you time, stress, and potentially costly mistakes.
How Do I Transport and Set up Delicate DIY Decorations on the Wedding Day?
You'll want to carefully pack delicate decorations in padded boxes. Arrive early to set up, and enlist help from friends or family. Use sturdy bases and secure items with tape or wire. Don't forget tools and extra supplies.
Conclusion
You've now got a toolkit of beautiful DIY wedding decorations to make your special day uniquely yours. Remember, "Rome wasn't built in a day," so start your projects early and enlist help from friends and family. With these creative ideas, you'll transform your venue into a personalized wonderland without breaking the bank. Your handmade touches will not only save money but also create lasting memories for you and your guests to cherish for years to come.

I’m Sarah, the creator and writer behind this site. I’m a wife and a mother of two wonderful kids who keep me on my toes and inspire me daily. My passion lies in creating and organizing memorable events and group activities, where people can come together and make lasting memories.

Leave a Reply