
Looking for affordable ways to showcase your wedding memories? You've got plenty of options! Create a DIY photo collage wall or Polaroid-style display board for a rustic touch. Design a digital slideshow album with custom changes and music to relive the day. Craft a personalized scrapbook or memory box filled with mementos. For a modern twist, set up an interactive online gallery or turn a favorite photo into a framed puzzle. Don't forget the classic wedding photo journey album, mixing candid and formal shots. With these ideas, you'll find the perfect way to preserve your special moments without breaking the bank.
Key Takeaways
- DIY photo collage walls transform venues into visual celebrations of love using affordable materials like string and clothespins.
- Polaroid-style display boards create a nostalgic atmosphere and encourage guest participation with instant photos.
- Hanging photo string lights offer a magical, budget-friendly display option that combines warm lighting with cherished memories.
- Personalized scrapbooks and memory boxes provide unique, cost-effective ways to preserve wedding mementos and photos.
- Digital slideshows with customizable transitions, music, and narration offer an engaging and affordable way to present wedding memories.
DIY Photo Collage Wall
A DIY photo collage wall can transform your wedding venue into a stunning visual celebration of your love story. This budget-friendly option allows you to showcase your favorite moments as a couple while adding a personal touch to your decor.
Start by selecting a variety of photos that represent your relationship, from first dates to the proposal. Choose a focal point in your venue, like behind the head table or near the entrance.
Gather materials such as string, clothespins, frames, or even reclaimed wood to create your display. You can opt for a symmetrical grid layout or a more organic, free-form arrangement. Mix and match frame sizes and styles for added visual interest.
Consider incorporating elements that reflect your wedding theme or color scheme. Add fairy lights for a romantic glow, or use greenery to soften the edges.
Don't forget to include some blank space for guests to add Polaroid photos taken during the reception. This interactive element will make your collage wall a living, growing representation of your special day.
Digital Slideshow Album
Create a mesmerizing digital slideshow album to showcase your wedding memories.
You'll have the freedom to customize shifts and effects, adding a touch of magic to each photo shift.
Additionally, you can enhance the emotional impact by incorporating your favorite music or even adding narration to tell your love story.
Customizable Transitions and Effects
Digital slideshow albums offer a dynamic way to showcase your wedding photos. With customizable animations and effects, you can elevate your presentation and create a unique viewing experience.
Start by selecting a variety of animations between images, such as fade, dissolve, or slide. Mix these up to keep viewers engaged and maintain visual interest throughout the slideshow.
Add subtle effects to enhance individual photos without overshadowing their natural beauty. Consider using a soft glow effect for romantic portraits or a vintage filter for outdoor shots. You can also incorporate zooming and panning techniques to draw attention to specific details in your images.
Don't overdo it, though – use effects sparingly to avoid distraction.
Many slideshow software options allow you to sync your photos with music, creating an emotional impact. Choose songs that reflect your relationship or the mood of your wedding day.
You can also add text overlays to introduce different sections of your album or provide context for specific moments. Remember to keep the overall design cohesive, using consistent fonts and colors that complement your wedding theme.
With these customizable elements, you'll create a memorable digital album that truly captures the essence of your special day.
Music and Narration Options
Selecting the right music and narration for your digital slideshow album can transform it from a simple collection of photos to an immersive storytelling experience. Choose music that reflects your personality as a couple and complements the mood of your wedding day. Consider instrumental tracks for a subtle background or popular songs that hold special meaning for you both.
For narration, you can record personal anecdotes, vows, or messages from loved ones to add depth to your story. Alternatively, use text overlays to provide context or share memorable quotes.
Here's a guide to help you choose the perfect audio elements:
| Music Genre | Mood | Best For |
|---|---|---|
| Classical | Elegant, Timeless | Traditional Ceremonies |
| Jazz | Sophisticated, Fun | Cocktail Hour, Reception |
| Pop | Upbeat, Celebratory | Dance Floor Moments |
| Acoustic | Intimate, Romantic | Couple Portraits |
| Electronic | Modern, Energetic | Contemporary Urban Weddings |
Remember to obtain proper licensing for any copyrighted music you use. Many online platforms offer royalty-free options specifically for wedding videos. By carefully selecting your music and narration, you'll create a personalized and emotionally resonant digital album that you'll cherish for years to come.
Personalized Scrapbook
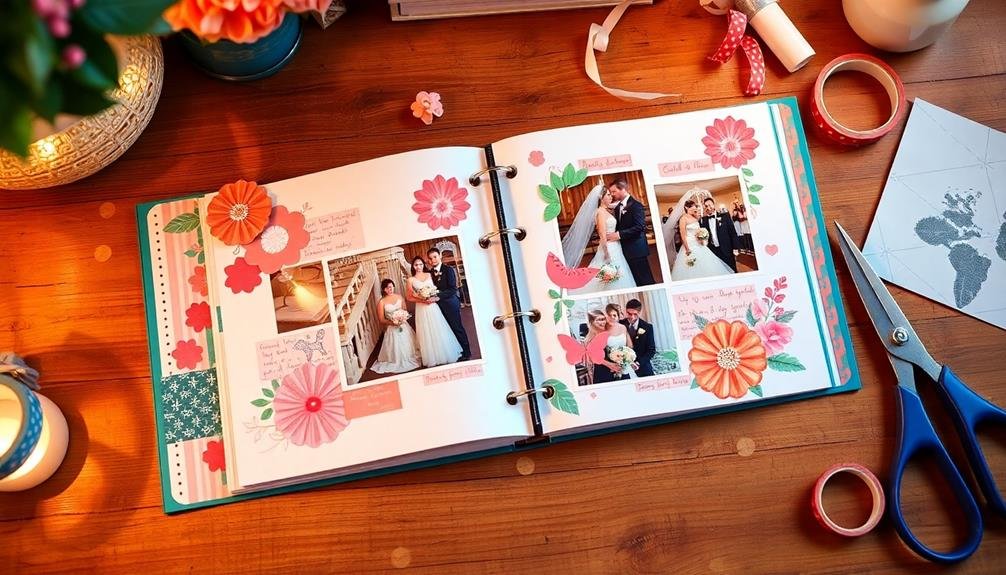
Craft a personalized scrapbook to showcase your wedding photos in a unique and memorable way. This DIY approach allows you to infuse your personality and style into every page. Start by choosing a theme that reflects your relationship or wedding aesthetic, such as vintage, rustic, or modern.
Gather materials like colorful papers, ribbons, stickers, and embellishments that complement your chosen theme. Include not just photos but also mementos from your special day, such as invitation samples, dried flowers from your bouquet, or handwritten notes from guests.
Create eye-catching layouts by mixing different photo sizes and orientations. Add personal touches by writing captions or short stories next to the images, detailing special moments or funny anecdotes. Use decorative elements sparingly to avoid overwhelming the photos.
Consider creating themed sections like "Getting Ready," "Ceremony," and "Reception" to organize your memories chronologically. Don't forget to leave some blank spaces for future additions, such as anniversary photos or notes.
This evolving scrapbook will become a cherished keepsake that tells the story of your love and commitment for years to come.
Polaroid-Style Display Board
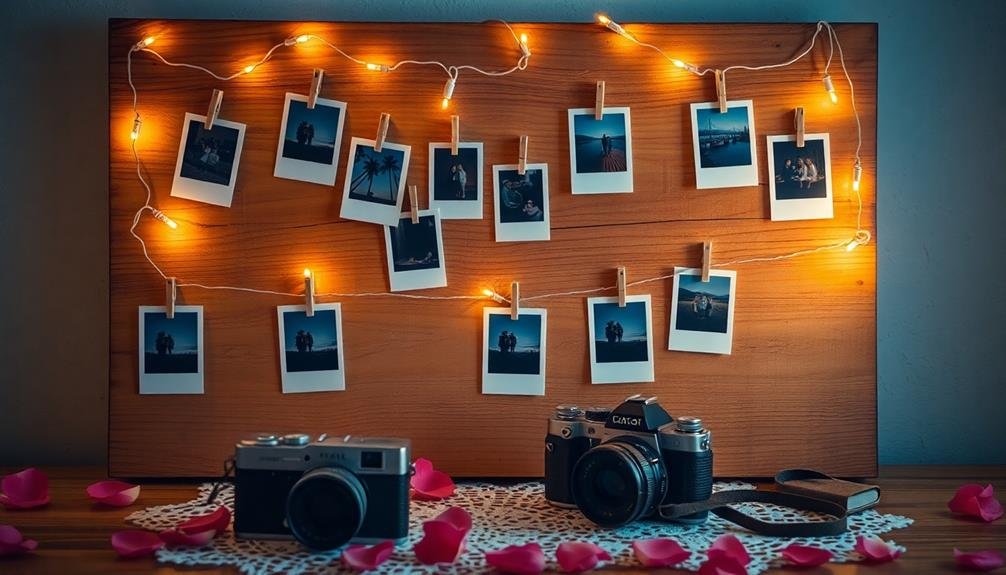
Create a charming and nostalgic atmosphere at your wedding with a Polaroid-style display board.
You'll find this DIY setup easy to arrange, requiring only a large board, some string, and clips to showcase instant photos.
Encourage your guests to snap pictures throughout the event and add them to the board, turning it into an interactive, ever-growing collection of memories.
Rustic Charm and Nostalgia
Bring back the charm of yesteryear with a Polaroid-style display board at your wedding. This DIY project combines rustic elements with nostalgic instant photos to create a unique and memorable display.
Start by sourcing a large wooden board or pallet, then sand and stain it for a weathered look. Attach twine or thin rope across the board in horizontal rows, securing it with small nails or staples.
Throughout the day, snap instant photos of guests, special moments, and details using a Polaroid camera or a modern equivalent. Encourage guests to write messages on the white borders of the photos. Use wooden clothespins to clip the pictures to the twine, creating a growing collage of memories as the celebration unfolds.
To enhance the rustic feel, decorate the board with fairy lights, dried flowers, or vintage ornaments. Place the display in a prominent location where guests can easily view and contribute to it.
After the wedding, this board becomes a ready-made keepsake that captures the essence of your special day in a charming, tactile format you'll treasure for years to come.
Easy DIY Setup
Setting up your own Polaroid-style display board doesn't have to be complicated. With a few simple materials and some creativity, you can create a stunning visual centerpiece for your wedding reception. Start by selecting a large cork board or foam core as your base. Then, gather your supplies: string lights, mini clothespins, and decorative washi tape.
Arrange the string lights in a zigzag pattern across the board, securing them with small tacks or adhesive hooks. Next, use the mini clothespins to hang blank Polaroid-style frames or actual printed photos along the strings. Add a personal touch by using washi tape to create borders or patterns on the board.
Here's a quick guide to help you plan your display:
| Materials | Quantity | Purpose |
|---|---|---|
| Cork/foam board | 1 | Base for display |
| String lights | 1-2 sets | Create a warm, inviting glow |
| Mini clothespins | 50-100 | Hang photos and frames |
| Washi tape | 3-5 rolls | Decorate and customize the board |
Remember to leave space for guests to add their own Polaroid photos throughout the event. This interactive element will make your display a memorable part of your special day.
Interactive Guest Participation
Three key elements make a Polaroid-style display board truly interactive for your wedding guests.
First, provide instant cameras or a photo booth with printable images. This allows guests to capture candid moments throughout the event.
Second, set up a large, visually appealing board or backdrop where guests can instantly display their photos. Use clothespins, magnetic strips, or adhesive tabs for easy attachment.
Third, encourage creativity by offering props, speech bubbles, and decorative frames for guests to personalize their shots. You'll want to place the board in a high-traffic area, such as near the entrance or close to the dance floor. This guarantees maximum participation and creates a constantly evolving display of memories.
To make the most of this interactive element, consider designating a friend or family member to oversee the area, guaranteeing cameras have film and guiding guests who may need assistance.
You can also incorporate the display into your wedding album by taking photos of the completed board or collecting the images at the end of the night. This unique approach not only provides entertainment but also captures authentic moments from your guests' perspectives.
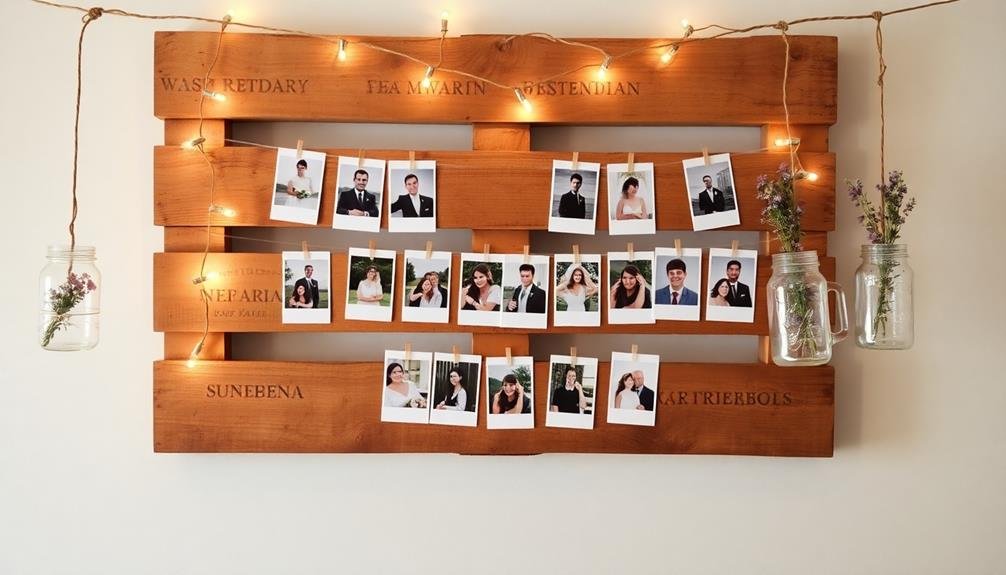
Rustic Wood Pallet Frame

A rustic wood pallet frame adds a charming, vintage touch to your wedding photography display. You can easily create this DIY project using reclaimed wood pallets, which are often available for free from local businesses.
Start by disassembling the pallet and sanding the wood to achieve a smooth surface. Cut the pieces to your desired frame size and arrange them in a pleasing pattern.
To customize your frame, you can stain the wood to complement your wedding colors or leave it natural for a more authentic look. Attach twine or wire across the frame to create a clothesline effect for hanging photos. Use mini clothespins to secure your favorite wedding snapshots, allowing for easy swapping and rearranging.
Consider incorporating other rustic elements like burlap, lace, or dried flowers to enhance the frame's charm. You can also add small chalkboard signs to label different sections of your photo display.
This versatile frame can be used as a backdrop for your reception, a photo booth prop, or as a standalone display piece. After the wedding, repurpose it as a unique home decor item to showcase your cherished memories.
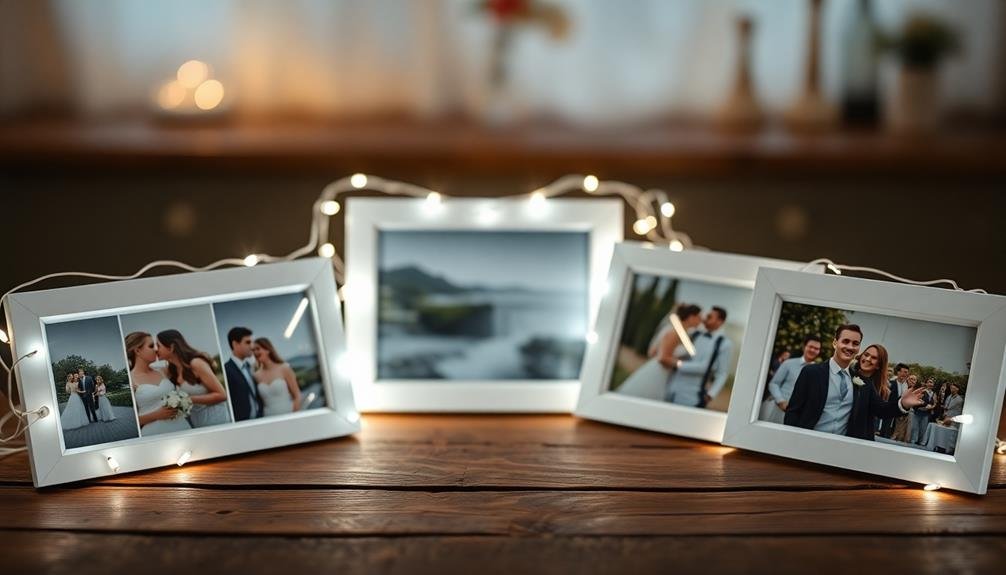
Hanging Photo String Lights
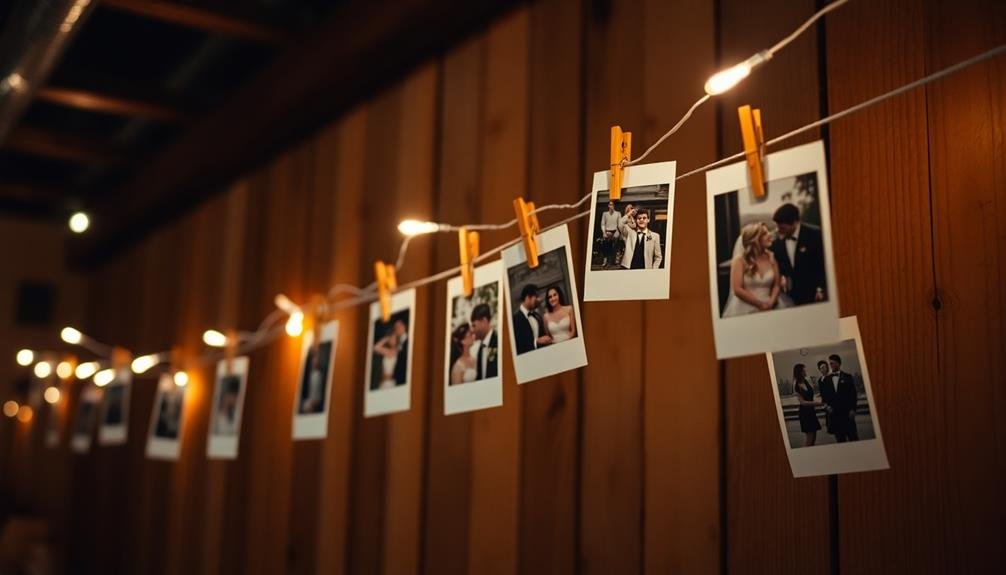
Twinkling lights transform your wedding photos into a magical display. To create this enchanting effect, start by selecting string lights with small clips attached. These are readily available online or at craft stores. Choose warm white LEDs for a soft, romantic glow that won't overpower your photos.
Next, decide where you'll hang your photo string lights. A blank wall, a wooden frame, or even trees at an outdoor reception can serve as perfect backdrops. Measure the area and purchase enough string lights to cover it comfortably.
When selecting photos, opt for a mix of candid shots and posed portraits. Print them in various sizes for visual interest, but keep them small enough to be supported by the clips. Alternatively, use instant photos for a vintage touch.
As you hang the lights, space your photos evenly along the strings. Vary the heights to create a dynamic display. Consider overlapping some photos or adding small decorative elements like paper hearts or eucalyptus sprigs between pictures.
This DIY project not only showcases your memories but also doubles as ambient lighting for your reception. It's an affordable, personalized touch that your guests will love.
Wedding Memory Box
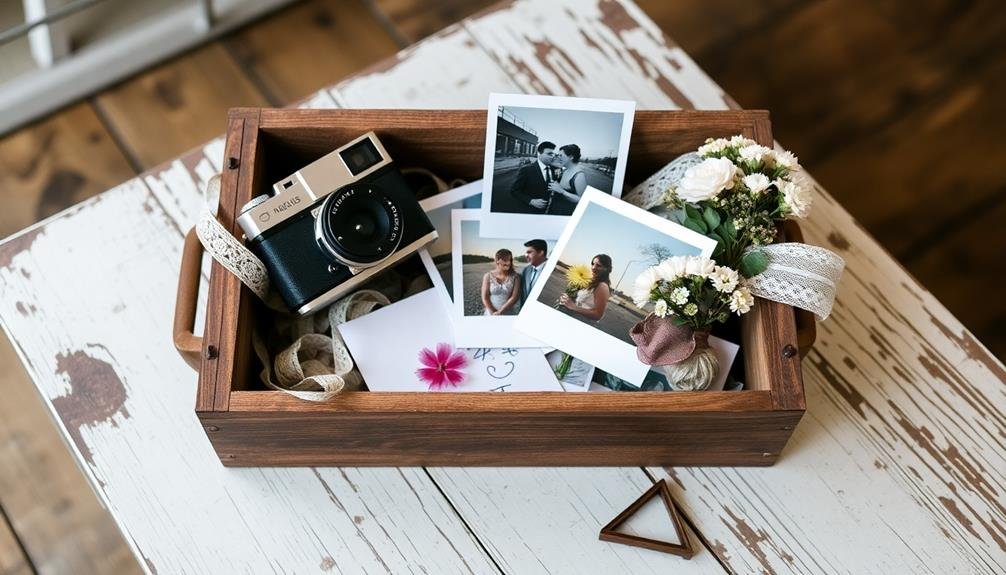
Create a unique wedding memory box to preserve your special day's mementos in a personalized keepsake container.
You'll want to design a box that reflects your style and complements your wedding theme.
Fill the memory box with carefully curated items that hold significant meaning, such as your wedding invitation, dried flowers from your bouquet, or handwritten vows.
Personalized Keepsake Container Design
For couples seeking a unique way to preserve their wedding memories, a personalized keepsake container or wedding memory box offers a beautiful solution. You can design a custom container that reflects your wedding theme and personal style.
Start by choosing a base material, such as wood, metal, or acrylic. Consider engraving your names and wedding date on the exterior for a personalized touch.
Inside, create compartments to organize various mementos. Include spaces for photos, your wedding invitation, dried flowers from your bouquet, and small trinkets from the day. You can add fabric-lined sections to protect delicate items or use clear sleeves for easy viewing.
Incorporate creative elements like a built-in photo frame on the lid or a secret compartment for love letters. Add decorative hardware, such as vintage knobs or clasps, to enhance the overall design. Consider using acid-free materials to preserve your keepsakes long-term.
For a DIY approach, upcycle an existing box or craft one from scratch. Use scrapbooking techniques to decorate the interior, creating a mini-album within the box.
This personalized keepsake container will become a cherished family heirloom, allowing you to relive your special day for years to come.
Curating Meaningful Mementos Inside
Once you've designed your perfect wedding memory box, it's time to fill it with carefully selected mementos that capture the essence of your special day.
Choose items that evoke strong emotions and memories, representing different aspects of your wedding. Consider including a mix of traditional keepsakes and unique, personal items that tell your love story.
When curating your wedding memory box, focus on these key elements:
- Tangible reminders: Include physical items like your wedding invitation, a pressed flower from your bouquet, or a small piece of fabric from your dress or veil.
- Photographic memories: Add a selection of your favorite wedding photos, including candid shots and formal portraits that showcase the day's highlights.
- Written sentiments: Incorporate handwritten notes, such as your vows, a love letter exchanged on the wedding day, or cards from guests.
Don't forget to include items that represent your relationship's journey, like ticket stubs from your first date or a memento from your engagement.
As you gather these meaningful objects, you'll create a treasure trove of memories that you can revisit for years to come, reliving the joy and love of your wedding day.
Customized Photo Book
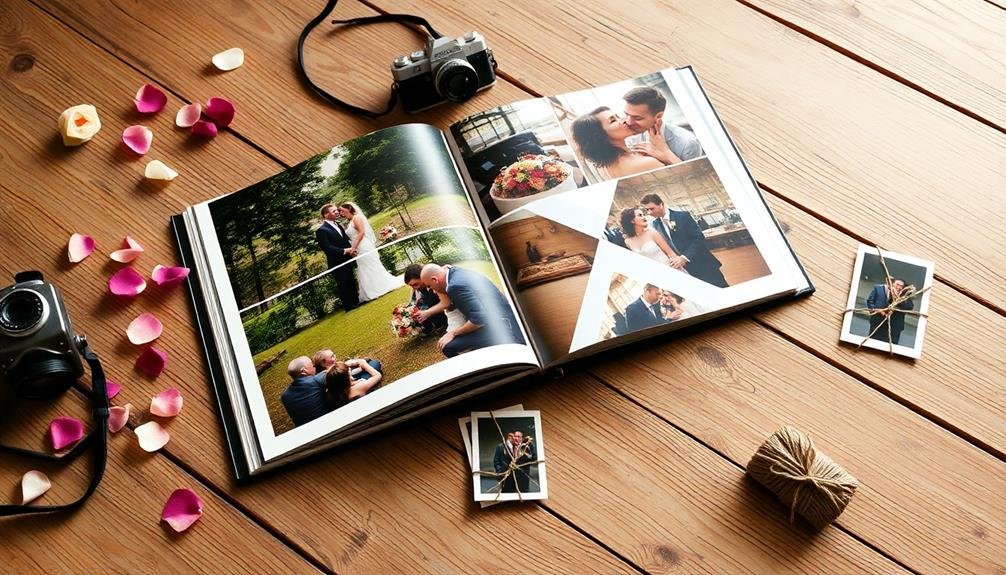
After the big day, a customized photo book serves as a cherished keepsake of your wedding memories. Create a unique album that reflects your style and personality by selecting a theme that complements your wedding's aesthetic.
Choose from various cover materials, such as leather, linen, or hardcover, to set the tone for your book.
When designing the layout, mix and match different page styles to keep things interesting. Include full-page spreads for dramatic shots, collages for candid moments, and smaller images for detail shots.
Don't forget to add captions or quotes to provide context and evoke emotions tied to specific moments.
Consider incorporating non-photo elements like pressed flowers from your bouquet, snippets of wedding vows, or ticket stubs from your honeymoon. These personal touches will make your photo book truly one-of-a-kind.
To guarantee your book tells a cohesive story, arrange photos chronologically or by theme. Start with getting ready shots, move through the ceremony and reception, and end with your grand exit or honeymoon highlights.
This approach will help you relive your special day every time you flip through the pages.
Interactive Online Gallery

An interactive online gallery offers a modern twist on sharing your wedding photos with friends and family.
It's a cost-effective way to display your memories while allowing guests to easily access and interact with your images. You can create a password-protected website where visitors can view, comment on, and even download their favorite shots.
To make your online gallery stand out:
- Include a timeline feature that organizes photos chronologically, from getting ready to the last dance.
- Add a tagging system so guests can find themselves and others in the photos quickly.
- Incorporate a slideshow option with background music for a more immersive experience.
You'll want to choose a platform that's user-friendly and mobile-responsive, ensuring everyone can enjoy your photos regardless of their device.
Consider adding a guestbook section where visitors can leave messages and share their own memories from your special day.
You can also integrate social media sharing buttons, making it easy for guests to post their favorite shots on their profiles.
With an interactive online gallery, you're not just sharing photos; you're creating a collaborative space that keeps your wedding memories alive long after the big day.
Framed Photo Puzzle
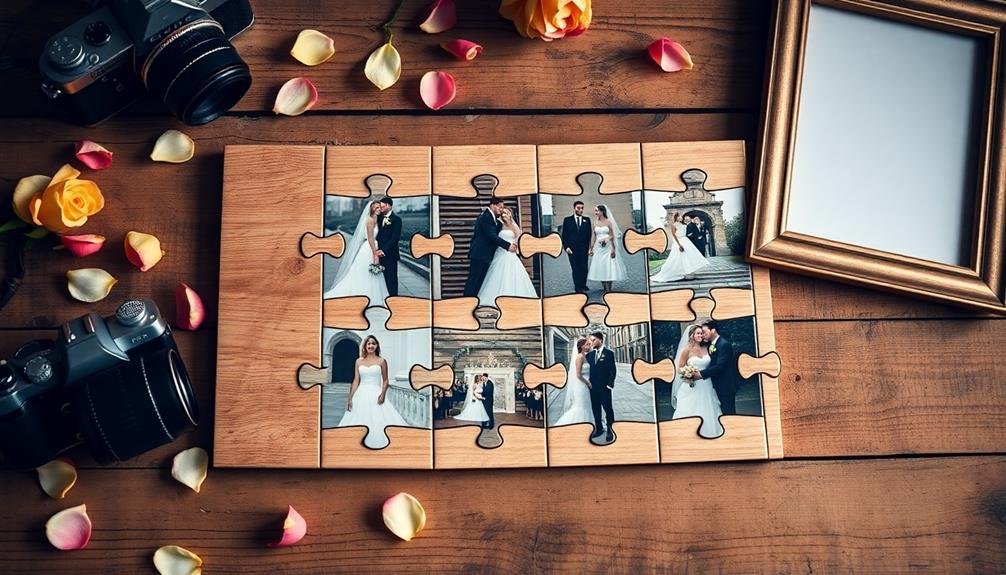
While online galleries offer a digital experience, a framed photo puzzle brings a tactile element to your wedding memories. This unique display idea combines the beauty of a framed photograph with the interactive fun of a puzzle. Choose a favorite wedding photo and have it printed as a jigsaw puzzle. Once assembled, you can frame the completed puzzle for a one-of-a-kind wall piece.
To create your framed photo puzzle, start by selecting a high-quality image from your wedding day. Look for a photo that captures a special moment or showcases your venue. Next, order a custom puzzle using this image. Many online services offer this option at affordable prices.
When your puzzle arrives, set aside time to assemble it with your partner or family members, reliving your wedding day as you piece it together. Once complete, carefully glue the puzzle to preserve its form. Choose a frame that complements your home decor and mount the puzzle inside.
Display your framed photo puzzle in a prominent location, such as your living room or bedroom. This creative display not only showcases your wedding memories but also serves as a conversation starter for guests.
Frequently Asked Questions
How Can I Protect My Wedding Photos From Fading Over Time?
You can protect your wedding photos from fading by storing them in acid-free albums, using archival-quality sleeves, and keeping them away from direct sunlight. Digitize your images and store backups in multiple locations for added security.
What's the Best Way to Share Digital Wedding Albums With Guests?
You've got several great options for sharing digital wedding albums with guests. Create a password-protected online gallery, use a cloud storage service, or send custom USB drives. You can also share via social media or email for easy access.
Are There Eco-Friendly Options for Wedding Photo Displays?
You'll find several eco-friendly options for wedding photo displays. Try using recycled materials for frames, create digital slideshows, or opt for plantable seed paper prints. You can also display photos on reusable fabric banners or recycled wood pallets.
How Long Does It Typically Take to Create a Custom Wedding Album?
You'll typically wait 4-8 weeks for your custom wedding album. It's a time-consuming process as designers carefully curate and edit photos, create layouts, and perfect every detail. Rush options may be available if you're in a hurry.
Can I Combine Multiple Display Ideas for a More Unique Presentation?
You can mix and match display ideas to create a truly unique presentation. Combine traditional albums with digital displays, or use photo books alongside wall galleries. Don't be afraid to get creative and personalize your wedding memories.
In Summary
You've now got a wealth of creative and budget-friendly ideas to showcase your wedding memories. Whether you're crafting a DIY collage or designing a digital album, these options will help you relive your special day in unique ways. Don't be afraid to mix and match ideas or put your own spin on them. With a little creativity and effort, you'll create a one-of-a-kind display that captures the essence of your love story for years to come.

I’m Sarah, the creator and writer behind this site. I’m a wife and a mother of two wonderful kids who keep me on my toes and inspire me daily. My passion lies in creating and organizing memorable events and group activities, where people can come together and make lasting memories.

Leave a Reply