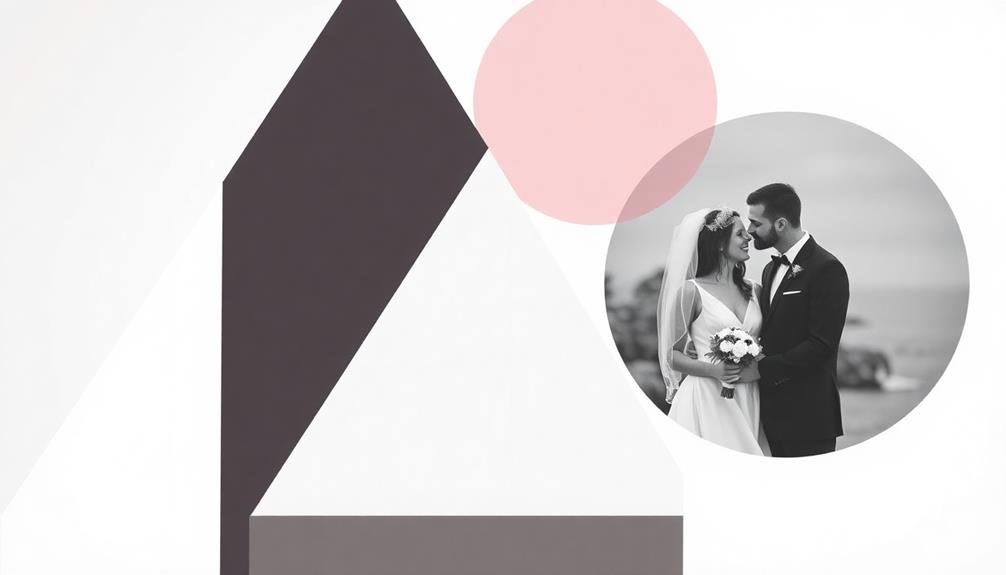
Create a stunning wedding album with affordable canvas print ideas that'll make your memories pop. Try a gallery wall collage mixing candid and formal shots, or go bold with an oversized statement piece. For a cohesive look, opt for a triptych display telling your love story. Black and white prints add timeless elegance, while a mixed media showcase incorporates unique textures. Arrange prints on floating shelves or along your staircase for a personalized touch. Get creative with geometric compositions or embrace minimalism to highlight intimate moments. These budget-friendly options offer endless possibilities to showcase your special day in style.
Key Takeaways
- Create a DIY canvas print collage using smaller, affordable canvases arranged in a gallery wall style.
- Opt for a single oversized canvas print of your favorite wedding moment as a cost-effective statement piece.
- Use a triptych canvas display to tell your wedding story across three panels, reducing individual print costs.
- Design a budget-friendly canvas squares grid with uniform sizes to showcase multiple wedding highlights.
- Transform digital wedding photos into artistic black and white prints for an elegant, affordable canvas display.
Gallery Wall Collage
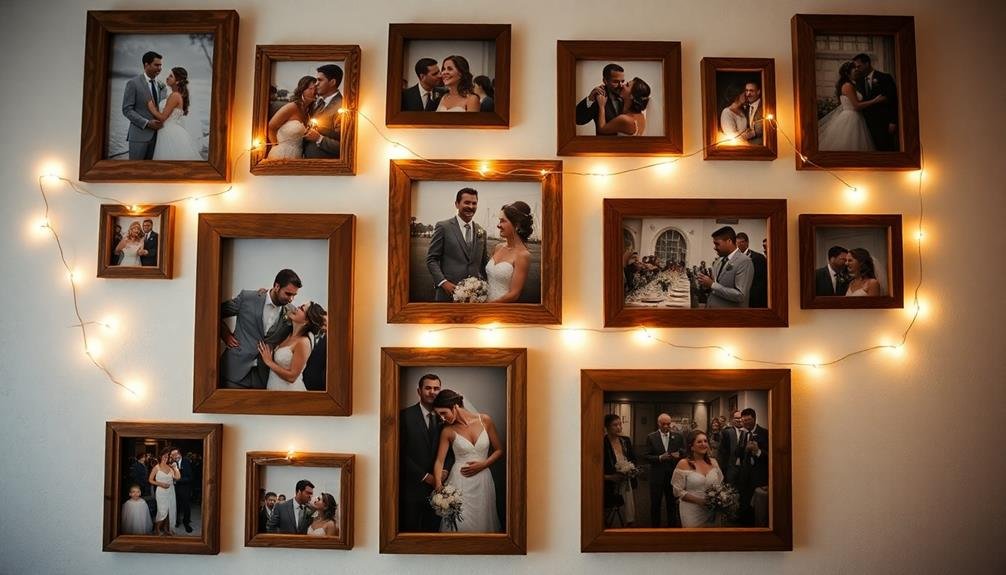
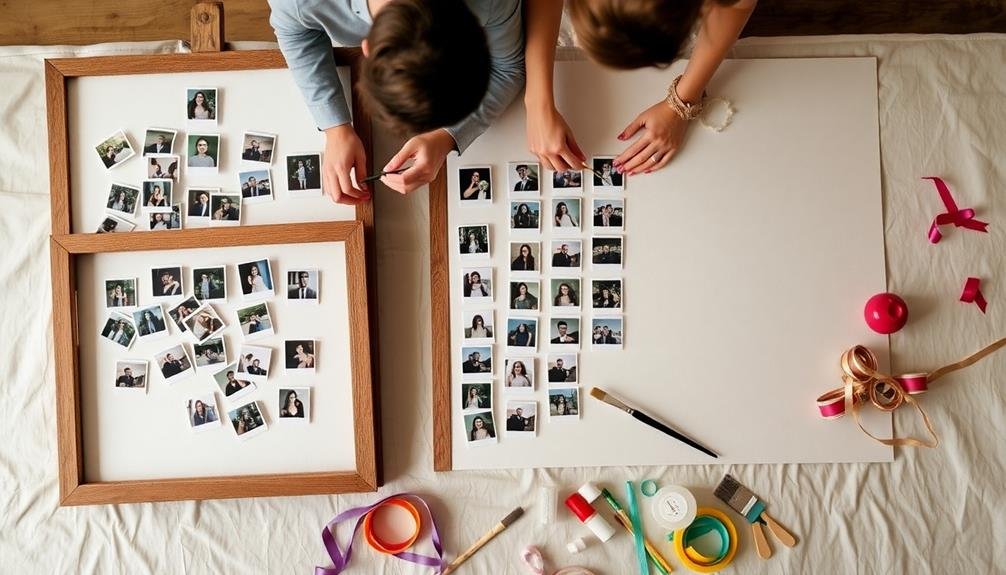
After the wedding, a gallery wall collage offers a stunning way to showcase your favorite moments. You'll create a alluring focal point in your home by arranging multiple canvas prints of various sizes and shapes. Select a mix of candid shots, formal portraits, and detail images to tell your wedding day story.
To start, choose a wall space and decide on the overall shape of your collage. You can opt for a symmetrical layout or an organic, free-form arrangement. Pick canvas prints in complementary sizes, such as 8×10, 11×14, and 16×20 inches. Consider including a larger centerpiece print surrounded by smaller ones.
When selecting photos, aim for a balance of color and black-and-white images. Include close-ups of your rings, bouquet, and other meaningful details alongside wider shots of the ceremony and reception. Don't forget to incorporate photos of your guests and family members.
To create visual interest, vary the orientation of your canvases. Mix portrait and landscape formats, and consider adding a few square prints. Before hanging, arrange the canvases on the floor to perfect your layout. Use a level and measuring tape to guarantee precise placement on the wall.
Oversized Statement Piece
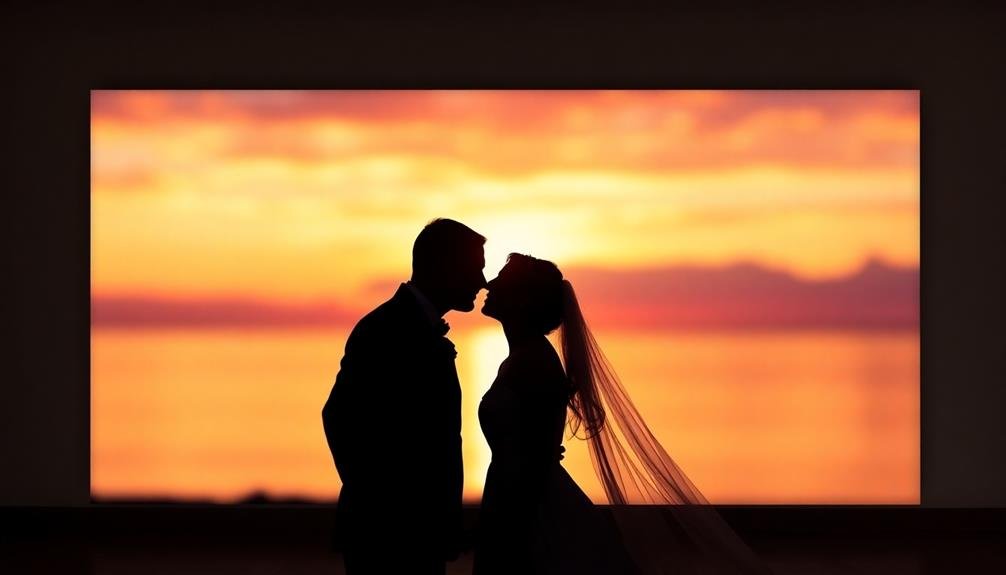
One breathtaking way to showcase your favorite wedding photo is through an oversized statement piece. This bold approach transforms a single, cherished image into a stunning focal point for your home. Choose a photo that captures the essence of your special day, whether it's a romantic portrait or a candid moment of joy.
To create your oversized canvas, select a high-resolution image and have it professionally printed on a large-scale canvas. Sizes can range from 3 feet to 6 feet or more, depending on your available wall space. Consider the room's layout and color scheme when deciding on the perfect spot for your statement piece.
For added impact, opt for a black and white or sepia-toned print, which can lend a timeless, elegant feel to any space. Alternatively, embrace vibrant colors to inject energy into your decor. To enhance the piece's prominence, install subtle lighting above or around the canvas.
Remember to balance the oversized canvas with your existing decor. Keep surrounding wall art minimal to avoid visual clutter and allow your wedding statement piece to truly shine as the room's centerpiece.
Triptych Canvas Display
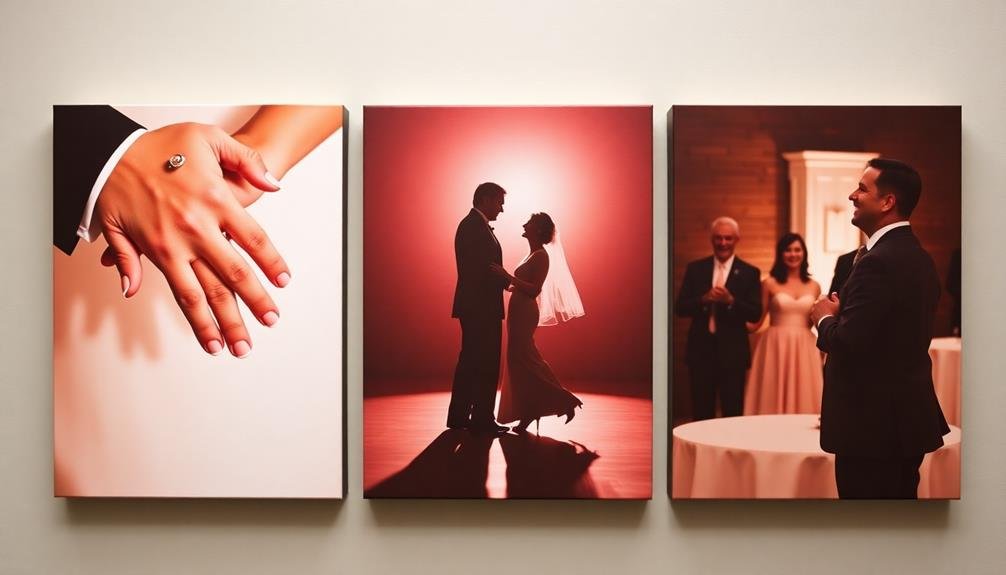
Creating a triptych canvas display offers a unique and sophisticated way to showcase your wedding memories. This three-panel arrangement allows you to tell a story or highlight different aspects of your special day. Choose three complementary images that flow well together, such as a sequence of events or varying perspectives of the same scene.
When selecting your photos, consider the following options:
| Idea | Description |
|---|---|
| Timeline | Prep, ceremony, reception |
| Emotions | Laughter, tears, joy |
| Details | Rings, dress, bouquet |
| Portraits | Bride, groom, couple |
To create a cohesive look, maintain a consistent color palette or editing style across all three panels. You can opt for equal-sized canvases or experiment with different sizes for added visual interest. For example, use a larger central panel flanked by two smaller ones.
When hanging your triptych, guarantee proper spacing between panels – typically 1-2 inches. This arrangement works well above a sofa, fireplace, or as a focal point in your bedroom. By displaying your wedding photos in this artistic format, you'll create a stunning conversation piece that celebrates your love story every day.
Black and White Elegance
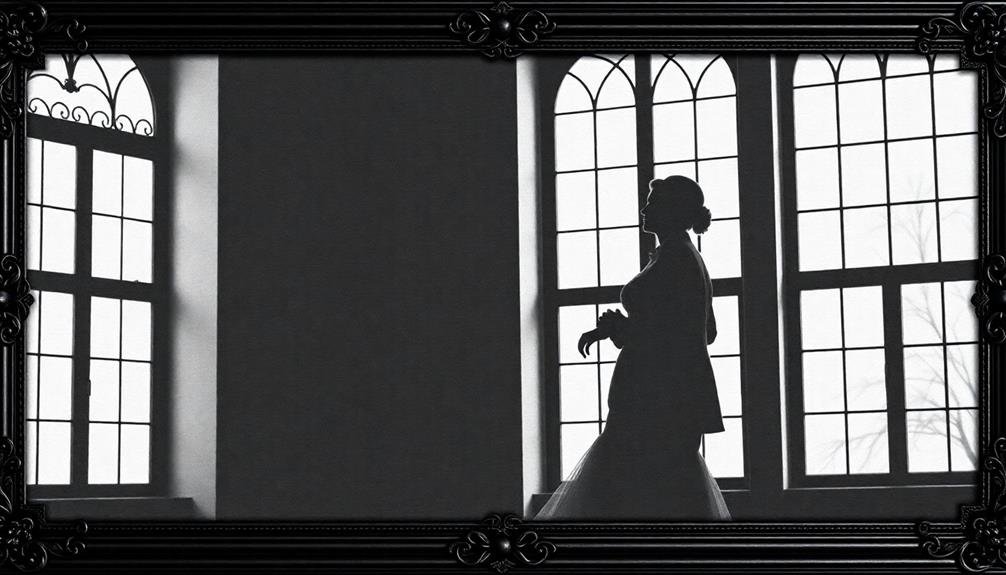
Black and white photography brings out the timeless elegance of your wedding day. By stripping away color, you'll emphasize the emotions, textures, and contrasts that make your wedding unique.
For a stunning canvas print, choose a powerful black and white image that captures a pivotal moment, like your first kiss or the exchange of rings.
Consider creating a gallery wall with multiple black and white prints in various sizes. Mix close-ups of details, such as your rings or bouquet, with wider shots of the venue and candid moments between guests. This approach tells a complete story of your day while maintaining a cohesive, sophisticated look.
To add visual interest, experiment with different finishes for your canvas prints. A high-gloss finish can make shadows and highlights pop, while a matte finish creates a softer, more romantic feel.
You can also play with borders, leaving a white edge around the image for a classic gallery look.
Don't forget to include some artistic shots in your selection. Silhouettes, reflections, or unconventional angles can make for striking black and white compositions that'll be conversation starters in your home.
Mixed Media Showcase
Elevate your wedding memories by exploring mixed media showcases that blend traditional photography with tactile elements.
You can create a unique display by combining printed photos with meaningful objects, textures, or digital prints.
This approach allows you to tell your love story in a multi-dimensional way, engaging viewers' senses beyond just sight.
Combining Photos and Objects
Mixed media showcases offer a unique way to display your wedding memories. By combining photos with physical objects from your special day, you'll create a truly one-of-a-kind album that tells your love story in a tangible way.
Start by selecting meaningful items from your wedding, such as pressed flowers from your bouquet, a piece of lace from your dress, or a fabric swatch from the groom's tie. Arrange these objects alongside your favorite photos on a canvas or in a shadow box. You can even incorporate handwritten vows, invitation snippets, or ticket stubs from your honeymoon.
Don't be afraid to experiment with textures and dimensions. Use raised lettering for important dates or quotes, or create a 3D effect by layering photos and objects. Consider adding small trinkets or charms that represent shared interests or milestones in your relationship.
To tie everything together, choose a cohesive color scheme that complements your wedding palette. Use complementary materials like burlap, twine, or ribbon to add visual interest and create a polished look.
With a little creativity, you'll craft a beautiful mixed media showcase that captures the essence of your special day.
Textures and Digital Prints
Taking your mixed media showcase to the next level involves exploring the interplay between textures and digital prints. You can create stunning visual effects by combining digital wedding photos with textured elements.
Try printing your favorite images on canvas or textured paper to add depth and character. Experiment with layering digital prints over various materials like burlap, lace, or even wood grain for a unique, rustic look.
Don't limit yourself to traditional photo paper. Consider printing on unconventional surfaces like metal, glass, or acrylic for a modern twist. You can also incorporate textured elements directly into your digital designs before printing. Add subtle patterns, brush strokes, or grainy filters to your images to enhance their tactile appeal.
For a truly immersive experience, combine textured prints with 3D elements. Attach fabric swatches, pressed flowers, or small mementos to your canvas prints.
You can even create a collage effect by mixing different-sized prints with various textures. Remember to balance the visual and tactile elements to avoid overwhelming the viewer. By thoughtfully combining textures and digital prints, you'll create a one-of-a-kind wedding album that's both visually striking and emotionally resonant.
Panoramic Timeline
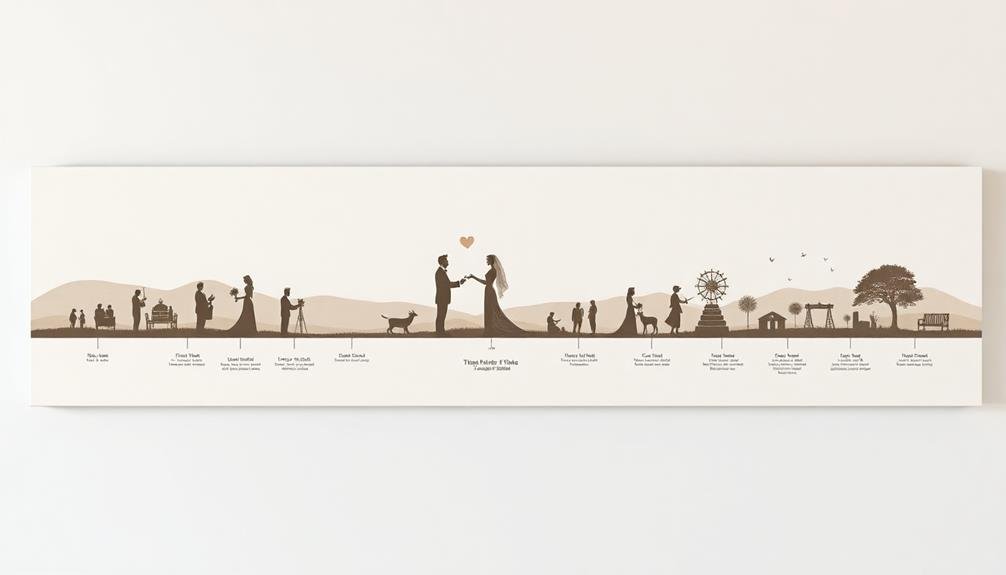
A panoramic timeline offers a unique way to showcase the entire wedding day from start to finish. You'll create a long, horizontal canvas that captures key moments chronologically.
Start by selecting 10-15 photos that represent different stages of your special day, from getting ready to the reception's end.
Arrange these images side by side, ensuring they flow seamlessly. You can add small time stamps or captions beneath each photo to highlight the progression. Consider using a consistent filter or color scheme across all images to maintain visual cohesion.
For added interest, vary the sizes of individual photos within the panorama. Place larger images for pivotal moments, like the first kiss or cake cutting, and smaller ones for connecting scenes. You can also incorporate graphic elements, such as a timeline or decorative borders, to enhance the overall design.
When printing, opt for a canvas size that's at least 36 inches wide to accommodate the panoramic format. This eye-catching piece will serve as a stunning visual narrative of your wedding day, perfect for displaying in your home or gifting to parents.
Seasonal Wedding Story
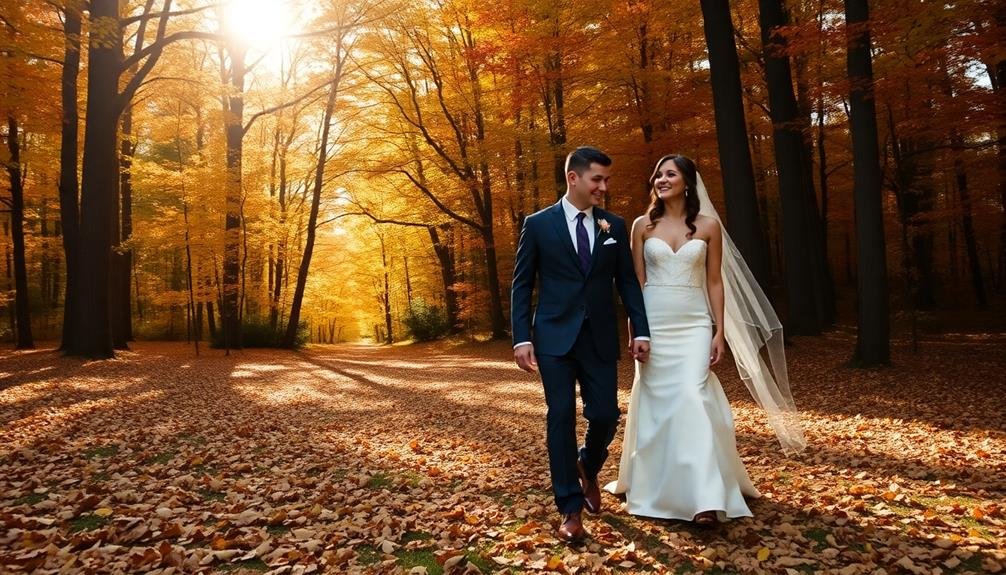
Embrace the unique charm of each season in your wedding photos and videos by capturing the distinctive color palettes that nature provides.
You'll want to incorporate themed props and decor that reflect the time of year, enhancing the seasonal atmosphere of your special day.
Don't forget to showcase the evolving natural backdrops, from spring blossoms to autumn foliage, which can serve as stunning settings for your wedding story.
Capturing Seasonal Color Palettes
Throughout the year, each season offers a unique color palette that can beautifully enhance your wedding story. To capture these seasonal hues in your photos and videos, you'll want to work closely with your photographer and videographer to highlight the natural colors around you.
In spring, focus on soft pastels and fresh greens. Incorporate blooming flowers and budding trees into your shots.
Summer weddings can showcase vibrant blues, sunny yellows, and lush greenery. Take advantage of golden hour lighting for warm, glowing images.
For fall, embrace rich reds, oranges, and yellows. Use fallen leaves as natural props and seek out areas with colorful foliage.
Winter weddings can feature crisp whites, deep greens, and icy blues. Capture the sparkle of snow or frost for added magic.
To emphasize seasonal colors in your canvas prints, choose complementary frames and backgrounds.
Consider creating a multi-panel display that showcases your wedding's color palette across different seasons.
You can also incorporate seasonal elements into your album design, using color-coordinated layouts and themed page embellishments to tie everything together.
Themed Props and Decor
Seasonal props and décor can dramatically enhance your wedding photos and videos, creating a cohesive visual story that reflects the time of year. For spring weddings, incorporate pastel-colored parasols, floral crowns, or butterfly-themed accessories.
Summer nuptials can feature beach balls, sunglasses, or tropical fruit centerpieces. In autumn, use pumpkins, colorful leaves, or rustic lanterns to add warmth to your shots. Winter weddings benefit from faux fur wraps, pine cones, or twinkling fairy lights.
Don't forget to match your props to your overall theme. If you're having a vintage-inspired wedding, include antique books, old-fashioned cameras, or retro suitcases. For a rustic celebration, use wooden crates, mason jars, or burlap accents.
Bohemian weddings can incorporate dreamcatchers, macramé hangings, or feather accessories. Remember to keep your props subtle and meaningful. They should enhance your photos without overshadowing the main subjects – you and your partner.
Discuss your ideas with your photographer and videographer beforehand to guarantee they can incorporate these elements seamlessly into their shots, creating a unique and personalized wedding album that truly captures the essence of your special day.
Nature-Inspired Backdrops Evolving
Nature's canvas provides an ever-changing backdrop for your wedding photos and videos throughout the year. As seasons shift, you'll find unique opportunities to capture your love story against nature's evolving palette.
In spring, embrace the fresh bloom of flowers and vibrant green foliage. Frame your shots with cherry blossoms or tulip fields for a romantic, renewal-themed aesthetic.
Summer offers lush landscapes and golden sunsets. Utilize beach scenes, wildflower meadows, or sun-dappled forests to create warm, carefree memories.
As autumn arrives, incorporate the rich hues of changing leaves. Capture intimate moments among rustic barn settings or pumpkin patches for a cozy, harvest-inspired album.
Winter transforms landscapes into serene wonderlands. Embrace snow-covered branches, frost-tipped pine trees, or ice-covered lakes for a magical, ethereal backdrop.
Don't forget to contemplate time of day; golden hour lighting can enhance any seasonal setting.
To showcase nature's evolution in your wedding story, contemplate a series of engagement photos taken across different seasons. This approach allows you to document your journey to the altar while highlighting nature's ever-changing beauty, creating a truly unique and personalized wedding album.
Rustic Wooden Frame Accents
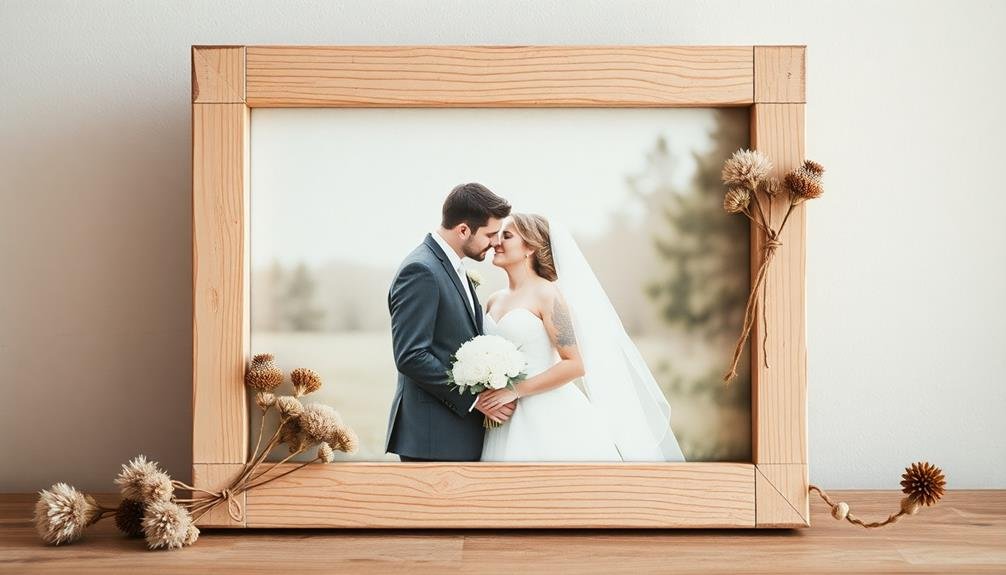
Why not add a touch of rustic charm to your wedding photography with wooden frame accents? These versatile and budget-friendly elements can transform your photos into unique, eye-catching pieces of art.
You'll find that wooden frames complement various wedding themes, from rustic barn celebrations to bohemian outdoor ceremonies.
To incorporate rustic wooden frame accents into your wedding photography, consider these ideas:
- Create a photo booth backdrop using reclaimed wooden pallets, adorned with fairy lights and floral arrangements.
- Use vintage wooden picture frames as props for guests to pose with during the reception.
- Craft a large wooden frame to hang from a tree, creating a picturesque spot for couple and group shots.
- Design a gallery wall using mismatched wooden frames to display your favorite wedding moments.
When printing your photos on canvas, choose frames that match the rustic aesthetic. Opt for distressed wood finishes or natural, unfinished wood for an authentic look.
You can even DIY your frames using reclaimed wood or driftwood for a truly unique touch. Remember to balance the rustic elements with your overall wedding style to create a cohesive and memorable album.
Canvas Squares Grid
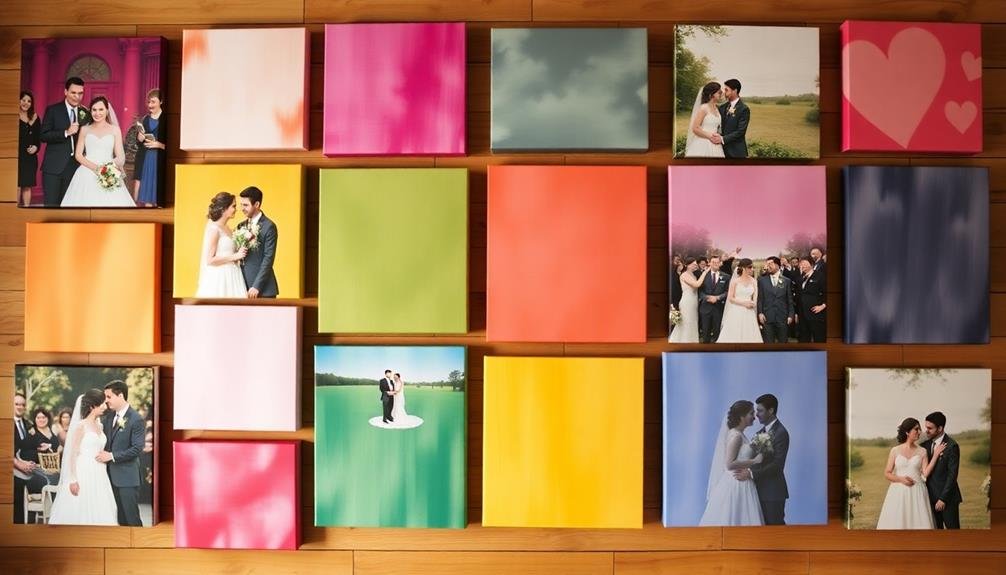
Create a stunning visual narrative of your wedding day with a canvas squares grid.
You'll arrange your most cherished moments in a customizable layout, selecting from various grid patterns to suit your style and space.
Arranging Memorable Moments
In light of the growing trend of displaying wedding photos as canvas squares, arranging memorable moments in a grid format has become increasingly popular. This approach allows you to create a visually striking and cohesive display of your special day.
When arranging your canvas squares, consider the following tips to maximize impact:
- Group related images: Cluster photos from specific parts of your wedding, such as the ceremony, reception, or first dance.
- Create a color story: Arrange images with complementary colors or similar tones next to each other for a harmonious look.
- Mix up orientations: Alternate between portrait and landscape orientations to add visual interest and break up the grid.
- Balance close-ups and wide shots: Combine intimate portraits with broader scenes to provide a thorough view of your wedding day.
As you arrange your canvas squares, don't be afraid to experiment with different layouts. You can create symmetrical patterns or opt for a more organic, freeform arrangement.
Remember to leave some space between each canvas to allow the individual images to breathe and stand out. By thoughtfully arranging your memorable moments, you'll create a stunning visual narrative of your wedding day that you'll treasure for years to come.
Customizing Grid Layouts
When it comes to customizing grid layouts for your canvas squares, you'll want to think outside the box. Instead of a traditional symmetrical grid, consider asymmetrical arrangements that create visual interest.
Mix up square sizes, using larger canvases for key moments and smaller ones for details or candid shots. Try a diagonal layout, starting with a large square in one corner and cascading smaller squares across the wall. Or create a heart shape with your squares, perfect for showcasing romantic moments.
You can also experiment with color-blocking, grouping photos with similar hues together for a cohesive look. Don't forget about negative space – leaving gaps between canvases can make your layout more dynamic. Use these spaces to add wedding date decals or love quotes.
For a timeline effect, arrange your squares chronologically, from getting ready shots to the last dance. Consider incorporating non-photo elements, like pressed flowers from your bouquet or snippets of your vows, printed on canvas squares.
This adds texture and personalizes your grid even further. Remember, your layout should tell your unique love story, so don't be afraid to break traditional grid rules and create something truly one-of-a-kind.
Balancing Colors Effectively
Striking the right color balance in your canvas squares grid can elevate your wedding photo display from good to stunning. When arranging your canvas prints, consider the overall color scheme and how each image interacts with its neighbors.
You'll want to create a harmonious blend that guides the viewer's eye across the entire display.
To achieve effective color balance in your canvas squares grid:
- Alternate between color and black-and-white prints to create visual interest and prevent overwhelming viewers with too much color.
- Group similar color tones together, such as warm oranges and reds in one section, cool blues and greens in another.
- Use neutral-toned images as buffers between vibrant colors to give the eye a place to rest.
- Incorporate pops of your wedding's accent colors throughout the grid to tie the display to your overall theme.
Don't be afraid to experiment with different arrangements before finalizing your layout.
Step back and view the grid as a whole, making adjustments as needed.
Floating Shelves Arrangement
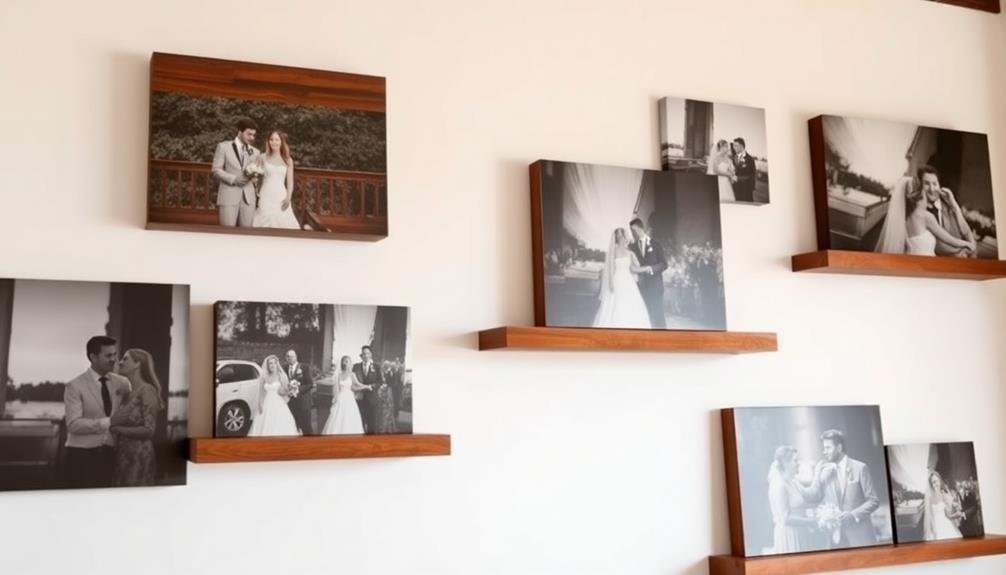
Despite the topic, floating shelves don't actually have much to do with wedding photography and videography. However, they're an excellent way to display your wedding photos and canvas prints after the big day.
You'll find that floating shelves offer a sleek, modern look that can complement various home decor styles.
When arranging your wedding photos on floating shelves, start by choosing shelves of different lengths to create visual interest. Mix and match frame sizes and orientations for a dynamic display. You can group photos by theme, color, or chronology to tell your wedding story.
Don't forget to incorporate other decorative elements alongside your photos. Small potted plants, candles, or meaningful trinkets can add depth to your arrangement. Consider using a larger statement piece, like a canvas print of your favorite wedding photo, as an anchor for your display.
Layer your items by placing some photos towards the back of the shelf and others closer to the front. This technique adds dimension and creates a more curated look.
Remember to leave some negative space to prevent the shelves from appearing cluttered.
Staircase Photo Journey
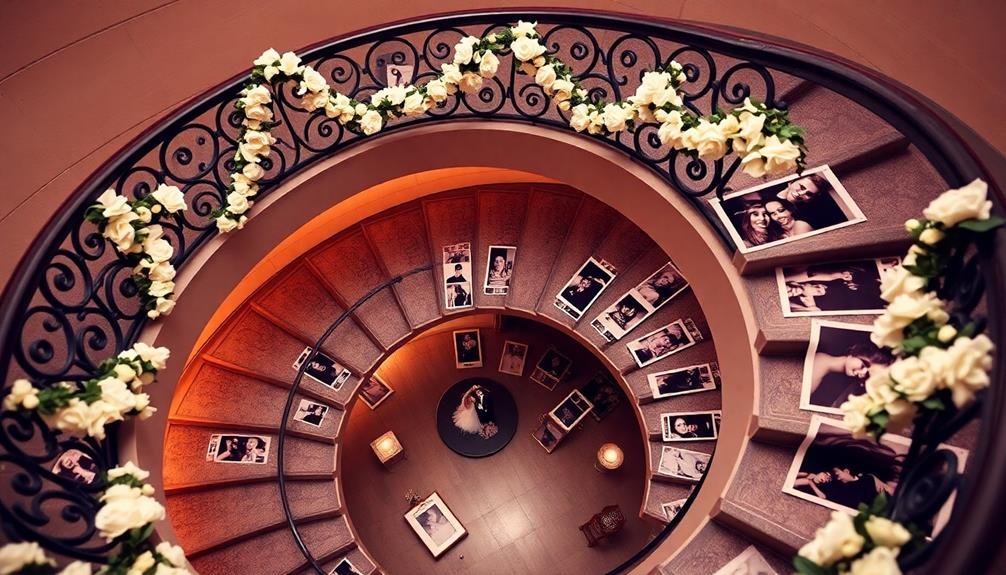
Creating a staircase photo journey offers a unique and enchanting way to showcase your wedding memories. This budget-friendly idea transforms your staircase into a visual timeline of your relationship and wedding day. Start by selecting a variety of photos that represent significant moments, from your first date to the wedding reception.
To create your staircase photo journey:
- Choose a consistent frame style and size for all photos.
- Arrange the photos chronologically, starting from the bottom step.
- Use removable adhesive strips to hang frames, avoiding damage to walls.
- Add small captions or dates beneath each photo for context.
As you ascend the stairs, you'll relive your love story step by step. Consider incorporating both color and black-and-white images for visual interest.
Don't forget to include candid shots alongside posed photos to capture the genuine emotions of each moment. For a cohesive look, maintain a consistent editing style across all images.
You can also intersperse small decorative elements, such as fairy lights or greenery, to enhance the display. This creative and personal touch won't only impress your guests but also serve as a daily reminder of your beautiful journey together.
Geometric Shape Composition
Geometric shape composition offers a modern and visually striking approach to wedding photography. You can use architectural elements, natural formations, or even props to create eye-catching images that stand out in your wedding album.
Look for triangles, circles, squares, and other shapes in your surroundings to frame your shots. Try positioning the couple within a triangular doorway or archway, creating a sense of balance and symmetry. Capture them through circular windows or use overhead shots of spiral staircases for a unique perspective.
Incorporate repeating patterns, like columns or railings, to add depth and visual interest to your photos. Don't be afraid to get creative with your compositions. Use reflections in windows or mirrors to create abstract geometric shapes around the couple.
Experiment with negative space by positioning the newlyweds in one corner of a large, empty room with interesting architectural lines. You can even use props like umbrellas or balloons to introduce circular elements into your shots.
Minimalist Moments Collection
A minimalist approach to wedding photography can produce powerful, timeless images that capture the essence of the day. By focusing on simplicity and clean compositions, you'll create a collection of photos that stand the test of time. Embrace negative space and let your subjects shine without distracting backgrounds.
To achieve a minimalist look in your wedding photos, consider these techniques:
- Use a shallow depth of field to isolate your subjects.
- Incorporate white space to draw attention to key elements.
- Simplify your color palette, sticking to neutral tones.
- Focus on capturing genuine emotions and intimate moments.
When printing your minimalist wedding photos on canvas, opt for larger sizes to maximize the impact of negative space. Choose simple, sleek frames or go frameless for a modern look.
Consider creating a gallery wall with a mix of sizes, maintaining a cohesive theme throughout.
Don't forget to include close-up shots of details like rings, flowers, or place settings. These images work well in a minimalist collection, allowing you to showcase the finer points of your special day without overwhelming the viewer.
Frequently Asked Questions
How Can I Protect My Canvas Prints From Fading Over Time?
To protect your canvas prints from fading, you'll want to use UV-resistant varnish, hang them away from direct sunlight, and control humidity. You can also opt for high-quality pigment inks and consider framing them behind UV-protective glass.
What's the Best Lighting to Showcase Canvas Prints in My Home?
You'll want to use soft, indirect lighting to showcase your canvas prints. Consider track lights or picture lights aimed at the artwork. Avoid harsh direct sunlight, which can fade colors. Dimmable LED lights offer flexibility for different moods and times of day.
Can I Create Canvas Prints From Digital-Only Wedding Photos or Videos?
Yes, you can create canvas prints from digital photos or video stills. You'll need high-resolution images for the best quality. Simply upload your digital files to a canvas printing service, choose your size, and they'll produce your custom print.
Are There Eco-Friendly Options for Canvas Printing Materials?
Yes, you'll find eco-friendly options for canvas printing. Look for companies that use recycled materials, water-based inks, and sustainable production methods. You can also opt for organic cotton canvases or bamboo-based alternatives to reduce environmental impact.
How Do I Clean and Maintain Canvas Prints Without Damaging Them?
To clean your canvas prints, you'll want to use a soft, dry cloth to gently dust them. Don't use water or cleaning solutions. For deeper cleaning, you can use a soft brush attachment on your vacuum cleaner.
In Summary
You've explored a range of creative and affordable options to showcase your wedding memories. Whether you opt for a gallery wall, an oversized statement piece, or a minimalist collection, these canvas print ideas will transform your photos and videos into stunning works of art. Don't be afraid to mix and match styles or experiment with different layouts. Your unique wedding album will be a treasured keepsake that you'll love displaying in your home for years to come.

I’m Sarah, the creator and writer behind this site. I’m a wife and a mother of two wonderful kids who keep me on my toes and inspire me daily. My passion lies in creating and organizing memorable events and group activities, where people can come together and make lasting memories.

Leave a Reply