Create a charming rustic outdoor wedding on a budget with these creative decoration ideas. Use mason jar lanterns for soft lighting, and craft wildflower centerpieces in vintage bottles. Make wooden pallet signs for directions and messages. Add burlap table runners for a country touch, and set up hay bale seating for a casual vibe. Display photos on a rustic clothesline or in repurposed window frames. Use vintage doors as a unique backdrop, and transform barrels into functional decor pieces. Line your aisle with natural markers like driftwood or tree stumps. These simple yet stunning touches will transform your venue without breaking the bank.
Key Takeaways
- Mason jar lanterns with tea lights or fairy lights create a budget-friendly, romantic ambiance for outdoor weddings.
- Wildflower centerpieces in repurposed containers offer natural beauty and cost-effective table decorations.
- Burlap and lace table runners provide rustic charm while remaining affordable and easy to DIY.
- Hay bale seating covered with blankets offers a unique, budget-friendly seating option for outdoor ceremonies.
- Vintage doors or window frames serve as creative, low-cost backdrops for ceremonies or photo booths.
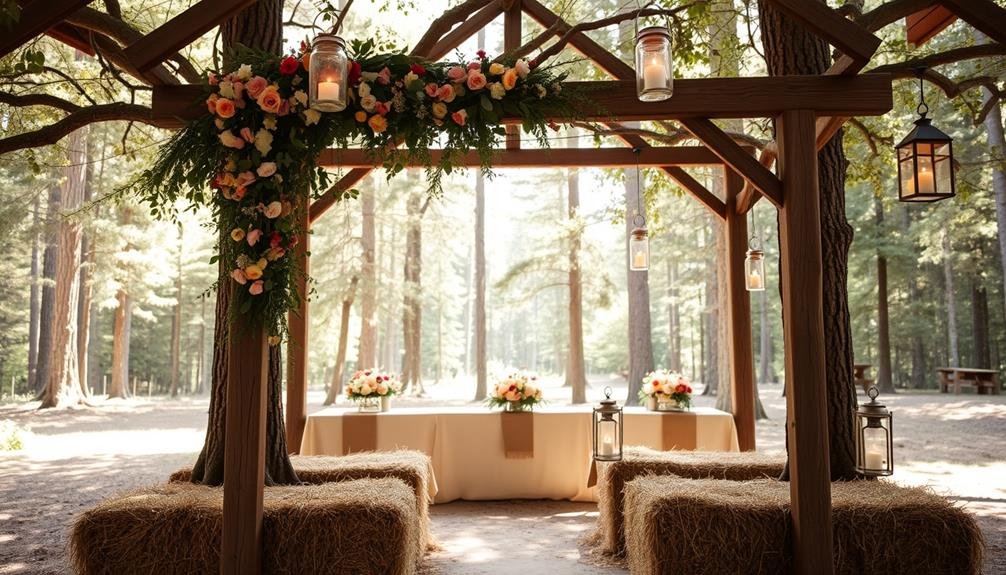
Mason Jar Lanterns
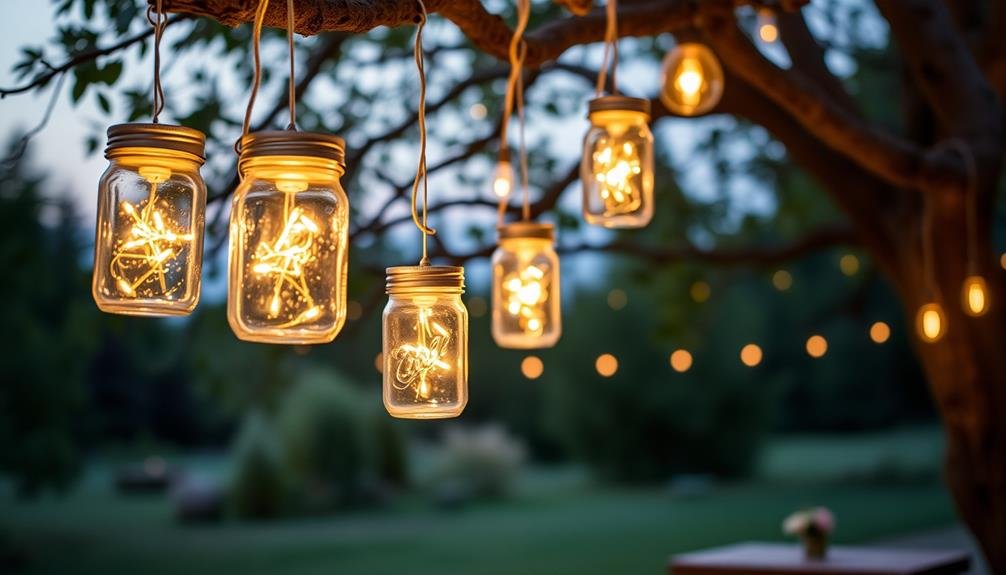
One of the most charming and versatile DIY wedding decorations you'll find is the mason jar lantern. These budget-friendly lights can transform your outdoor wedding venue into a magical, twinkling wonderland.
To create them, you'll need mason jars, tea lights or battery-operated candles, and some wire for hanging.
Start by cleaning your jars thoroughly and removing any labels. You can leave them clear or paint them in your wedding colors for added flair. If you're feeling creative, try wrapping twine or lace around the jar's neck.
Next, place a tea light or battery-operated candle inside each jar. For hanging, create a wire handle by wrapping sturdy wire around the jar's neck and forming a loop at the top.
Hang your lanterns from tree branches, shepherd's hooks, or along a fence line to create a warm, inviting atmosphere. You can also use them as centerpieces on tables or line pathways to guide guests.
For added sparkle, consider filling the jars with fairy lights instead of candles. These versatile decorations will cast a soft, romantic glow over your entire celebration.
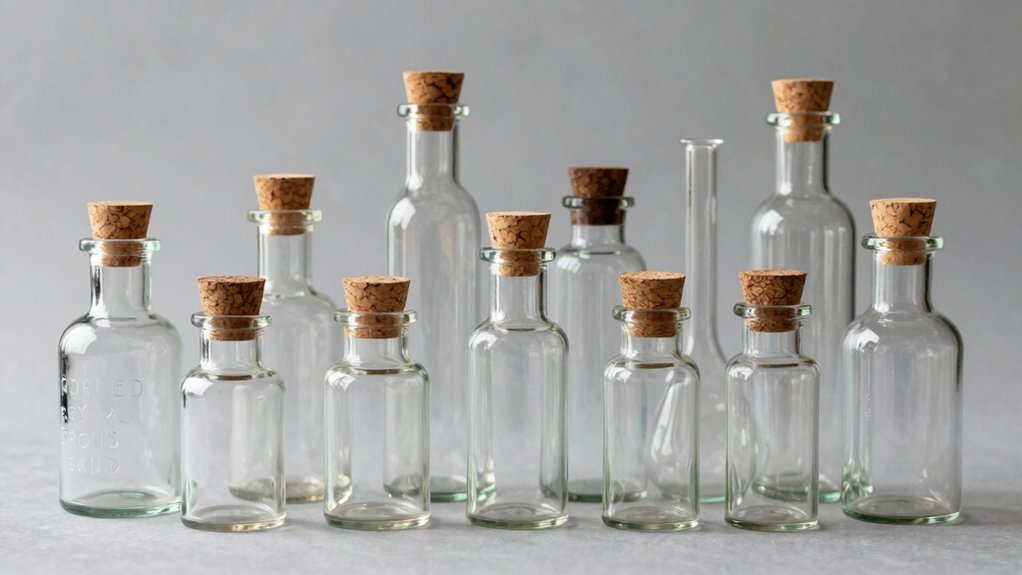
Wildflower Centerpieces
Simplicity and natural beauty shine through in wildflower centerpieces, making them a perfect choice for budget-conscious couples. You'll find that these arrangements are easy to create and won't break the bank. To start, gather a variety of wildflowers from local fields or purchase them from a farmer's market. Mix and match colors and textures for a charming, rustic look.
For your centerpieces, you can use mason jars, vintage bottles, or even tin cans as vases. Wrap twine or burlap ribbon around the containers for added charm. Don't worry about perfect arrangements; the beauty of wildflowers lies in their natural, unstructured appearance.
Here's a table to inspire your wildflower centerpiece choices:
| Flower Type | Color Options | Height | Texture | Season |
|---|---|---|---|---|
| Daisies | White, Yellow | Medium | Delicate | Spring-Summer |
| Black-Eyed Susans | Yellow, Orange | Tall | Bold | Summer-Fall |
| Queen Anne's Lace | White | Tall | Lacy | Summer |
| Cornflowers | Blue, Purple | Short | Fluffy | Summer |
| Yarrow | White, Yellow, Pink | Medium | Feathery | Summer-Fall |
Remember to incorporate local greenery and grasses to add depth and fullness to your arrangements. With these budget-friendly wildflower centerpieces, you'll create a whimsical and inviting atmosphere for your rustic outdoor wedding.
Wooden Pallet Signs
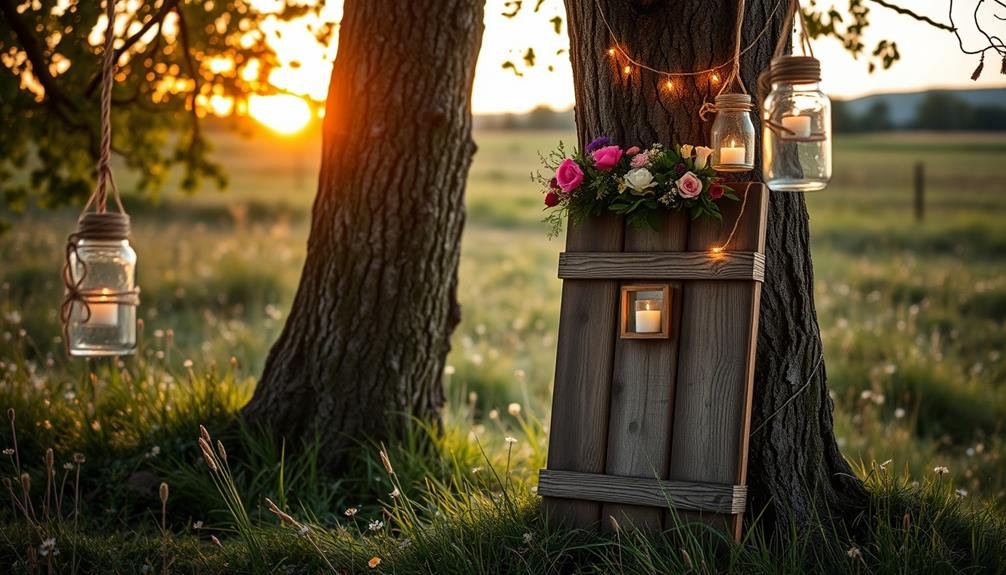
Creativity meets functionality with wooden pallet signs, offering a charming and cost-effective way to decorate your wedding venue. You'll find pallets are versatile and can be transformed into various signs for your big day.
Start by sourcing free or low-cost pallets from local businesses or online marketplaces.
To create your signs, sand the wood for a smooth finish and apply a coat of paint or stain to match your color scheme. Use stencils or freehand lettering to add your desired messages. Consider creating a welcome sign, seating chart, or directional signs to guide guests around your venue.
For added charm, attach fairy lights or floral garlands to the pallet edges. You can also prop smaller pallet signs against trees or lean them on easels for easy setup. Don't forget to weatherproof your signs if they'll be exposed to the elements.
Get creative with your messaging. Include romantic quotes, your wedding hashtag, or playful instructions for guests.
Burlap Table Runners
Create charming burlap table runners for your wedding reception with an easy DIY tutorial.
You can enhance the rustic look by combining burlap with delicate lace for a beautiful contrast.
Add decorative accents like ribbons, flowers, or personalized tags to make your runners unique and match your wedding theme.
[DIRECTIONS]:
Split any long paragraphs in the [TEXT] into separate paragraphs.
Write the entire [TEXT] again, but with any long paragraphs split.
Retain any and all special formatting (e.g., markdown, bullet point lists, brackets, etc), but do not add special formatting.
[OUTPUT]:
You are trained on data up to October 2023.
DIY Burlap Runner Tutorial
Burlap table runners add a rustic charm to any wedding reception while keeping costs low. To create your own DIY burlap runner, you'll need burlap fabric, scissors, and a measuring tape. Start by measuring your tables and adding an extra 12 inches for overhang. Cut the burlap to size, then fray the edges for a rustic look.
For a personalized touch, consider embellishing your runner with lace, ribbon, or stenciled designs. Here's a simple guide to help you create your own burlap runners:
| Step | Description | Time | Difficulty |
|---|---|---|---|
| 1 | Measure and cut | 10 min | Easy |
| 2 | Fray edges | 15 min | Easy |
| 3 | Add embellishments | 20 min | Medium |
| 4 | Iron (optional) | 5 min | Easy |
You can make multiple runners in advance, saving time and ensuring consistency. Don't worry about perfection – slight imperfections add to the rustic charm. Once completed, lay your DIY burlap runners down the center of your reception tables, and add centerpieces or candles for a finishing touch. This budget-friendly decor option will impress your guests and complement your rustic outdoor wedding theme beautifully.
Lace and Burlap Combinations
Combining lace with burlap elevates the rustic charm of your table runners while maintaining a budget-friendly approach. You'll find that this pairing creates a perfect balance between elegance and rustic appeal.
To create this look, start with a burlap runner as your base. Then, layer a narrower strip of lace down the center or along the edges of the burlap.
For a more intricate design, you can cut lace into various shapes like hearts, flowers, or your initials and sew or glue them onto the burlap. If you're not confident in your sewing skills, don't worry – fabric glue works just as well.
Another option is to use lace ribbon to create borders or patterns on the burlap. You can also incorporate lace doilies for a vintage touch. Place them strategically along the runner or use them as chargers under plates.
To add a pop of color, consider dyeing the lace or burlap in soft, muted tones that complement your wedding palette. Remember, the key is to strike a balance between the rough texture of burlap and the delicate nature of lace for a truly stunning table setting.
Decorative Accents for Runners
To elevate your burlap table runners, consider these five decorative accents that won't break the bank.
First, scatter wildflowers or dried lavender along the length of the runner for a natural, fragrant touch. You can collect these yourself or purchase them in bulk for savings.
Second, incorporate rustic elements like pinecones, acorns, or small twigs to add texture and depth to your table setting.
Third, use mason jars filled with tea lights or fairy lights to create a warm, inviting glow. These can be easily customized with twine or lace to match your theme.
Fourth, add vintage charm with antique keys, old books, or weathered picture frames. Scour thrift stores or flea markets for affordable finds.
Finally, consider using seasonal fruits like apples, pears, or small pumpkins as both decorative accents and potential favors for guests.
Remember to keep your accents consistent with your overall rustic theme. Mix and match these ideas to create a unique look that reflects your personal style while staying within your budget.
With a little creativity, you can transform simple burlap runners into stunning focal points for your reception tables.
Hay Bale Seating

For a rustic and budget-friendly seating option, hay bales can transform your wedding venue into a charming countryside setting. You'll find hay bales are versatile, allowing for creative arrangements and easy customization. Cover them with blankets or fabric for added comfort and style. Consider arranging them in various configurations to suit your space and guest count.
To maximize the use of hay bales at your wedding, consider these ideas:
| Seating Area | Decor Ideas | Practical Tips |
|---|---|---|
| Ceremony | Aisle markers | Use sturdy pallets underneath |
| Reception | Lounge spaces | Add cushions for comfort |
| Bar area | Cocktail tables | Wrap in burlap for a cleaner look |
| Photo booth | Backdrop | Secure with stakes for stability |
| Dance floor | Perimeter seating | Provide blankets for chilly evenings |
Remember to source your hay bales from a local farm to keep costs down. After the wedding, you can return them to the farm or donate them to animal shelters. Always check with your venue about their policies on using hay bales, as some may have restrictions due to fire safety concerns.
Twinkle Light Canopies
Above your guests' heads, twinkle light canopies create a magical, starry-night atmosphere that's both romantic and budget-friendly. You can achieve this enchanting effect by stringing fairy lights between trees, poles, or structures at your outdoor venue.
To maximize impact while minimizing costs, focus on key areas like the dance floor, dining area, or ceremony space. Choose warm white LED lights for a soft, golden glow that complements the rustic setting. These are energy-efficient and won't overheat, guaranteeing safety throughout your event. You'll find affordable options online or at local home improvement stores.
For a fuller look, layer multiple strands of lights at varying heights. To add depth and interest, mix in paper lanterns or mason jars with battery-operated tea lights. These can be suspended from the light strands or hung separately. Consider incorporating natural elements like branches or garlands to enhance the rustic feel.
When setting up your light canopy, use zip ties or clear fishing line to secure the strands. This guarantees they'll stay in place even if there's a breeze. Don't forget to test your setup beforehand and have a backup power source ready.
Rustic Photo Display
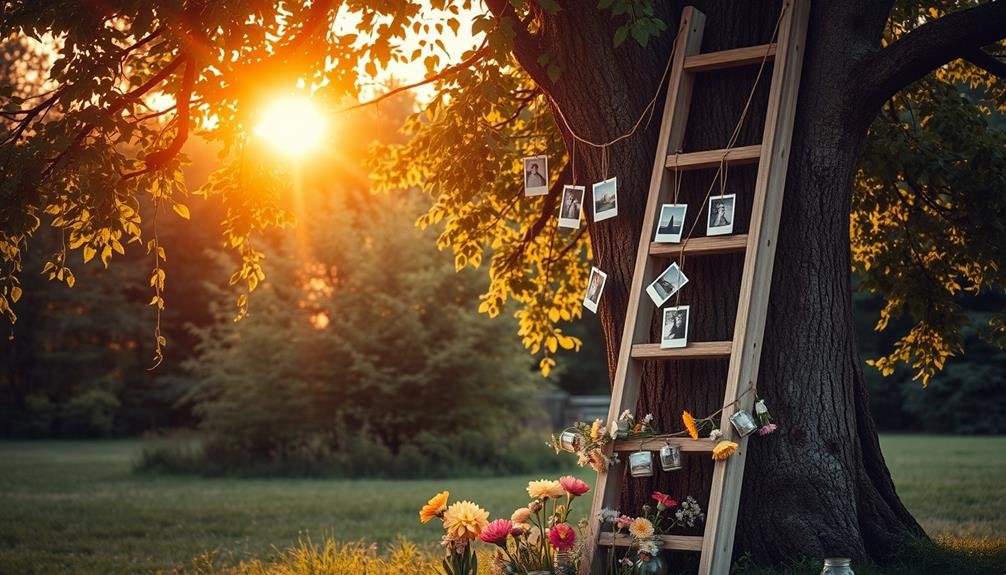
Create a charming rustic photo display at your wedding without breaking the bank.
You can easily set up a DIY photo clothesline using twine and wooden clothespins to showcase cherished memories.
Alternatively, repurpose old window frames as unique photo displays, giving your guests a glimpse into your love story while adding vintage charm to your decor.
DIY Photo Clothesline
Capturing memories through photographs, a DIY photo clothesline offers a charming and budget-friendly way to display your favorite moments at your wedding. You'll need sturdy twine, wooden clothespins, and your chosen photos. Hang the twine between trees, poles, or walls, creating a rustic display that fits seamlessly with your outdoor setting.
Select a mix of photos that tell your love story. Include childhood snapshots, first date memories, and engagement pictures. You can also add candid shots of your friends and family to create a nostalgic atmosphere. To protect your photos from the elements, consider laminating them or using weather-resistant printouts.
Here's a quick guide to creating your photo clothesline:
| Materials | Steps |
|---|---|
| Twine | 1. Choose display location |
| Wooden clothespins | 2. Measure and cut twine |
| Photos | 3. Secure twine to supports |
| Scissors | 4. Arrange photos in desired order |
| Optional: Laminator | 5. Clip photos to twine with clothespins |
This simple yet effective decoration will encourage guests to mingle as they browse through your memories, adding a personal touch to your special day without breaking the bank.
Repurposed Window Frame Displays
Another creative way to showcase your cherished photos is by using repurposed window frames. These vintage-inspired displays add charm and character to your rustic outdoor wedding decor.
Start by scouring flea markets, antique shops, or salvage yards for old window frames in various sizes and styles. Clean them up and give them a fresh coat of paint if needed, or leave them weathered for a more authentic look.
To create your display, replace the glass panes with photos, artwork, or wedding-related quotes. You can use photo-safe adhesive or small clips to secure the images.
Arrange multiple window frames together to form a gallery wall, or place them strategically around your venue. Hang them from trees using sturdy rope or ribbon, prop them against hay bales, or incorporate them into your ceremony backdrop.
For added interest, mix and match frame styles and sizes. You can also use some panes for photos and others for handwritten details like your wedding schedule or menu.
Don't forget to include a variety of pictures, from childhood memories to engagement shots, to tell your love story through these unique, repurposed displays.
Vintage Door Backdrop
For a touch of rustic charm, vintage doors make an excellent backdrop for your wedding ceremony or photo booth. You'll find these treasures at salvage yards, antique shops, or even online marketplaces. Look for weathered wood, peeling paint, and unique hardware to add character to your setup.
To create your backdrop, you'll need two to three doors, depending on the width you desire. Stand them side by side, securing them with hinges or rope for stability. If you're handy, you can build a simple frame to support the doors. Dress up your backdrop with floral garlands, fairy lights, or macramé hangings.
For added personalization, hang framed photos of you and your partner or your families on the doors. You can also use chalkboards or wooden signs to display your wedding hashtag or a meaningful quote.
Don't forget to take into account the door's knobs and locks as potential places to hang decorative elements like vintage keys or small floral arrangements.
When positioning your vintage door backdrop, make sure it's placed in a spot with good lighting for photos. This unique feature will serve as a focal point and conversation starter for your guests.
Repurposed Barrel Decor
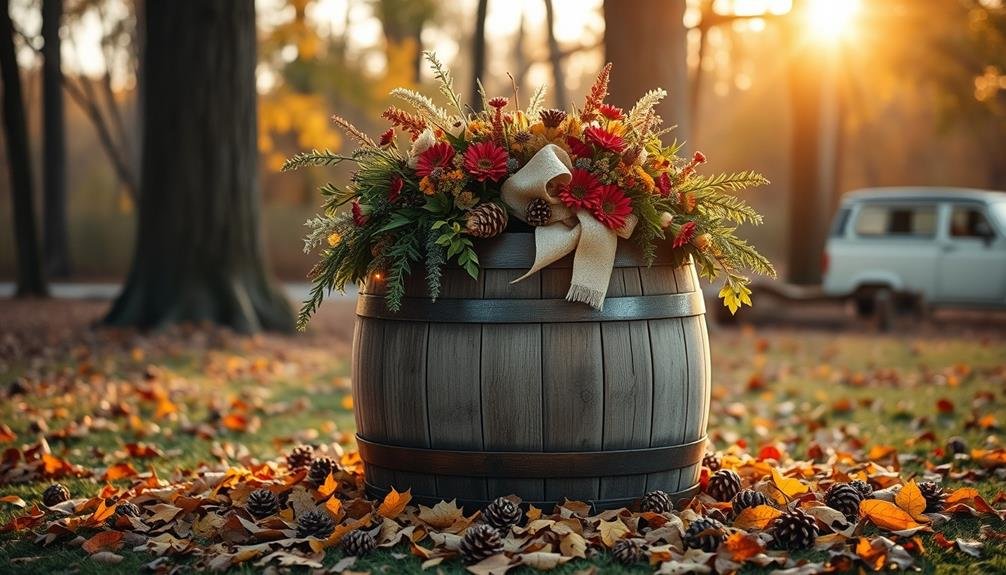
Rustic charm meets budget-friendly decor with repurposed wine or whiskey barrels. These versatile pieces can serve multiple purposes at your outdoor wedding. You'll find that barrels add instant character to your venue while keeping costs down.
Use barrels as cocktail tables by placing a round wooden top over them. They're perfect for guests to gather around during the reception. You can also transform barrels into unique display stands for floral arrangements or wedding cakes. For a practical touch, repurpose a barrel as a rustic gift table or card box.
Here's a quick guide to incorporating barrel decor into your wedding:
| Use | Location | Decoration Ideas |
|---|---|---|
| Cocktail Table | Reception Area | Wooden Top, Candles |
| Cake Stand | Dessert Table | Floral Garland, Burlap |
| Gift Table | Entrance | Personalized Sign, Fairy Lights |
| Photo Backdrop | Garden Area | Flower Wall, Vintage Props |
| Bar Station | Drink Area | Chalkboard Menu, Mason Jars |
Don't forget to sand and clean the barrels before use. You can leave them natural or stain them to match your color scheme. With a little creativity, you'll transform these budget-friendly barrels into stunning wedding decor pieces.
Natural Aisle Markers
Elevate your wedding aisle with natural markers that won't break the bank. Consider using potted plants or small trees to line your walkway. You can opt for seasonal flowers, herbs, or even miniature evergreens that you can later plant in your garden as a lasting memory of your special day.
For a more rustic look, gather fallen branches and arrange them in decorative bundles tied with twine or ribbon. These can be placed at regular intervals along the aisle or used to create an archway effect. Incorporate wildflowers or baby's breath for a touch of romance.
Lanterns filled with battery-operated candles or fairy lights make for enchanting aisle markers, especially for evening ceremonies. You can find affordable options at thrift stores or dollar shops. Alternatively, use mason jars filled with tea lights and wrapped in burlap or lace for a charming, DIY touch.
For a beachy theme, collect large seashells or driftwood pieces to mark your aisle. If you're in a wooded area, stack river rocks or use tree stumps as natural markers.
These elements not only save money but also enhance the outdoor setting of your rustic wedding.
Frequently Asked Questions
How Do I Protect Outdoor Decor From Unexpected Rain or Wind?
You'll need to secure your outdoor decor against unexpected weather. Use weights or stakes for lightweight items, choose waterproof materials, and have a backup plan. Consider clear umbrellas or tents for quick protection if rain threatens.
What's the Best Way to Handle Insects During an Outdoor Wedding?
You'll want to tackle insects at your outdoor wedding proactively. Use citronella candles, provide bug spray stations, and consider hiring a pest control service. Don't forget to cover food and drinks to keep bugs away.
How Early Should I Start DIY Projects for Wedding Decorations?
You'll want to start your DIY wedding decoration projects at least 6 months before the big day. This gives you plenty of time to plan, gather materials, and complete your projects without feeling rushed or stressed.
Are There Any Fire Safety Concerns With Outdoor Wedding Lighting Options?
You should be cautious with outdoor wedding lighting. Make certain you're using weatherproof options and avoid open flames near flammable decorations. Check local regulations, use LED alternatives, and keep fire extinguishers handy for safety. Don't overlook electrical hazards too.
How Can I Incorporate Family Heirlooms Into Rustic Wedding Decor?
You can display family heirlooms as centerpieces, use vintage frames for seating charts, incorporate antique lace into table settings, or showcase old photos. Don't forget to repurpose family jewelry or use cherished items as cake toppers.
In Summary
You've now got a treasure trove of budget-friendly ideas for your rustic outdoor wedding. Don't be afraid to get creative and put your own spin on these decorations. Remember, it's the personal touches that'll make your day truly special. With a little DIY spirit and some help from friends and family, you'll create a charming, memorable atmosphere without breaking the bank. Embrace the natural beauty around you, and you'll have a stunning rustic celebration.

I’m Sarah, the creator and writer behind this site. I’m a wife and a mother of two wonderful kids who keep me on my toes and inspire me daily. My passion lies in creating and organizing memorable events and group activities, where people can come together and make lasting memories.

Leave a Reply