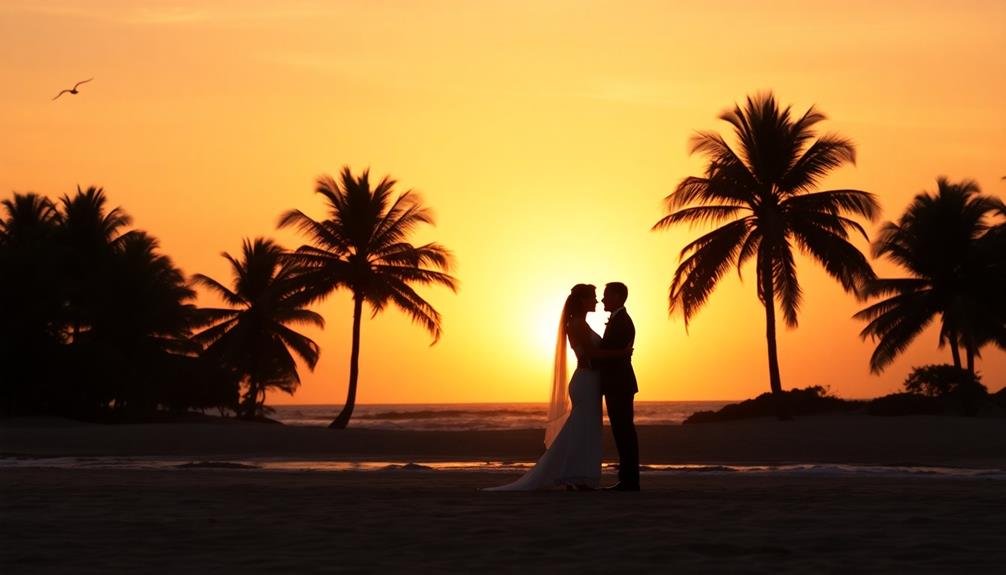
Capture stunning sunset wedding photos on a budget by embracing creative techniques and locations. Position your couple for dramatic silhouettes against a beach, wheat field, or urban skyline. Harness the golden hour's warm glow in rustic barns, mountaintop vistas, or lush gardens. Play with natural light, using backlit portraits and dappled forest canopies for ethereal effects. Don't forget unique settings like vineyards, desert dunes, or coastal cliffs to add drama and romance. Experiment with reflections in lakes or rippling water for mirror-like images. With these affordable ideas, you'll create breathtaking memories without breaking the bank. Discover how to make the most of nature's most beautiful light.
Key Takeaways
- Capture silhouettes by positioning the couple between the camera and setting sun for striking, cost-effective imagery.
- Utilize golden hour lighting for warm, romantic portraits without expensive equipment or studio setups.
- Experiment with natural light play, such as backlighting or dappled sunlight, for ethereal effects on a budget.
- Choose unique, free locations like beaches, wheat fields, or urban rooftops for diverse, affordable backdrops.
- Incorporate natural elements and reflections (water, sand, foliage) to add depth and interest without additional costs.
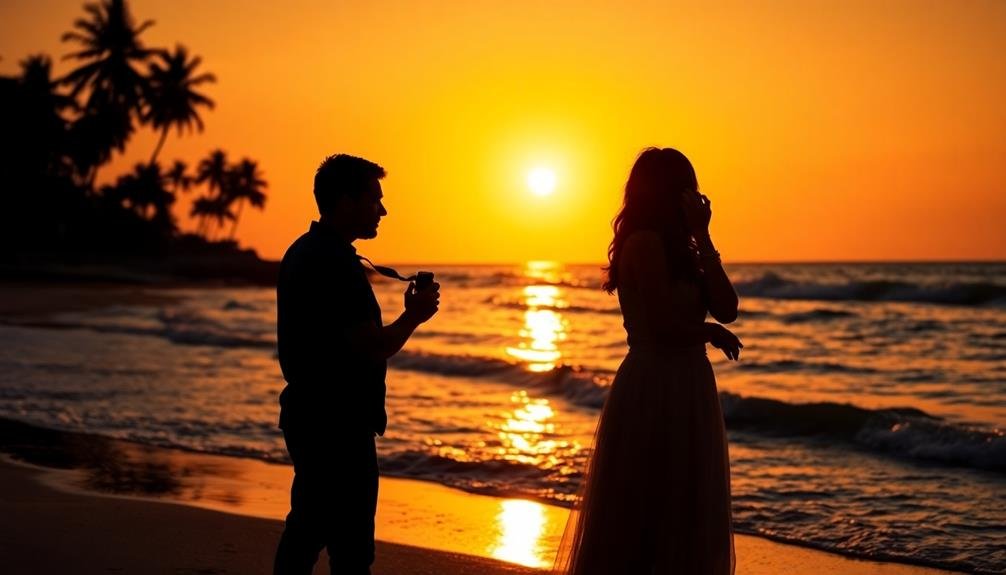
Beach Silhouettes
Beach silhouettes stand out as an enchanting way to capture the romance of a seaside wedding. To create these stunning images, position the couple between the camera and the setting sun. As the light fades, their silhouettes will be dramatically outlined against the colorful sky.
Experiment with different poses, such as the couple holding hands, embracing, or even dancing. You can enhance the effect by incorporating props like umbrellas, balloons, or even a surfboard. Try capturing the couple running along the shoreline or jumping in mid-air for a playful touch.
Don't forget to use the natural elements around you, like rocks, dunes, or palm trees, to frame your shots. For the best results, shoot during the golden hour, just before sunset. This time of day provides soft, warm light that's perfect for silhouettes.
Use a wide-angle lens to capture more of the landscape and sky. Adjust your camera settings to expose for the bright background, which will naturally darken the subjects. Remember to shoot in RAW format to give yourself more flexibility in post-processing.
With these techniques, you'll create unforgettable beach silhouettes that'll be treasured for years to come.
Golden Hour Field Romance
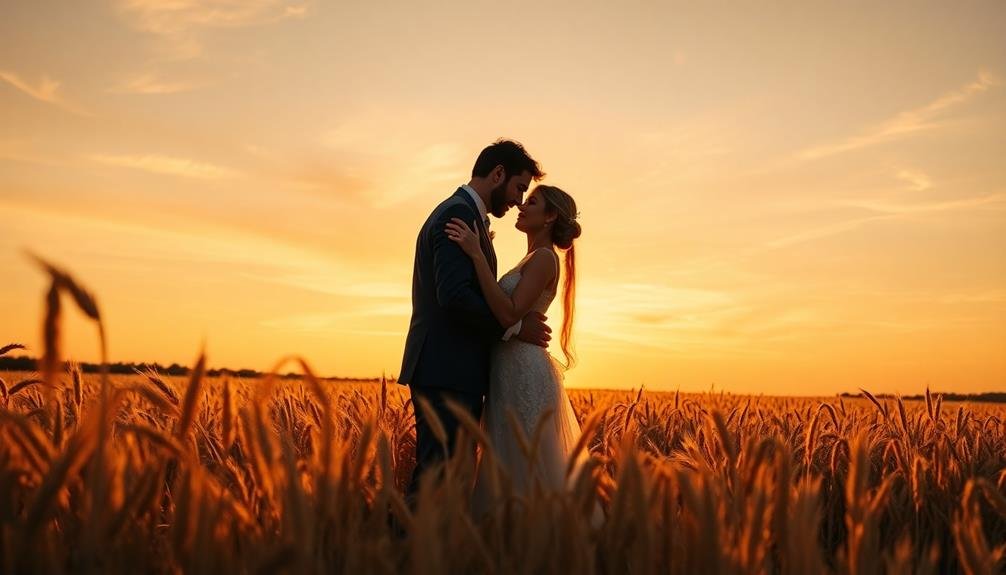
Capture the magic of golden hour in a wheat field for unforgettable wedding photos.
You'll want to position the couple for stunning silhouette shots against the setting sun, and create intimate backlit portraits that showcase their love.
Don't forget to experiment with dreamy lens flare techniques to add an ethereal quality to your images.
Wheat Field Silhouette Shots
During the golden hour, wheat fields transform into a romantic backdrop for stunning silhouette shots. As the sun dips low on the horizon, you'll want to position the couple facing each other with the sun directly behind them. This creates a striking contrast between their dark silhouettes and the warm, glowing sky.
To capture these shots, set your camera to manual mode and underexpose the image slightly. This will emphasize the silhouettes and enhance the vibrant colors of the sky. Experiment with different poses, such as the couple holding hands, embracing, or even jumping in the air for a playful touch.
Don't forget to incorporate the wheat field into your composition. You can have the couple stand among the tall stalks or frame them with the golden grains. For added interest, try using a wide-angle lens to capture more of the landscape or a telephoto lens to compress the background and create a dreamy effect.
Remember to work quickly, as the golden hour light changes rapidly. Encourage the couple to interact naturally, capturing authentic moments that showcase their love against the breathtaking wheat field backdrop.
Backlit Couple Portraits
While silhouettes can create striking images, backlit portraits offer a softer, more romantic approach to golden hour photography. To capture these ethereal shots, position your couple with their backs to the setting sun. The warm light will create a beautiful glow around their bodies, highlighting their hair and creating a dreamy atmosphere.
Use a wide aperture (f/2.8 or lower) to achieve a shallow depth of field, blurring the background and focusing on the couple. Expose for the couple's faces, which will be in shadow, and let the background become slightly overexposed. This technique creates a warm, golden halo effect.
Encourage natural interactions between the couple, such as walking hand-in-hand, sharing a kiss, or simply gazing into each other's eyes. These candid moments will result in authentic, emotive portraits.
Experiment with different angles and compositions, including close-ups of the couple's faces and wider shots that incorporate the landscape.
To add variety, try using a reflector to bounce light back onto the couple's faces, or incorporate elements like tall grass or flowers in the foreground for added depth and interest.
Dreamy Lens Flare Techniques
Magic unfolds when lens flare meets golden hour romance. To capture this dreamy effect, position your couple with the sun behind them, just peeking over their shoulders or through their clasped hands. Use a wide-angle lens and shoot at f/16 or higher to create starbursts around the sun.
Experiment with partially blocking the sun with objects like trees or the couple's bodies to control the intensity of the flare. For a softer, more ethereal look, try using a vintage lens or adding a prism filter to your modern glass. These tools can create rainbow-like streaks and bokeh effects that add a touch of whimsy to your shots.
Don't be afraid to embrace imperfection – some of the most stunning images come from happy accidents with lens flare.
To elevate your golden hour field romance shots:
- Incorporate movement by having the couple walk, dance, or twirl
- Use backlight to create a glowing halo effect around the subjects
- Play with silhouettes for dramatic, high-contrast images
Remember to shoot in RAW format to give yourself more flexibility in post-processing, where you can fine-tune the flare and overall warmth of the images.
Urban Rooftop Elegance
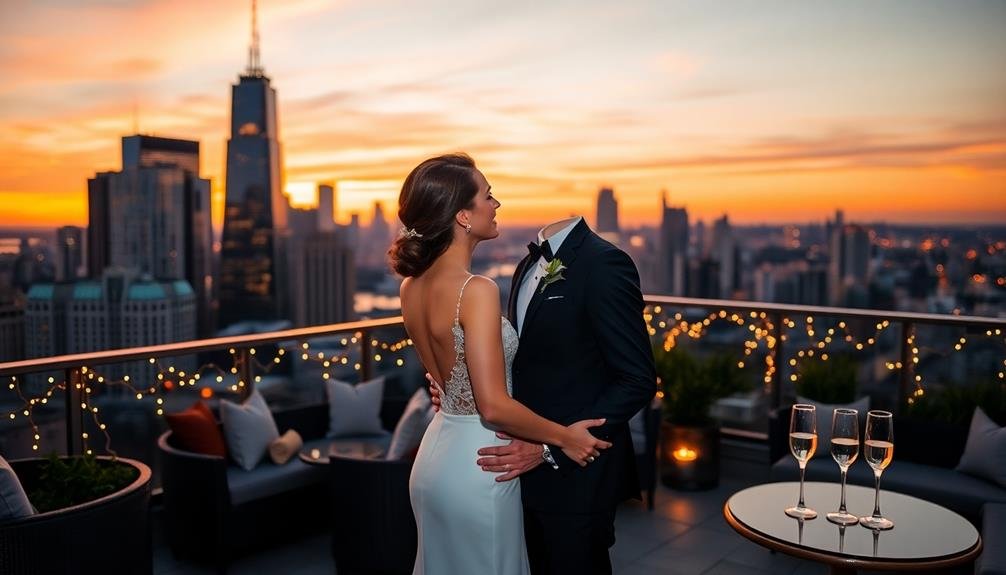
Skyscrapers and city lights provide a stunning backdrop for urban rooftop weddings. To capture the elegance of this setting, position the couple near the edge of the rooftop with the cityscape behind them. Use a wide-angle lens to encompass the expansive view while keeping the couple as the focal point.
As the sun sets, you'll want to take advantage of the golden hour light. Experiment with silhouettes by placing the couple between your camera and the setting sun. For a more dramatic effect, use off-camera flash to illuminate the couple while maintaining the colorful sky in the background.
Don't forget to capture the details that make rooftop weddings unique. Photograph string lights, urban decorations, and architectural elements that add to the ambiance. For a creative shot, use a drone to capture an aerial view of the rooftop celebration.
As night falls, incorporate the city lights into your shots. Use a slow shutter speed to create light trails from passing cars below.
Rustic Barn Glow
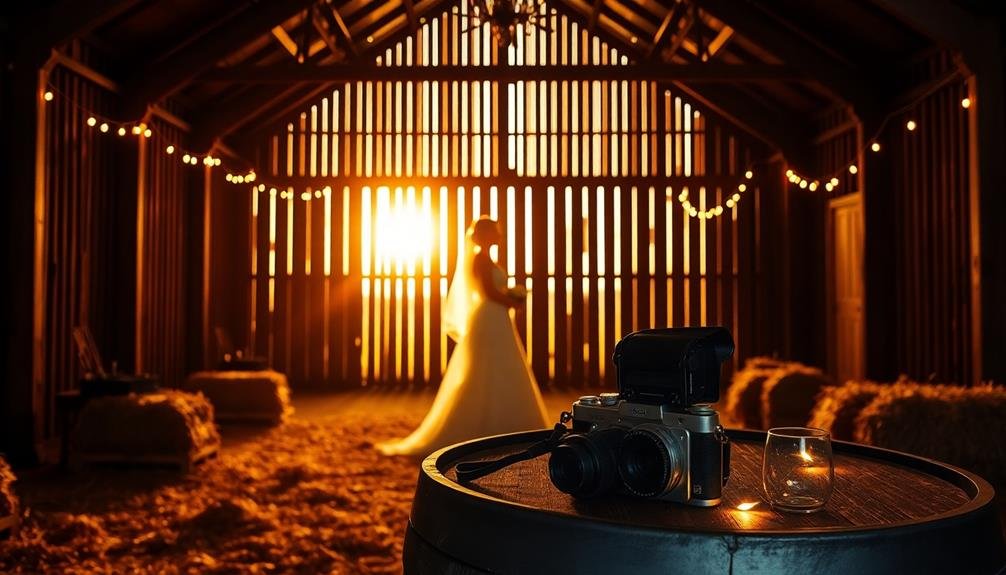
Rustic barn weddings exude a warm, romantic atmosphere that's perfect for capturing intimate moments. As the sun sets, the golden hour light filters through the barn's wooden slats, creating a magical glow that'll enhance your photos.
Position the couple near large barn doors or windows to maximize this natural light. Experiment with silhouettes by placing them in front of the setting sun, highlighting their profiles against the warm sky.
For a unique twist, incorporate rustic elements into your shots. Use hay bales, vintage farm equipment, or wooden crates as props or backdrops. Don't forget to capture the intricate details of the barn itself, such as weathered wood textures or antique fixtures.
To add depth to your rustic barn sunset shoot, consider these ideas:
- Utilize string lights or lanterns to create a soft, romantic ambiance
- Incorporate the surrounding landscape, like fields or orchards, into wide-angle shots
- Capture candid moments of the couple interacting with farm animals, if available
Remember to adjust your camera settings for the changing light conditions, and use a tripod for stability in low-light situations.
With creativity and attention to detail, you'll capture stunning rustic barn photos that'll be cherished for years to come.
Lakeside Reflections
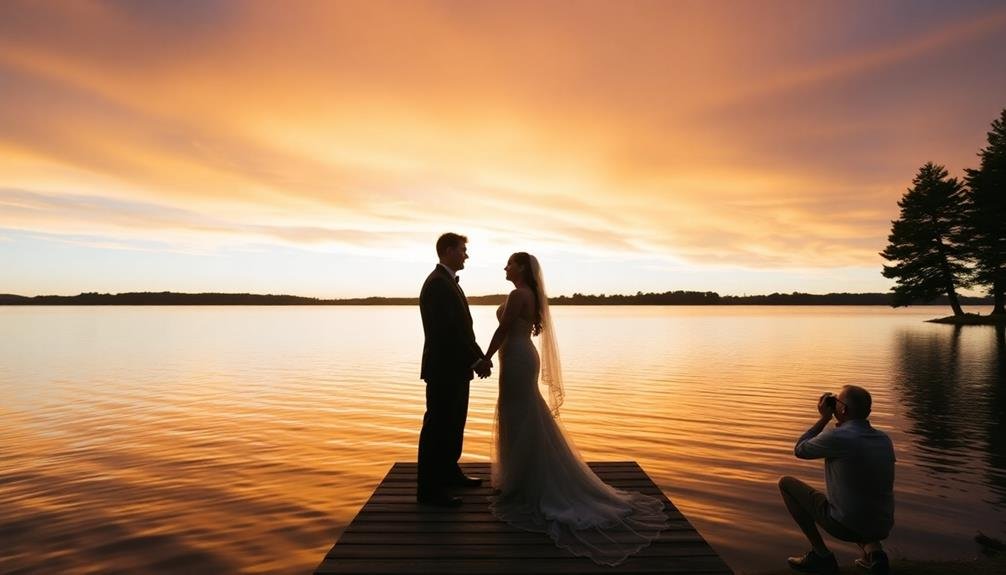
Consider the enchanting potential of lakeside wedding photos by harnessing rippling water mirror effects.
You'll find that golden hour glow adds a magical touch to these reflective shots, enhancing the romantic atmosphere.
Position the couple strategically for striking silhouettes against the shimmering water backdrop, creating unforgettable images that showcase both the scenic beauty and the couple's love.
Rippling Water Mirror Effects
If you're seeking a breathtaking backdrop for your wedding photos, rippling water mirror effects can create stunning lakeside reflections. To capture this magical effect, time your shoot during the golden hour when the sun is low on the horizon.
Position the couple near the water's edge, allowing the gentle ripples to create a fascinating mirror-like surface. Experiment with different angles to maximize the reflection's impact. Try shooting from a low vantage point to emphasize the water's surface, or capture a wider shot to include more of the surrounding landscape.
Don't forget to use a polarizing filter to enhance the reflections and reduce glare. Encourage the couple to interact naturally with their surroundings. Candid moments, such as skipping stones or sharing a quiet embrace, can result in captivating images that showcase both the beauty of the location and the couple's connection.
Consider incorporating these elements for added depth:
- Floating candles or lanterns on the water's surface
- Colorful sky reflections during sunset
- Silhouettes of the couple against the shimmering water
Remember to bring extra lighting equipment to balance exposure as the sun sets, ensuring you capture every magical moment of this rippling water mirror effect.
Golden Hour Glow Capture
Building on the concept of lakeside reflections, the golden hour offers an unparalleled opportunity for capturing ethereal wedding photos. Position your couple near the water's edge as the sun begins to set, casting a warm, golden glow across the scene. This magical light creates a soft, romantic ambiance that's perfect for intimate portraits.
To maximize the golden hour effect, use a wide aperture to create a dreamy bokeh background. Experiment with backlighting by placing the couple between you and the setting sun, creating a beautiful rim light around their silhouettes.
Don't forget to adjust your camera settings to account for the rapidly changing light conditions. Incorporate the surrounding landscape into your shots, using trees or other natural elements to frame the couple. Capture candid moments as they interact with each other, letting the golden light enhance their natural expressions.
For a dramatic effect, try using a long exposure to create a smooth, glassy surface on the water, reflecting the warm hues of the sky.
Remember to work quickly, as the golden hour is fleeting. Have a shot list prepared to make the most of this brief window of perfect light.
Silhouette Positioning Techniques
Silhouettes offer a striking way to capture the essence of a couple's love against a lakeside backdrop. To create enchanting silhouettes, position the couple between your camera and the setting sun. Experiment with different poses, such as having them face each other, hold hands, or share a kiss. The key is to guarantee their profiles are clearly defined against the colorful sky.
For added depth, incorporate the lake's reflections into your composition. Place the couple near the water's edge, allowing their silhouettes to be mirrored on the calm surface. This technique creates a symmetrical image that's both visually appealing and symbolic of the couple's union.
Don't be afraid to get creative with your silhouette shots. Try these ideas:
- Use props like umbrellas or balloons for unique shapes
- Capture the couple jumping or dancing for dynamic silhouettes
- Include natural elements like trees or rocks to frame the subjects
Remember to expose for the sky, not the couple, to achieve a perfect silhouette. Adjust your camera settings to underexpose the foreground, allowing the vibrant colors of the sunset to shine through.
With practice, you'll master the art of silhouette photography, creating stunning lakeside memories for the newlyweds.
Mountaintop Vistas
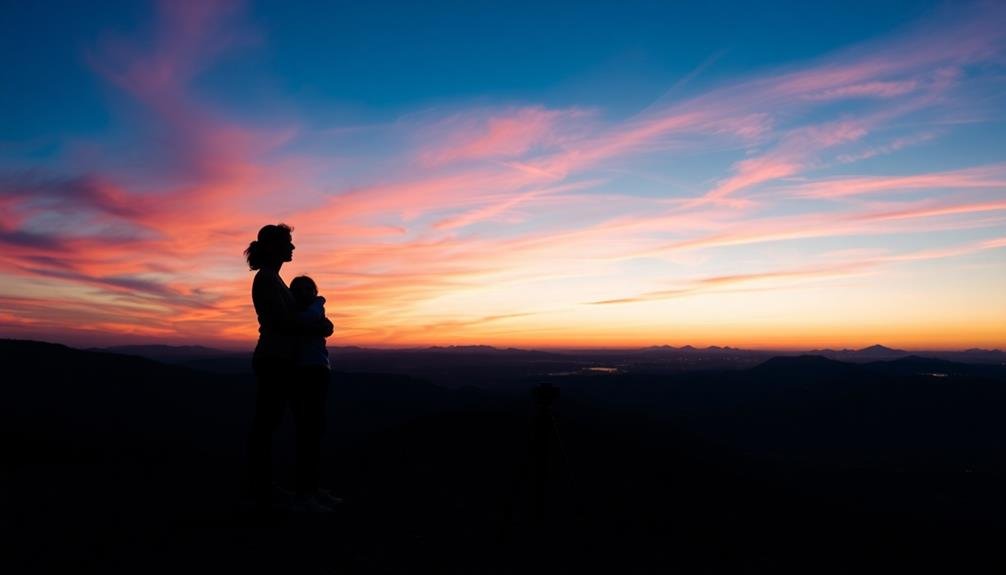
For couples seeking breathtaking backdrops, mountaintop vistas offer unparalleled beauty and drama. To capture these stunning scenes, you'll need to plan ahead and be prepared for the unique challenges of high-altitude photography.
Start by researching accessible mountaintops near your wedding venue. Look for locations that offer panoramic views and safe shooting areas. Consider the time of day for your shoot, as golden hour lighting can enhance the natural beauty of the landscape. You'll want to arrive early to scout the best angles and set up your equipment.
Bring a variety of lenses to capture both wide-angle shots of the expansive scenery and close-ups of the couple. A telephoto lens can compress the background, making distant mountains appear closer and more dramatic.
Don't forget to pack lightweight, portable lighting equipment to fill in shadows or create a warm glow as the sun sets.
Encourage the couple to interact naturally with their surroundings. Capture them walking along ridgelines, sitting on rocky outcrops, or simply embracing while gazing at the view.
Remember to showcase the scale of the landscape by including wide shots that highlight the couple's small size against the majestic backdrop.
Vineyard Rows at Dusk
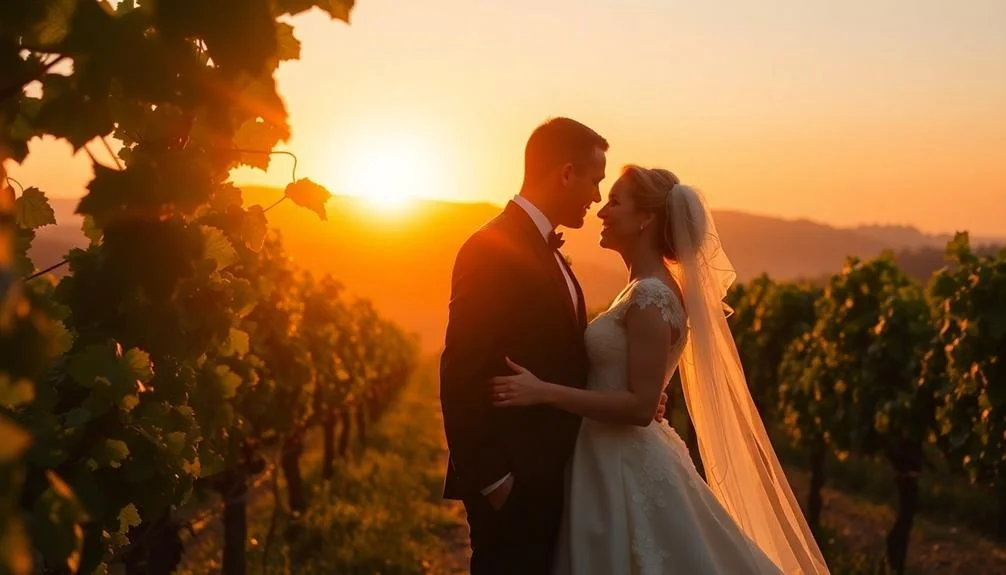
You'll find magical photo opportunities among vineyard rows at dusk.
Capture the golden hour lighting as it bathes the vines, creating a warm, romantic atmosphere for your wedding shots.
Position the couple between rows for intimate poses, using the vineyard's natural lines to frame your subjects and add depth to your compositions.
Golden Hour Lighting Effects
The magical golden hour provides an unparalleled opportunity for capturing stunning wedding photos in a vineyard setting. As the sun descends towards the horizon, it bathes the landscape in warm, soft light, creating a romantic atmosphere perfect for newlyweds.
You'll want to position the couple between rows of grapevines, allowing the light to filter through and create an enchanting backdrop. Experiment with backlighting techniques to create a dreamy, ethereal effect. Have the couple face each other with the sun behind them, capturing their silhouettes against the glowing sky.
You can also use the vineyard's natural elements, such as grapevines and trellises, to frame the couple and add depth to your compositions.
To make the most of golden hour lighting in a vineyard setting:
- Use a wide-angle lens to capture the expansive landscape
- Incorporate reflectors to bounce light onto the couple's faces
- Adjust your camera settings to account for rapidly changing light conditions
Don't forget to capture candid moments as the couple walks hand-in-hand through the vineyard rows. These natural, unposed shots often result in the most genuine and emotive images, perfectly complemented by the warm, golden light.
Romantic Between-Row Poses
As the golden hour fades into dusk, vineyard rows offer a mesmerizing backdrop for romantic poses. You'll want to position the couple between the rows, creating a sense of intimacy and seclusion. Have them face each other, holding hands or embracing, with the vines framing their silhouettes.
Experiment with different angles – shoot from ground level to capture the length of the rows, or from above to showcase the vineyard's expanse. Encourage the couple to walk slowly between the rows, capturing candid moments of laughter and stolen glances.
Use the natural lines of the vineyard to guide the viewer's eye towards the newlyweds. For added drama, place a light source behind the couple, creating a beautiful halo effect.
Don't forget to capture close-up shots of the couple's hands intertwined with grapevines or their rings nestled among the leaves. As the light dims, switch to a wider aperture to maintain the soft, dreamy atmosphere.
Consider using fairy lights or lanterns to add a magical touch to the scene. Remember, the key is to blend the couple's romance with the vineyard's rustic charm, creating timeless images that'll be treasured for years to come.
Garden Party Twilight
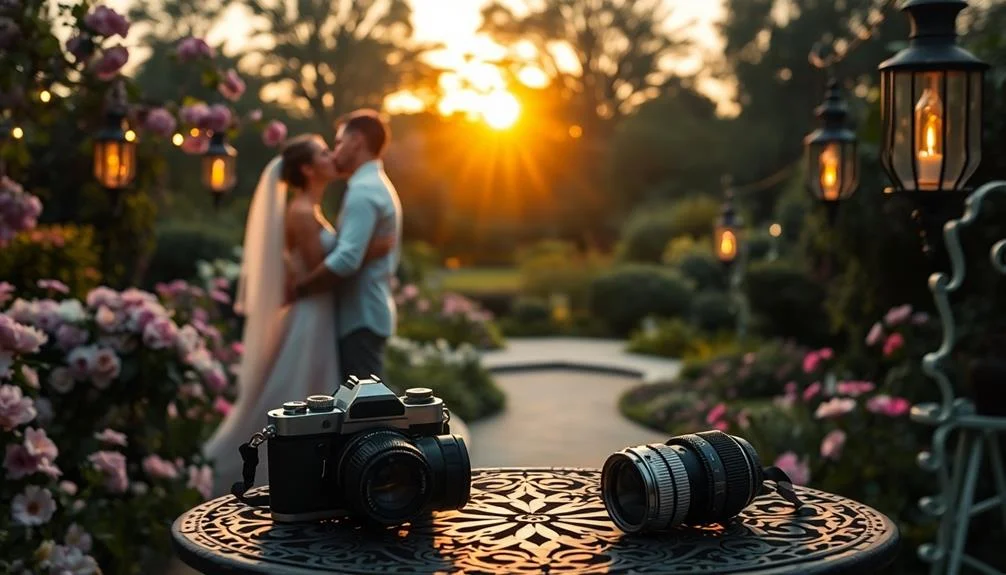
Enchanting garden party twilight weddings set the stage for magical photo opportunities. As the sun dips below the horizon, you'll want to capture the warm, golden light that bathes your guests and decorations. Position the couple near string lights or lanterns to create a soft, romantic glow in your shots.
Don't forget to use the natural beauty of the garden as a backdrop, incorporating lush foliage and colorful blooms into your compositions.
For a unique twilight perspective, try these ideas:
- Silhouette shots of the couple against the fading sky
- Close-ups of candles flickering on tables, illuminating place settings
- Wide-angle shots showcasing the entire garden party atmosphere
As darkness falls, switch to creative lighting techniques. Use off-camera flash to highlight the couple while maintaining the ambient garden lighting. Capture guests mingling and dancing under the stars, and don't miss the opportunity to photograph any special nighttime elements like sparklers or fire pits.
Remember to adjust your camera settings for low-light conditions, using a higher ISO and wider aperture to capture the enchanting twilight atmosphere without compromising image quality.
Desert Sands Warmth
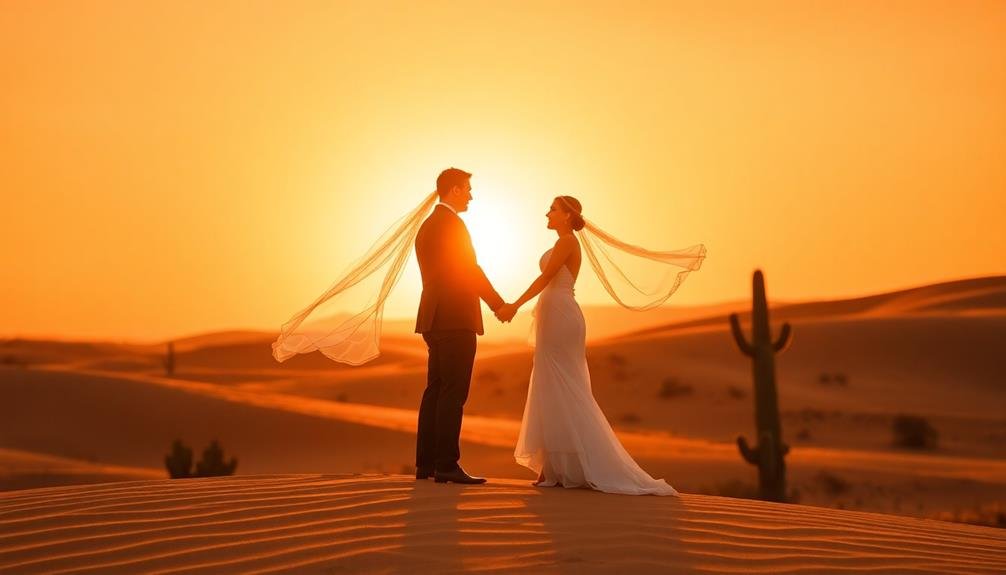
Stunning desert landscapes provide a unique backdrop for wedding photography, offering warm hues and dramatic vistas. To capture the essence of desert sands warmth, you'll want to time your shoot during the golden hour, just before sunset. This magical time bathes everything in a soft, warm glow, perfect for romantic portraits.
Position the couple against sand dunes or rocky outcrops to create depth and interest in your compositions. Encourage them to interact naturally, capturing candid moments as they walk hand-in-hand or share a quiet embrace. Use the desert's natural textures to your advantage, incorporating cacti, joshua trees, or weathered wood into your shots.
For a dramatic effect, try silhouette shots against the setting sun. Experiment with different angles and perspectives, like shooting from ground level to emphasize the vastness of the desert.
Don't forget to capture close-ups of details like wedding rings nestled in the sand or the bride's veil caught in a gentle breeze.
To add warmth to your images, adjust your white balance settings or use a warm color filter. Remember to bring plenty of water and sunscreen for you and the couple, as desert conditions can be challenging.
Forest Canopy Light Play
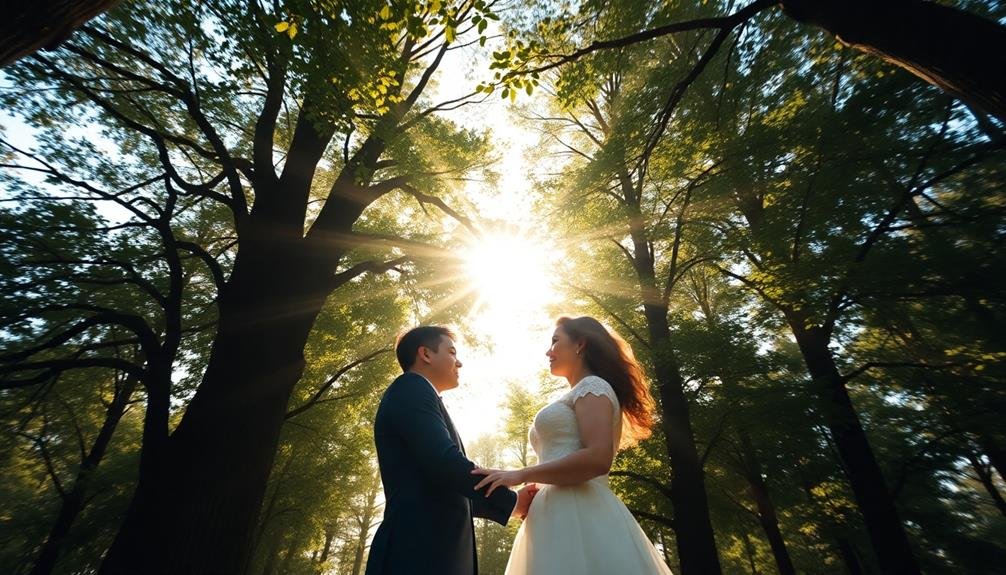
While desert landscapes offer warm hues, forest settings provide a magical interplay of light and shadow. As you plan your forest canopy wedding shoot, focus on capturing the enchanting dappled sunlight filtering through the trees. Position your couple beneath towering trees, allowing streaks of light to illuminate their faces and create an ethereal atmosphere.
Experiment with different times of day to achieve varying effects. Early morning or late afternoon light will cast long, dramatic shadows and create a golden glow. For a softer look, shoot during overcast conditions when the light is more diffused.
Incorporate the forest's natural elements into your compositions. Use fallen logs as seating, drape veils over low-hanging branches, or frame shots with arching tree limbs.
Don't forget to capture close-ups of details like rings nestled in moss or bouquets set against rough tree bark.
Consider the symbolic meaning of a forest setting:
- Growth and new beginnings
- Strength and resilience
- Mystery and adventure
Coastal Cliffs Drama
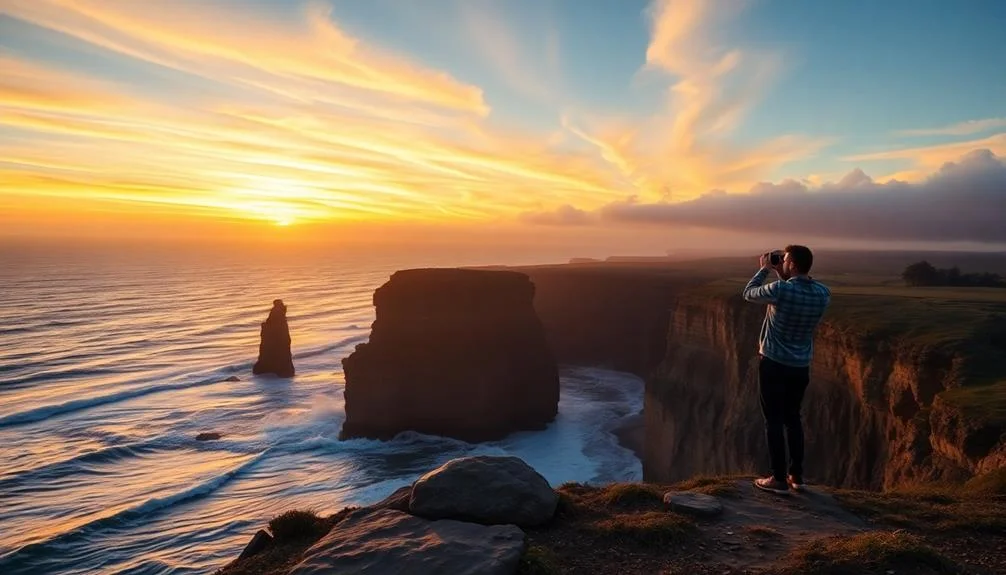
From atop coastal cliffs, you'll find a dramatic backdrop for unforgettable wedding photos. The rugged landscape, crashing waves, and expansive ocean views create a sense of grandeur and romance. Position the couple near the cliff's edge for a stunning silhouette against the setting sun. Capture the wind-blown veil and flowing dress for added movement and drama.
Use the natural rock formations as framing elements, placing the newlyweds within arches or beside towering cliffs. Incorporate the textures of weathered stone and coastal vegetation into your compositions. For safety, scout secure locations beforehand and bring an assistant to help with lighting and gear.
Experiment with different angles: shoot from below to emphasize the cliff's height, or from above to showcase the coastline's curves. Capture wide-angle shots to convey the vastness of the ocean, then switch to close-ups for intimate moments.
As the light fades, use long exposures to create dreamy, ethereal images with blurred waves and soft clouds.
Don't forget to capture the changing colors of the sky as day turns to night, providing a range of moods for your wedding album.
Frequently Asked Questions
What Equipment Is Essential for Capturing Quality Sunset Wedding Photos and Videos?
You'll need a DSLR or mirrorless camera with wide-angle and telephoto lenses, a sturdy tripod, ND filters, and an external flash. Don't forget extra batteries and memory cards. A quality microphone is essential for video capture.
How Far in Advance Should We Book a Sunset Wedding Photographer?
You'll want to book your sunset wedding photographer at least 6-12 months in advance. Popular dates fill up quickly, especially during peak wedding season. Don't wait too long, or you might miss out on your preferred professional.
What Backup Plans Are Recommended in Case of Unfavorable Weather?
You'll want to plan for indoor locations as a backup. Consider covered outdoor spots or rent a tent. Discuss weather contingencies with your photographer. They may suggest alternative timing or creative lighting solutions for overcast conditions.
Are Permits Required for Sunset Shoots in Public Locations?
You'll often need permits for sunset shoots in public spaces. Check with local authorities before your session. Some beaches, parks, and landmarks require advance approval. Don't risk fines or interruptions—secure necessary permissions ahead of time.
How Long Does a Typical Sunset Wedding Photo and Video Session Last?
You'll typically spend about 1-2 hours on a sunset wedding photo and video session. It's best to start 30-45 minutes before sunset and continue for a short while after. You'll capture the golden hour and twilight.
In Summary
You've now got a wealth of sunset shoot ideas to inspire your affordable wedding photography and videography. Whether you're drawn to beaches, fields, rooftops, or forests, there's a perfect backdrop for your vision. Don't be afraid to get creative and make these concepts your own. Remember, the golden hour light is fleeting, so plan ahead and work efficiently. With these ideas, you'll capture stunning memories without breaking the bank. Happy shooting!

I’m Sarah, the creator and writer behind this site. I’m a wife and a mother of two wonderful kids who keep me on my toes and inspire me daily. My passion lies in creating and organizing memorable events and group activities, where people can come together and make lasting memories.


Leave a Reply