
You'll find plenty of budget-friendly vintage veil options for your wedding day. Consider a classic birdcage veil for timeless elegance or try a DIY tulle fingertip veil for a personal touch. A lace-trimmed Juliet cap offers romantic charm, while a vintage bridal flower crown provides a bohemian alternative. Retro bandeau veils and beaded headbands with netting capture mid-century glamour. For a Spanish-inspired look, opt for a mantilla-style veil. Don't overlook thrifted tea-length veils or embroidered fingertip styles for unique finds. With these ideas, you'll create a stunning vintage bridal look without breaking the bank. Explore further to uncover more creative possibilities for your special day.
Key Takeaways
- Classic birdcage veils offer timeless elegance and vintage charm at an affordable price.
- DIY fingertip veils using tulle fabric provide a budget-friendly option for a classic vintage look.
- Upcycling heirloom veils or repurposing lace curtains creates unique, cost-effective vintage-inspired accessories.
- Vintage bridal flower crowns serve as beautiful, budget-friendly alternatives to traditional veils.
- Thrifted tea-length veils from second-hand shops offer authentic vintage style without breaking the bank.
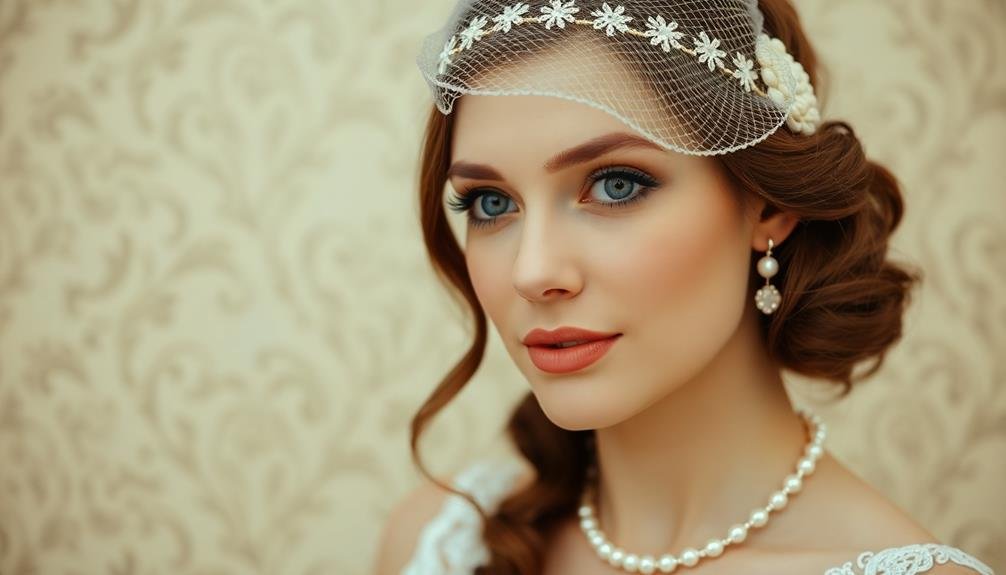
Classic Birdcage Veil

Many brides love the timeless elegance of a classic birdcage veil. This vintage-inspired accessory is perfect for creating a retro look without breaking the bank.
You'll find that birdcage veils are typically made from netting or tulle and cover just the upper part of your face, often extending to your cheekbones or chin.
To achieve this look on a budget, consider purchasing a ready-made birdcage veil online or from a bridal shop. Alternatively, you can craft your own using tulle, a small comb, and some basic sewing skills.
Choose a color that complements your dress, such as ivory, white, or even a soft blush.
When styling your birdcage veil, pair it with a sleek updo or vintage-inspired waves. Secure it with decorative pins or a small fascinator for added flair.
You can also embellish the veil with pearls, crystals, or delicate lace appliqués to make it uniquely yours.
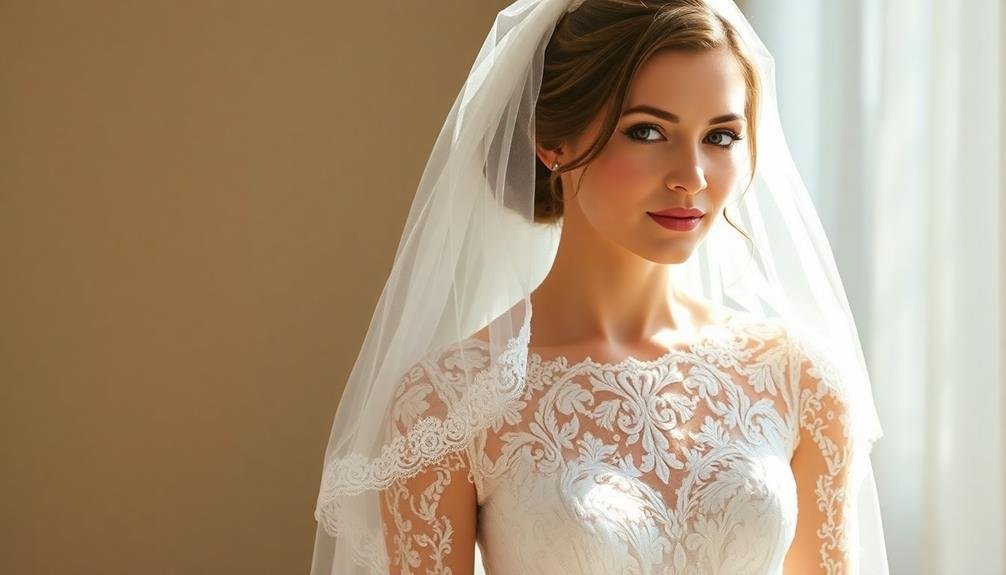
DIY Tulle Fingertip Veil
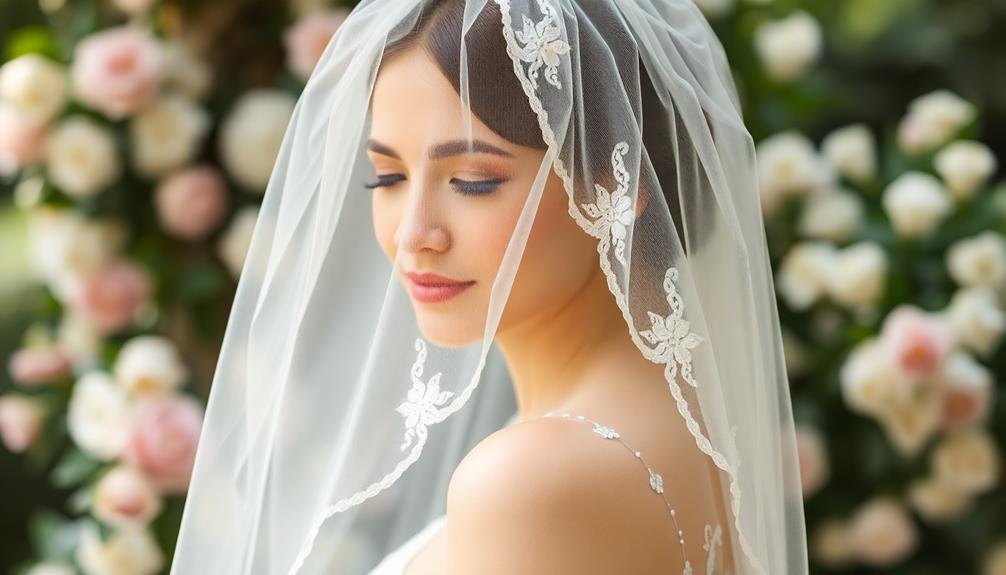
For brides looking to cut costs without sacrificing style, a DIY tulle fingertip veil can be the perfect solution. This classic veil option falls between your shoulders and fingertips, offering a timeless look that's easy to create at home. You'll need tulle fabric, a comb, and basic sewing supplies to get started.
Begin by measuring the desired length of your veil, typically 36-38 inches for a fingertip style. Cut the tulle to size, making sure it's wide enough to drape elegantly. Fold the tulle in half and sew a gathering stitch along the folded edge. Attach the gathered edge to your comb using strong thread or hot glue.
To add a vintage touch, consider these embellishment ideas:
| Embellishment | Difficulty | Cost |
|---|---|---|
| Lace trim | Easy | Low |
| Pearl beading | Moderate | Medium |
| Floral appliqués | Advanced | Medium |
Choose an embellishment that complements your dress and overall wedding theme. With patience and creativity, you'll craft a beautiful, budget-friendly veil that rivals expensive store-bought options. Don't forget to practice your DIY skills before the big day to guarantee a polished final product.
Lace-Trimmed Juliet Cap

A romantic and vintage-inspired option, the lace-trimmed Juliet cap veil offers a unique alternative to traditional veils. This style features a cap-like covering that sits on the crown of your head, often adorned with intricate lace details.
To create this look on a budget, you'll need a piece of lace fabric, some tulle, and basic sewing skills. Start by cutting a semicircle of lace fabric to fit the crown of your head. Sew a piece of elastic to the straight edge to guarantee a snug fit.
Next, attach a length of tulle to the back of the cap, creating the veil portion. You can customize the length to your preference, whether you want a short shoulder-length veil or a flowing cathedral-style.
For added vintage charm, consider incorporating heirloom lace or beading from a family member's wedding dress. You can also embellish the cap with pearls, rhinestones, or delicate floral appliques.
This DIY approach allows you to create a one-of-a-kind veil that perfectly complements your wedding dress and personal style, all while keeping costs low.
Vintage Bridal Flower Crown
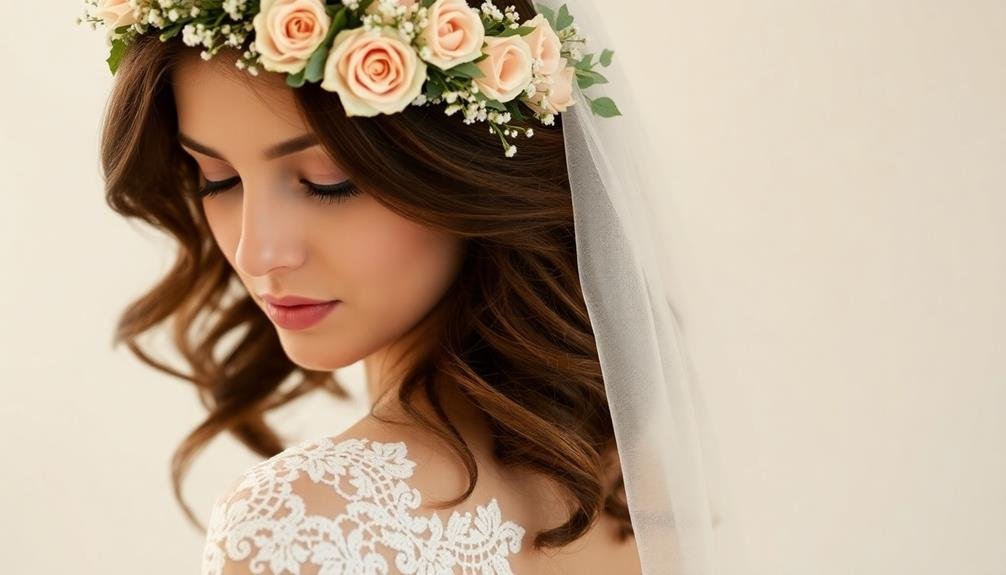
While flower crowns have gained popularity in recent years, they've long been a timeless bridal accessory. For a vintage-inspired look, you can create a beautiful and budget-friendly bridal flower crown that doubles as a veil alternative.
To craft your own, start by selecting artificial flowers that match your wedding color scheme and style. Opt for smaller blooms like baby's breath, daisies, or rosebuds for a delicate appearance. You'll need floral wire, floral tape, and ribbon to construct the crown.
Begin by forming a circular base with floral wire, sizing it to fit your head comfortably. Wrap small bunches of flowers around the wire, securing them with floral tape. Continue this process until you've covered the entire wire frame.
For a more dramatic look, add cascading elements by attaching longer stems or ribbons to the back of the crown.
To incorporate a veil-like effect, attach tulle or lace to the back of the crown. This creates a soft, ethereal drape that mimics the look of a traditional veil. You can customize the length and fullness to suit your preferences.
Retro Bandeau Veil
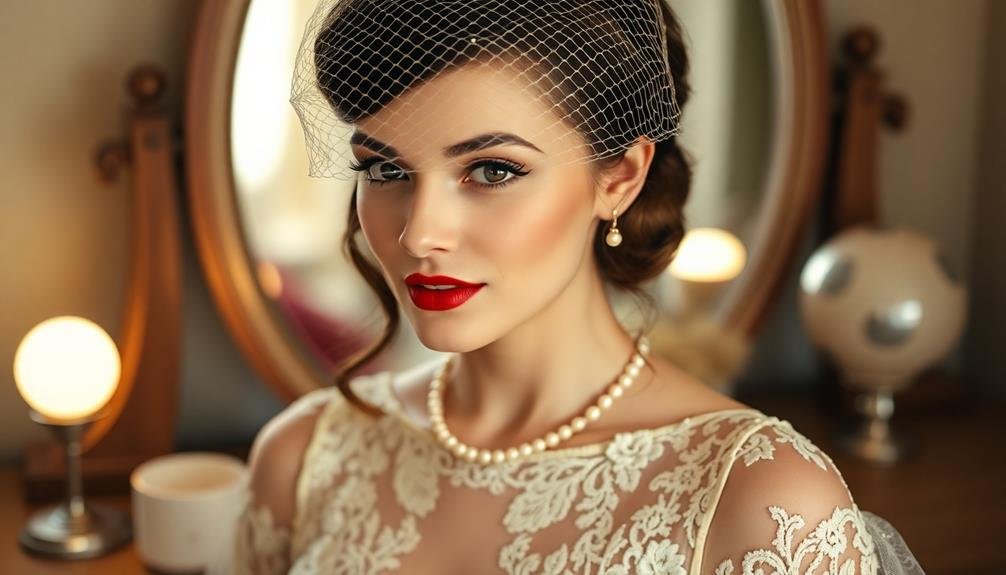
If you're aiming for a classic 1950s-inspired look, consider a retro bandeau veil for your wedding day.
You can create your own DIY bandeau veil using tulle and a headband, or find vintage-inspired options at bridal shops.
Pair your bandeau veil with other vintage accessories like pearl earrings or a birdcage fascinator to complete the retro bridal ensemble.
Classic 1950S Inspired Look
For brides seeking a timeless and budget-friendly veil option, the classic 1950s-inspired retro bandeau veil is an excellent choice. This style embodies the elegance and sophistication of the era, featuring a short, face-framing veil attached to a decorative headband or bandeau.
You'll find that this vintage look complements various wedding dress styles, from sleek sheaths to full-skirted ball gowns.
To create your own 1950s-inspired bandeau veil, you'll need:
- A wide headband or bandeau
- Short tulle or netting (about 18-24 inches long)
- Decorative elements like pearls, rhinestones, or lace appliques
Attach the tulle to the headband using a needle and thread or fabric glue. For added authenticity, consider incorporating period-appropriate embellishments like bows, flowers, or delicate beadwork.
You can easily customize the veil's length and fullness to suit your preferences, making it a versatile option for brides on a budget.
When styling your hair, opt for classic 1950s looks such as victory rolls, pin curls, or a sleek chignon to complement your retro bandeau veil. This timeless accessory will add a touch of vintage charm to your overall bridal ensemble without breaking the bank.
DIY Bandeau Veil Options
Building on the classic 1950s-inspired look, creating your own retro bandeau veil offers endless possibilities for customization and cost savings. This DIY option allows you to capture the essence of vintage glamour while staying within your budget.
To craft a bandeau veil, you'll need tulle, a comb or headband, and basic sewing supplies. Start by cutting a rectangular piece of tulle, about 18 inches wide and 24 inches long. Fold the tulle in half and gather it along the folded edge. Secure the gathered edge to your chosen base, whether it's a comb or headband, using thread or hot glue.
For added retro flair, consider embellishing your bandeau veil with vintage-inspired elements. Sew on pearls, rhinestones, or lace appliques to create a unique and personalized look. You can also experiment with different tulle colors, such as blush or champagne, to complement your wedding palette.
Don't be afraid to play with the shape and size of your bandeau veil. A shorter version can create a chic, face-framing effect, while a longer style adds drama and sophistication.
Styling With Vintage Accessories
Once you've crafted your retro bandeau veil, it's time to contemplate how to style it with vintage accessories. The key is to choose pieces that complement your veil without overwhelming your overall look.
Consider pairing your bandeau veil with delicate pearl earrings or a simple strand of pearls for a classic 1920s-inspired aesthetic.
For a more dramatic vintage look, opt for art deco-inspired hair combs or pins. These can be tucked into your hairstyle alongside the veil, adding sparkle and dimension. Vintage brooches can also be repurposed as hair accessories, pinned securely to your bandeau veil for a unique touch.
When selecting vintage accessories to style with your bandeau veil, keep these tips in mind:
- Stick to a cohesive color palette that matches your veil and dress
- Choose pieces that reflect your chosen era, whether it's the roaring 20s or the glamorous 50s
- Don't overdo it – a few well-chosen accessories will have more impact than too many competing elements
Upcycled Heirloom Veil
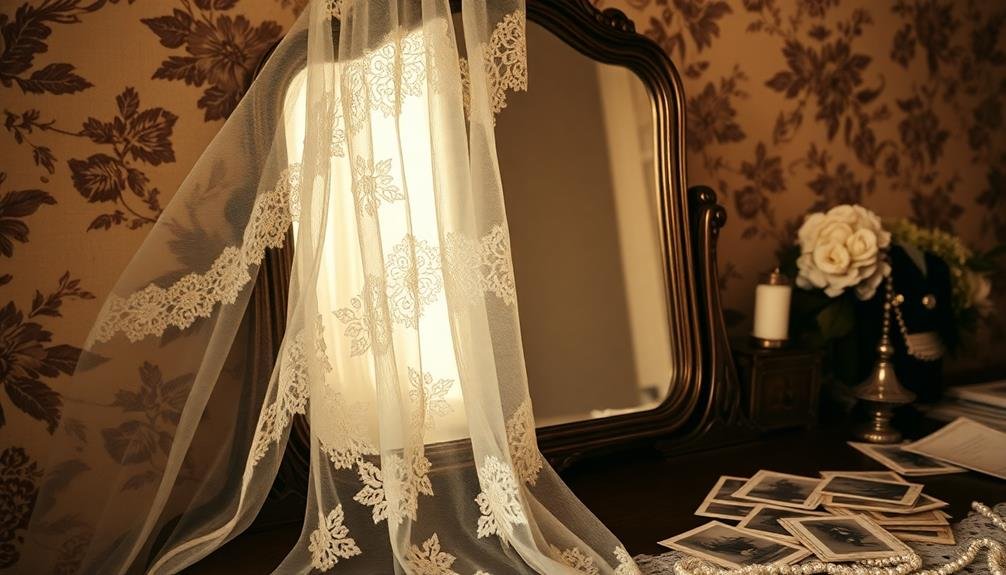
Brides with a sentimental streak can create a meaningful and budget-friendly veil by upcycling a family heirloom. Look through your family's closets for old wedding dresses, veils, or even lace tablecloths that could be repurposed.
You'll need fabric scissors, a comb, and some basic sewing skills to transform these treasures into a unique veil. If you've found an old veil, you might simply need to clean and restore it. For other fabrics, cut the material into your desired shape and size.
Attach a comb at the top using strong thread or hot glue. Consider adding vintage brooches or hair clips for extra flair.
Don't worry if the fabric isn't pristine. Small imperfections add character and emphasize the vintage aesthetic. You can also dye the material for a more cohesive look with your wedding palette.
Beaded Headband With Netting
For a more modern take on the traditional veil, consider creating a beaded headband with netting. This stylish option combines the elegance of a classic veil with the contemporary flair of a headpiece. You'll find it's an affordable DIY project that allows you to customize your look while staying within budget.
To create your beaded headband with netting, you'll need a plain headband, beads, tulle or netting, and some basic crafting supplies. Start by covering the headband with fabric or ribbon that matches your dress. Then, sew or glue beads onto the headband in your desired pattern.
Attach the netting to the back of the headband, allowing it to cascade down your back for a subtle veil effect.
This versatile option offers several advantages:
- Customizable design to match your wedding theme
- Lightweight and comfortable for all-day wear
- Easy to remove for the reception without ruining your hairstyle
You can adjust the length and fullness of the netting to suit your preferences. For a vintage look, opt for antique-inspired beads and shorter netting.
This budget-friendly alternative to traditional veils allows you to express your personal style while saving money for other wedding expenses.
Bohemian Mantilla-Style Veil

Lace and romance intertwine in the bohemian mantilla-style veil, a budget-friendly option that exudes effortless elegance. This Spanish-inspired veil drapes gracefully over your shoulders, creating a soft, ethereal look perfect for a vintage-themed wedding.
You'll find that mantilla veils are typically made from delicate lace or tulle, often featuring intricate scalloped edges.
To create your own bohemian mantilla-style veil on a budget, start with a large oval or circular piece of lace fabric. You can often find affordable lace curtains or tablecloths at thrift stores or online marketplaces. Cut the fabric to your desired length and shape, leaving the scalloped edges intact.
Attach a small comb or hair clips to secure the veil to your hairstyle. For added bohemian flair, consider embellishing your veil with small fabric flowers, pearls, or vintage brooches. You can also incorporate a floral crown or headband to complete the look.
This DIY approach allows you to customize your veil while keeping costs low. Remember, the key to achieving the perfect bohemian mantilla-style veil lies in its relaxed, romantic appearance.
Thrifted Tea-Length Veil

Thrifted tea-length veils offer a budget-friendly option for brides seeking vintage charm.
You can hunt for these treasures at second-hand shops or learn to create your own with a simple DIY tutorial.
When styling your thrifted veil, consider pairing it with complementary vintage accessories to complete your retro-inspired bridal look.
Finding Vintage Tea-Length Veils
Vintage tea-length veils can be a treasure trove for budget-conscious brides. These shorter veils, popular in the 1950s and 1960s, offer a charming retro look that's perfect for vintage-themed weddings.
To find authentic vintage tea-length veils, start by exploring local antique shops, estate sales, and vintage clothing stores. These places often have hidden gems at reasonable prices.
Don't overlook online platforms like Etsy, eBay, and Poshmark, where you'll find a wide selection of vintage veils from different eras. When searching, use specific keywords like "1950s tea-length veil" or "vintage birdcage veil" to narrow down your options.
When you've found a potential veil, consider these factors:
- Condition: Check for yellowing, tears, or missing embellishments
- Material: Look for high-quality fabrics like tulle, lace, or chiffon
- Authenticity: Verify the veil's age through seller descriptions or photos
DIY Tea-Length Veil Tutorial
For those with a knack for crafting, creating your own tea-length veil from a thrifted find can be both budget-friendly and rewarding.
Start by scouring local thrift stores for sheer curtains, tablecloths, or even old wedding dresses with suitable fabric. Look for materials like tulle, chiffon, or lace that can be repurposed into a veil.
Once you've found your fabric, measure and cut it to the desired tea-length, typically falling between your shoulders and elbows. Create a curved edge by folding the fabric in half and trimming an arc shape.
To finish the edges, you can use a rolled hem technique or attach lace trim for a vintage touch.
For the comb attachment, sew a small piece of sturdy fabric to the top edge of your veil. Attach a plastic comb to this fabric, ensuring it's securely fastened.
If you want to add embellishments, consider using vintage brooches, pearls, or rhinestones to create a personalized look.
Remember to steam or iron your veil gently before the big day to remove any wrinkles.
With patience and creativity, you'll have a unique, budget-friendly veil that perfectly complements your vintage-inspired wedding attire.
Styling Thrifted Veil Tips
Once you've acquired or created your thrifted tea-length veil, it's time to style it for your big day. Start by carefully inspecting the veil for any tears, stains, or loose threads. Gently clean it using a mild detergent or take it to a professional cleaner if needed.
Iron or steam the veil on a low setting to remove any wrinkles, being cautious not to damage delicate fabrics or embellishments.
To add a personal touch and enhance its vintage appeal, consider these styling tips:
- Attach small, vintage brooches or hair clips along the edge of the veil
- Sew on delicate lace trim or appliques to match your dress
- Add a subtle pop of color with hand-dyed silk flowers or ribbons
When styling your hair, opt for classic updos that complement the tea-length veil, such as a low chignon or vintage-inspired pin curls.
Secure the veil with decorative combs or pins that match your overall look. Don't be afraid to experiment with different placements, like slightly off-center or tilted, to find the most flattering position for your face shape and hairstyle.
Embroidered Fingertip Veil
Adorned with delicate stitching, an embroidered fingertip veil offers a touch of elegance without breaking the bank. This versatile accessory typically falls between your shoulders and fingertips, making it a perfect choice for brides who want a classic look without the drama of a longer veil.
To create your own budget-friendly embroidered fingertip veil, start with a plain tulle veil and add embroidery yourself. Choose a simple floral or vine pattern and use embroidery floss that matches your wedding colors. If you're not confident in your stitching skills, reflect on iron-on embroidery patches or asking a crafty friend for help.
For a vintage-inspired look, opt for antique lace appliqués or delicate beadwork along the edges. You can often find these elements at thrift stores or online marketplaces. Attach them to your veil using a fine needle and thread, ensuring they're securely fastened.
Don't forget to reflect on the placement of your embroidery. A subtle design along the hem can add just the right amount of detail, while more elaborate patterns might be better suited for the corners or scattered throughout the veil.
Frequently Asked Questions
How Do I Choose the Right Veil Length for My Body Type?
To choose the right veil length, consider your height and dress style. Short veils suit petite brides, while taller brides can opt for longer veils. Match the veil's length to your dress's formality and overall look.
Can I Wear a Veil With an Outdoor or Beach Wedding?
You can absolutely wear a veil for an outdoor or beach wedding. Choose a shorter style or lightweight fabric to prevent wind issues. Consider a blusher or fingertip-length veil for ease of movement and stunning photos.
What Hairstyles Work Best With Different Types of Vintage Veils?
You'll find various hairstyles complement vintage veils beautifully. For birdcage veils, try finger waves or sleek bobs. Juliet cap veils pair well with loose curls or braided updos. Long cathedral veils look stunning with classic chignons or half-up styles.
Are There Alternatives to Traditional Veils for a Vintage Look?
You've got plenty of vintage-inspired alternatives to traditional veils. Try a birdcage fascinator, a floral crown, a jeweled headband, or a lace cap. Don't forget about elegant hair combs or even a vintage-style hat for a unique look.
How Can I Incorporate Family Heirlooms Into My Wedding Veil?
You can attach family heirloom brooches, lace, or jewelry to your veil for a personal touch. Consider sewing a patch of your grandmother's dress or using antique hair combs to secure the veil. Don't forget to ask relatives for ideas!
In Summary
You've got plenty of budget-friendly options to achieve that perfect vintage wedding look. Whether you're drawn to the classic birdcage style or a bohemian mantilla veil, there's something for every bride. Don't be afraid to get creative with DIY projects or thrifted finds. Remember, it's all about expressing your unique style while keeping costs down. With these ideas, you'll be sure to turn heads and create timeless memories on your special day.

I’m Sarah, the creator and writer behind this site. I’m a wife and a mother of two wonderful kids who keep me on my toes and inspire me daily. My passion lies in creating and organizing memorable events and group activities, where people can come together and make lasting memories.

Leave a Reply