You can create stunning DIY wedding photography and videography signs on a budget with a little creativity. Craft rustic wooden photo booth signs, chalkboard hashtag displays, and vintage frame selfie stations to add personal touches. Use floral hoops or upcycled window panes for unique backdrops, and set up a Polaroid guestbook station for interactive fun. Repurpose pallets into camera props or make personalized clapperboard signs for Hollywood-inspired shots. Don't forget handwritten quote displays for meaningful photo opportunities. These budget-friendly ideas will elevate your wedding's visual appeal and create memorable moments for you and your guests. Explore further for detailed instructions on bringing these ideas to life.
Key Takeaways
- Create rustic wooden photo booth signs using reclaimed wood or inexpensive planks with personalized phrases and decorations.
- Design chalkboard hashtag displays for an interactive element, encouraging guests to share photos on social media.
- Set up a Polaroid guestbook station with clear instructions, props, and a decorated album for unique memories.
- Craft vintage frame selfie stations using thrifted frames, arranging them at various heights with props and backdrops.
- Make directional wedding moment arrows from affordable materials to guide guests to photo opportunities and key areas.
Rustic Wooden Photo Booth Signs
Why settle for generic photo booth signs when you can create charming rustic wooden ones yourself? These DIY signs add a personal touch to your wedding while saving money.
Start by sourcing reclaimed wood or purchasing inexpensive wooden planks from a hardware store. Sand the wood to achieve a smooth surface, then apply a light stain for that rustic look.
Choose your phrases carefully, opting for fun, wedding-related messages like "Strike a Pose," "Smile for the Camera," or "Happily Ever After Starts Here." Use stencils or freehand your lettering with paint pens or chalk markers. For added charm, incorporate small embellishments like twine, burlap, or artificial flowers.
Don't forget practical signs like "Photo Booth This Way" or "Props Table" to guide your guests. Create a mix of hanging signs and freestanding options using simple wooden easels.
Weather-proof your signs with a clear sealant if you're planning an outdoor wedding. Remember to test your signs in different lighting conditions to verify they're visible in photos.
With a little creativity, you'll have unique, Instagram-worthy photo booth signs that perfectly complement your wedding's aesthetic.
Chalkboard Hashtag Displays
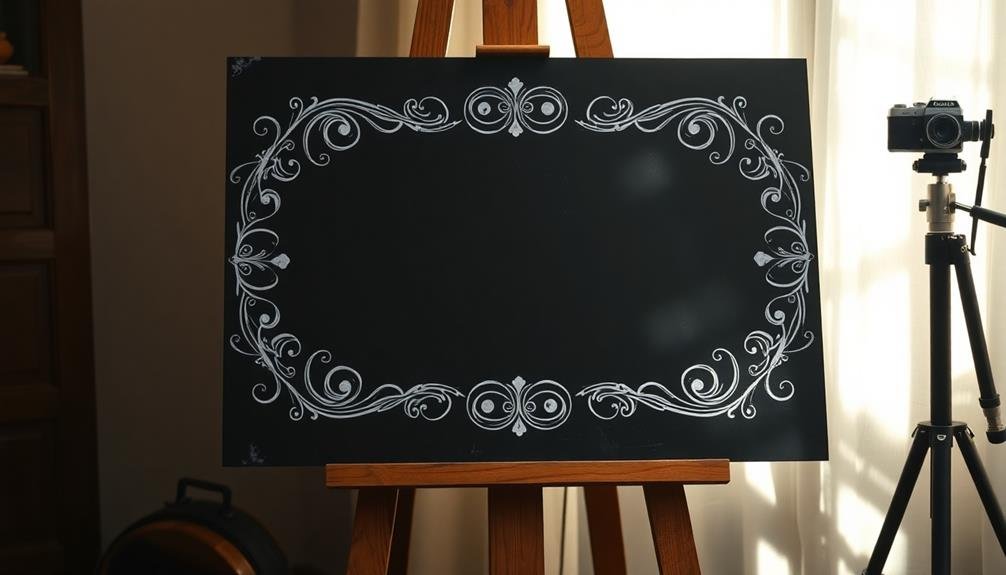
Chalkboard hashtag displays frequently add a trendy and interactive element to wedding photography setups. They encourage guests to share their photos on social media, creating a digital album of memories.
To create your own, you'll need a chalkboard, chalk or chalk markers, and creativity.
Start by choosing a catchy, unique hashtag for your wedding. Keep it short and easy to remember, such as #SmithSayIDo or #JonesTieTheKnot. Write the hashtag prominently on the chalkboard, using neat lettering or fancy calligraphy if you're skilled.
Add decorative elements around the hashtag, like floral designs or hearts, to make it visually appealing. Include brief instructions for guests, such as "Share your photos with us!" or "Tag us in your memories!"
Place the chalkboard in a high-traffic area, like near the entrance or photo booth. Consider adding fairy lights or flowers around the display to draw attention. You can also create multiple smaller chalkboards to place throughout the venue, guaranteeing guests don't forget to use the hashtag.
Remember to test the hashtag before the wedding to confirm it's not already in use. This will help keep your wedding photos organized and easily accessible online.
Vintage Frame Selfie Stations
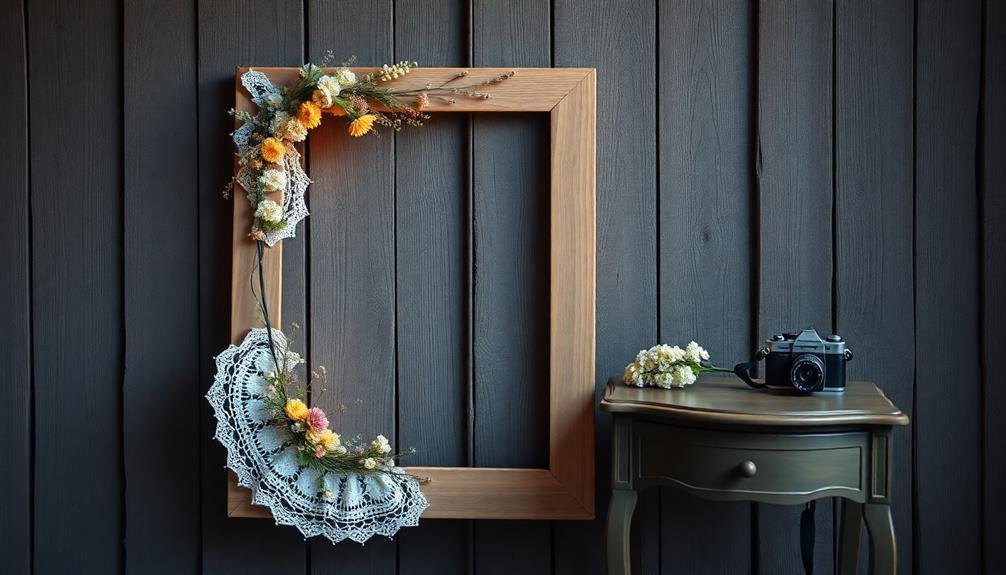
To create a vintage frame selfie station, you'll need to source affordable antique-style frames from thrift stores, flea markets, or online marketplaces.
Set up your photo area in a well-lit space with a backdrop that complements your wedding theme.
Arrange the frames at varying heights and angles, ensuring there's enough room for guests to pose behind them and snap their selfies.
Sourcing Affordable Vintage Frames
Creating a vintage frame selfie station can add a charming touch to your DIY wedding photography setup. To source affordable vintage frames, start by exploring thrift stores, flea markets, and antique shops in your area. You'll often find unique, ornate frames at bargain prices.
Don't overlook yard sales and estate sales, where you might discover hidden gems. Online marketplaces like eBay, Etsy, and Facebook Marketplace are also excellent resources for finding vintage frames. Search for "vintage picture frames" or "antique frames" and filter by price to stay within your budget.
Consider purchasing frames in bulk to save money, especially if you're planning multiple selfie stations. If you're handy, look for damaged frames that you can easily repair and repaint. This approach can yield significant savings.
Another cost-effective option is to buy new frames from discount stores and give them a vintage look using techniques like distressing or applying gold leaf. You can also create faux vintage frames using foam board, decorative molding, and metallic paint.
Setting Up Photo Area
Now that you've sourced your vintage frames, it's time to set up your selfie station. Choose a well-lit area with ample space for guests to gather. Position the frames at varying heights on a sturdy backdrop, like a decorative wall or a custom-made stand. Make sure they're securely fastened to prevent accidents.
Create a cohesive look by coordinating frame colors with your wedding theme. Add string lights or small spotlights to enhance the ambiance and improve photo quality. Place a small table nearby with props like hats, signs, and silly glasses for guests to use.
Don't forget to set up a tripod or designate a space for guests to place their phones. Include clear instructions on how to use the station, perhaps with a cute sign or chalkboard. Consider providing a hashtag for guests to use when sharing their photos on social media.
To keep the area tidy, assign a friend or family member to periodically check on the station, straighten props, and assist guests if needed.
Remember to test the lighting and frame placement beforehand to guarantee the best results for your DIY photo area.
Floral Hoop Photo Backdrops
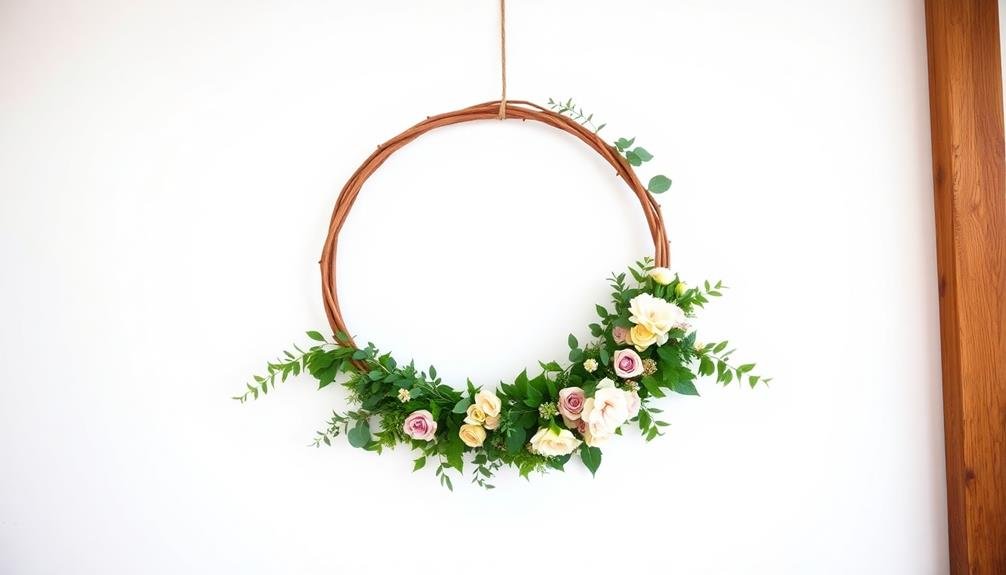
When creating floral hoop photo backdrops for your DIY wedding photography, you'll need to take into account three key aspects.
First, choose the right hoop size and material to match your wedding's aesthetic and provide a sturdy frame.
Next, master floral arrangement techniques to create a visually appealing and balanced design that complements your wedding theme.
Choosing the Right Hoop
For floral hoop photo backdrops, selecting the right hoop is essential to achieving the perfect look. Take into account the size, material, and color of the hoop to complement your wedding theme and decor. Larger hoops create a dramatic effect, while smaller ones offer a more intimate feel.
When choosing your hoop, keep these factors in mind:
| Factor | Considerations | Impact |
|---|---|---|
| Size | Space available, photo composition | Visual impact, versatility |
| Material | Durability, weight, aesthetics | Ease of use, overall look |
| Color | Wedding palette, contrast | Backdrop cohesion, visibility |
Metal hoops are sturdy and come in various finishes, such as gold, silver, or copper. Wooden hoops offer a rustic charm but may be heavier. Plastic hoops are lightweight and affordable but might not look as elegant.
Don't forget to take into account the flowers and greenery you'll use to decorate the hoop. Confirm the hoop's diameter can support your chosen floral arrangement without overwhelming it. By carefully selecting your hoop, you'll create a stunning backdrop that enhances your wedding photos and captures beautiful memories.
Floral Arrangement Techniques
Creating stunning floral arrangements for your hoop backdrop requires a combination of creativity and technique. Start by selecting a variety of flowers in complementary colors and sizes. You'll want to include large focal flowers, medium-sized blooms, and smaller filler flowers to create depth and interest.
Begin arranging your flowers by attaching floral foam or chicken wire to your hoop. This will provide a sturdy base for your arrangement. Start with your largest blooms, placing them strategically around the hoop to create a balanced design.
Next, add medium-sized flowers to fill in gaps and create shifts between the larger blooms. Use smaller filler flowers and greenery to add texture and fullness to your arrangement.
Don't forget to incorporate trailing elements like ivy or ribbon for a romantic touch. As you work, step back frequently to assess your design from different angles.
To guarantee your floral hoop backdrop lasts throughout your wedding day, mist the flowers with water and keep them out of direct sunlight. If you're using fresh flowers, create your arrangement as close to the event as possible for maximum freshness and impact.
Hoop Placement Strategies
With your floral hoop backdrop beautifully arranged, it's time to contemplate where and how to display it. Consider placing it at the ceremony site, creating a stunning focal point behind the altar or officiant.
Alternatively, use it as a photo booth backdrop during the reception, encouraging guests to snap memorable pictures.
For outdoor weddings, secure the hoop to sturdy trees or a freestanding frame. Indoors, hang it from the ceiling or mount it on a wall. Make certain it's at an appropriate height for photos, typically around 6-7 feet from the ground.
Don't limit yourself to a single hoop. Create a cascading effect with multiple hoops of varying sizes, arranged vertically or in a cluster. This adds depth and visual interest to your backdrop.
Lighting is essential for showcasing your floral hoop. Use string lights woven through the flowers or spotlights aimed at the backdrop to highlight its beauty. If you're using it for nighttime photos, consider adding battery-operated LED lights within the arrangement.
Remember to test your hoop's stability and adjust as needed. You don't want it toppling during an important moment or photo opportunity.
Polaroid Guestbook Instructions
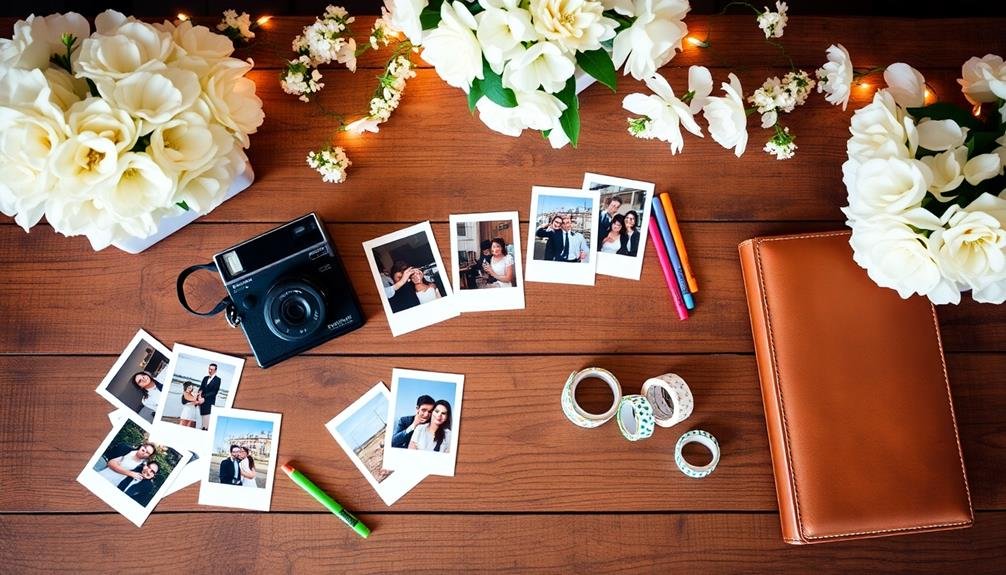
A Polaroid guestbook adds a fun, interactive element to your wedding reception. To create one, you'll need a Polaroid camera, film, a blank album, and some decorative supplies. Set up a station with clear instructions for guests to follow.
Start by choosing a sturdy album with enough pages to accommodate your guest list. Decorate the cover with your names and wedding date. Inside, leave ample space for photos and messages. Place the camera, extra film, and pens at the station.
Create a sign explaining how to use the camera and what to do with the photos. Instruct guests to take a picture, wait for it to develop, and stick it in the album. Encourage them to write a message next to their photo.
Consider having an attendant manage the station, ensuring smooth operation and preserving film. They can also help guests who aren't familiar with Polaroid cameras.
To make it more entertaining, provide props like funny hats, glasses, or signs for guests to use in their photos. This will result in a unique, personalized guestbook filled with instant memories from your special day.
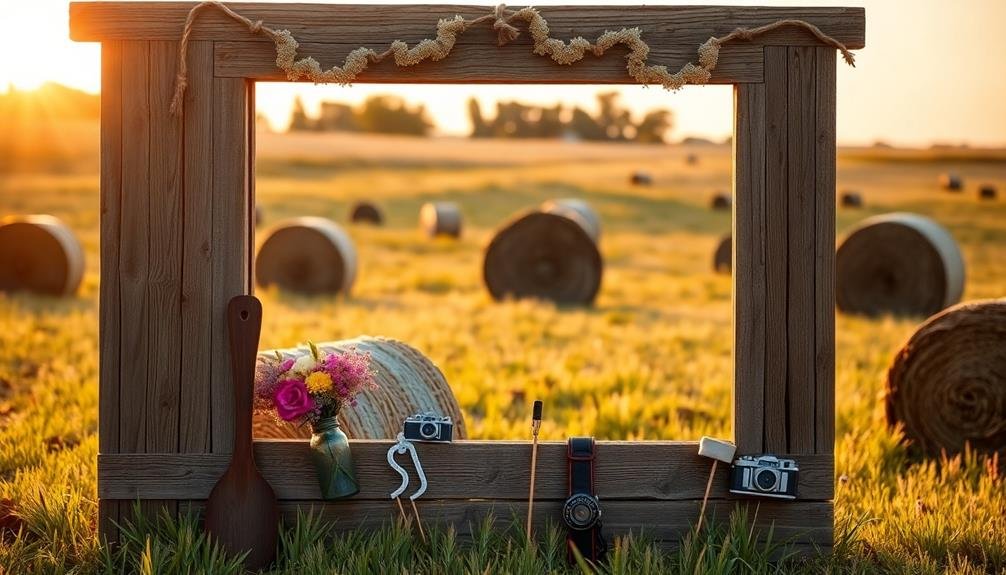
Directional Wedding Moment Arrows
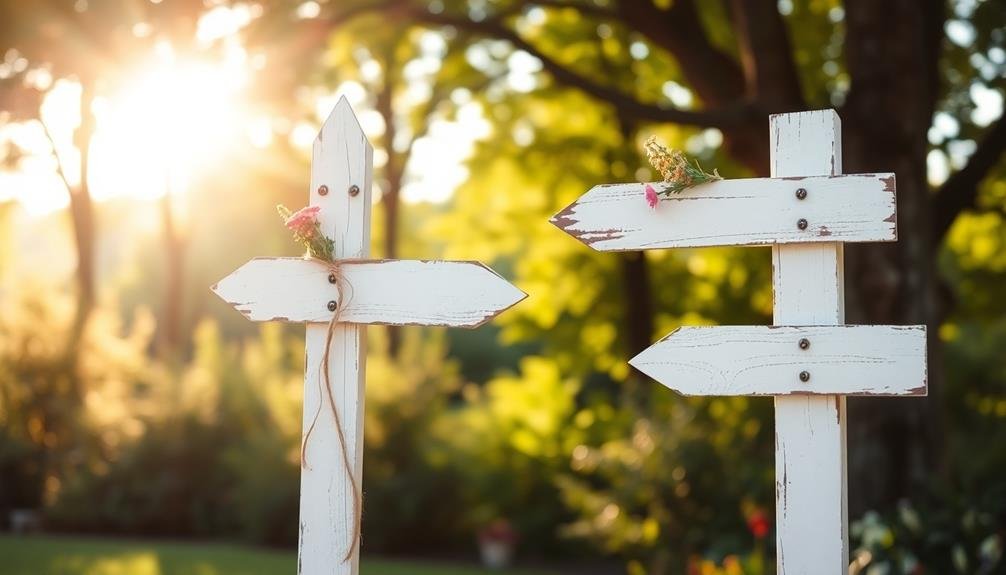
You'll love using directional wedding moment arrows to guide your guests and capture special moments.
Start by gathering affordable materials like cardboard, paint, and wooden dowels to craft eye-catching designs that match your wedding theme.
Once you've created your arrows, strategically place them throughout your venue to point guests toward photo opportunities, reception areas, or must-see decorations.
Affordable Materials for Arrows
Before your big day arrives, consider creating affordable directional arrows to guide your guests and capture special moments. You'll find plenty of budget-friendly materials to craft these arrows without breaking the bank.
Start with lightweight wood, such as balsa or thin plywood, which you can easily cut and shape. Alternatively, use sturdy cardboard for a more eco-friendly option.
For a rustic look, repurpose old wooden pallets or fence boards. Sand them down and cut them to size for a charming, weathered appearance.
If you're aiming for a modern aesthetic, opt for foam board or acrylic sheets, which are lightweight and easy to work with.
To add color and personality, use acrylic paint, spray paint, or even chalkboard paint for a customizable surface. Don't forget to seal your arrows with a clear coat to protect them from the elements.
For lettering, consider using vinyl decals, stencils, or hand-painting with a steady hand.
Embellish your arrows with affordable decorations like twine, ribbon, or artificial flowers from a dollar store.
Crafting Eye-Catching Designs
Eye-catching designs for your directional wedding moment arrows can transform simple signage into memorable decor pieces. To craft visually appealing arrows, start by choosing a cohesive color scheme that complements your wedding's overall aesthetic.
Consider incorporating your wedding colors, metallic accents, or rustic elements to match your venue.
Use stencils or freehand lettering to add text to your arrows. Opt for elegant cursive fonts or bold block letters, depending on your style. Don't forget to include key moments like "Ceremony," "Reception," or "Dance Floor" to guide your guests.
Embellish your arrows with decorative elements such as floral designs, geometric patterns, or subtle textures. You can use paint, markers, or even decoupage techniques to achieve these effects. For a unique touch, try adding small embellishments like rhinestones, glitter, or dried flowers.
Consider creating a mix of arrow sizes and styles to add visual interest. Combine thin, elongated arrows with chunkier, statement pieces. You can also experiment with different arrow shapes, from classic straight arrows to whimsical curved designs.
Remember to maintain consistency in your overall theme to create a cohesive look throughout your wedding venue.
Strategic Placement Tips
Once you've crafted your stunning directional wedding moment arrows, it's time to reflect on their placement for maximum impact. Contemplate key locations where guests will naturally gather or pass through.
Place arrows at the venue entrance, guiding attendees to the ceremony site, reception area, and other important spaces.
Don't forget to highlight special moments throughout the day. Position arrows near the cake-cutting station, dance floor, or photo booth to draw attention and encourage participation. Use them to direct guests to the gift table, guest book, or seating chart.
For outdoor weddings, strategically place arrows along pathways or at crossroads to prevent confusion. If you're hosting events at multiple locations, use arrows to guide guests between venues seamlessly.
Remember to reflect on visibility when placing your arrows. Make sure they're at eye level and well-lit, especially for evening events. You can also use them to create photo opportunities by placing them in picturesque spots around the venue.
Lastly, don't overdo it. Use arrows sparingly to maintain their impact and avoid cluttering your space. Focus on key areas where guidance is most needed to enhance your guests' experience.
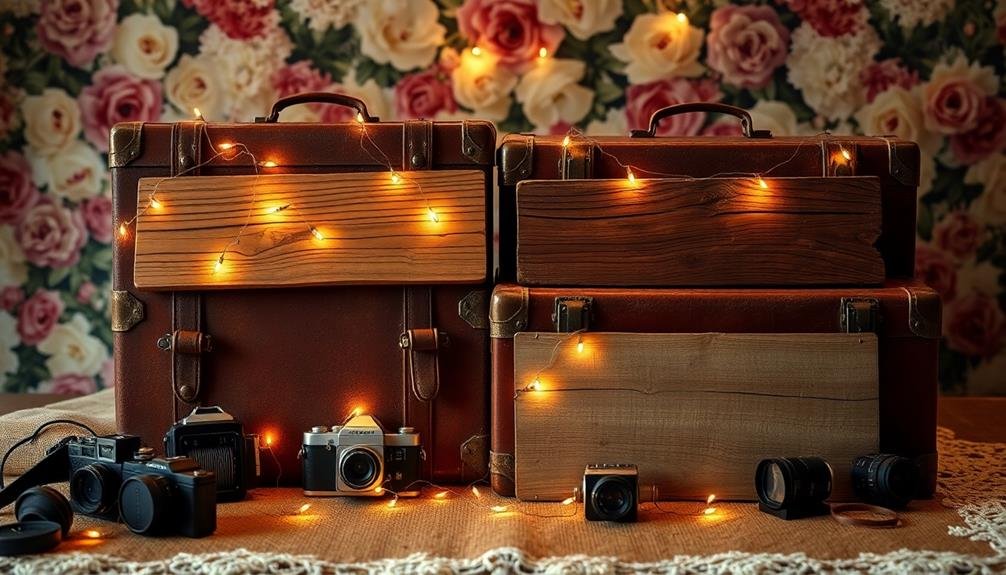
Repurposed Palette Camera Props
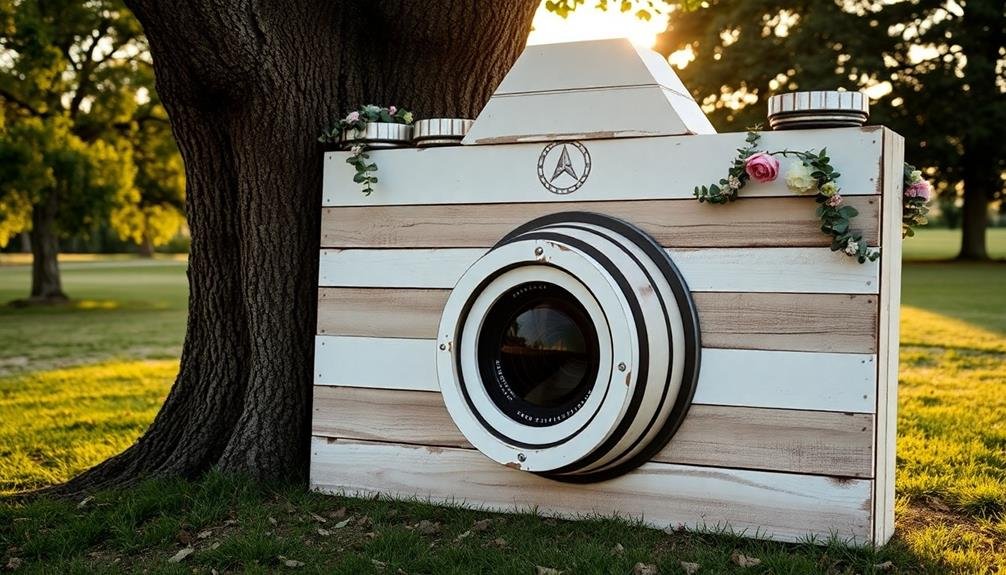
Crafted from reclaimed wood, repurposed palette camera props offer a charming and budget-friendly addition to your DIY wedding photography setup.
These versatile props can serve multiple purposes, from photo booth frames to decorative elements in your wedding shots. To create your own palette camera props, you'll need basic woodworking tools and some creativity.
Start by disassembling a wooden pallet and selecting the best planks. Sand them down to remove splinters and create a smooth surface. Cut the wood to form a camera shape, including a lens and viewfinder. Paint or stain the wood to match your wedding color scheme, and add embellishments like faux buttons or a flash.
Consider these ideas for incorporating your palette camera props:
- Use them as frames for guests to pose behind in the photo booth
- Place them strategically around the venue for candid shots
- Incorporate them into the couple's portrait session for unique, rustic images
- Display them as part of your wedding decor, doubling as both props and decorations
Personalized Film Clapperboard Signs
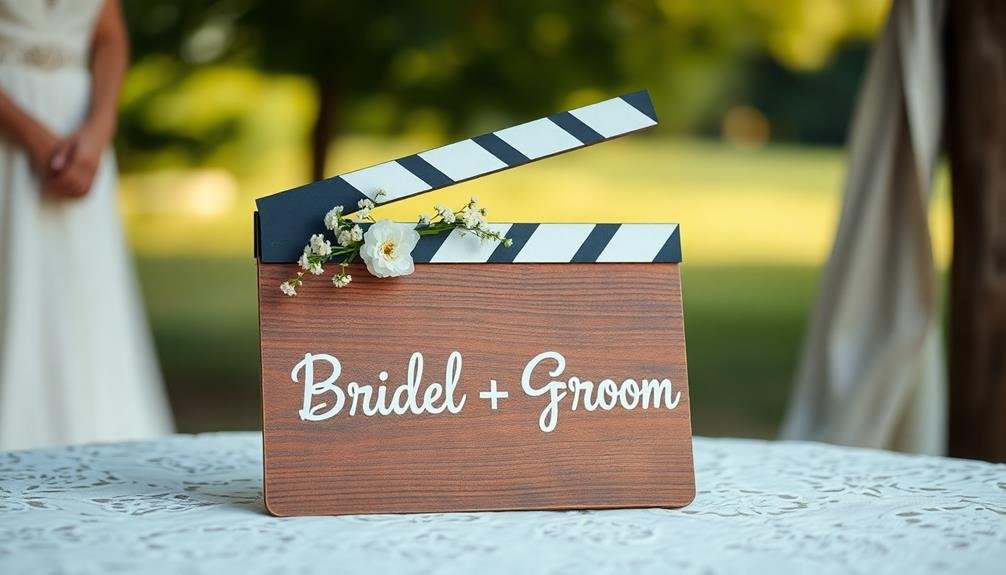
While wooden palette cameras add a rustic charm, personalized film clapperboard signs bring a touch of Hollywood glamour to your DIY wedding photography.
These iconic signs serve both as decorative elements and functional props for your wedding photos and videos.
To create your own clapperboard sign, start with a small chalkboard or paint a piece of wood with chalkboard paint.
Add white stripes at the top to mimic the classic clapperboard look. Use letter stencils or vinyl decals to add your names, wedding date, and "Scene 1: I Do" or another clever phrase.
For a more authentic feel, attach a hinge and a clapper stick to the top of the board. You can find these components at hardware stores or online.
Paint them white to match the stripes.
On your wedding day, use the clapperboard to mark different moments throughout the celebration.
Have guests pose with it for fun shots, or use it to indicate the start of important scenes like the first kiss or cake cutting.
You'll create memorable photos while adding a cinematic flair to your wedding album.
Handwritten Quote Photo Opportunities
Elevate your wedding photos with handwritten quote opportunities that add a personal touch to your special day. These DIY elements not only showcase your creativity but also create unique, Instagram-worthy moments for you and your guests to cherish.
To create handwritten quote photo opportunities, you'll need large pieces of paper or cardboard, markers, and some creativity. Choose quotes that hold special meaning for you as a couple, such as:
- Lines from your favorite songs or poems
- Meaningful phrases from your vows
- Inside jokes or catchphrases you share
- Inspirational words about love and commitment
Display these quotes in various locations throughout your venue, like near the ceremony backdrop, at the reception entrance, or in a dedicated photo booth area. You can also incorporate them into your decor by framing them or hanging them as banners.
Encourage guests to interact with the quotes by providing props or designating specific poses. For example, have couples hold up a quote about love or ask friends to gather around a friendship-themed message.
Don't forget to brief your photographer about these special elements so they can capture the moments effectively. With handwritten quotes, you'll create memorable, personalized photos that truly reflect your unique love story.
Upcycled Window Pane Frames
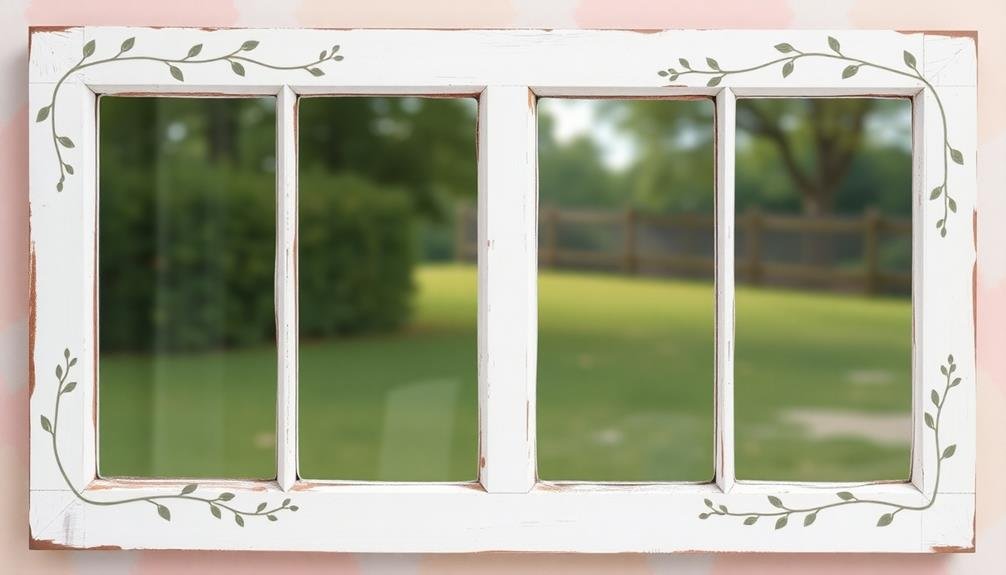
For a charming and budget-friendly backdrop, consider using upcycled window pane frames in your wedding photography. These versatile props can add a rustic, vintage touch to your photos while serving multiple purposes. You'll find old window frames at thrift stores, flea markets, or even in your grandparents' shed.
To prepare the frames, clean them thoroughly and sand any rough edges. You can paint them to match your wedding colors or leave them weathered for a more authentic look. Hang sheer curtains behind the panes to create a soft, dreamy effect, or use them as frames for your seating chart or menu.
For photo ops, position the frames strategically around your venue. Create a photo booth area where guests can pose behind the panes, or use them to frame the couple during portrait sessions. You can also hang them from trees or set them up on easels for outdoor shots.
Don't forget to decorate the frames with flowers, fairy lights, or ribbons to enhance their visual appeal. With a little creativity, these upcycled window panes will become a standout feature in your wedding photos and decor.
Frequently Asked Questions
How Can I Ensure Guests Participate in DIY Photo Opportunities?
To encourage guest participation in DIY photo opportunities, you'll want to create clear, inviting signage. Set up fun props, provide easy instructions, and designate a photo area. Don't forget to mention it during speeches or announcements.
What Lighting Works Best for Homemade Photo Booth Setups?
For your homemade photo booth, you'll want soft, flattering light. Use LED ring lights or softboxes for even illumination. Don't forget a backlight to separate subjects from the background. Avoid harsh shadows with diffused lighting options.
Are There Any Apps to Help Create Custom Wedding Photo Filters?
You'll find several apps perfect for creating custom wedding photo filters. Try Canva, VSCO, or Lightroom Mobile. They're user-friendly and offer various options to design unique filters that'll match your wedding theme and style. Don't forget to experiment!
How Do I Protect DIY Signs and Props From Weather Damage?
You'll want to weatherproof your signs and props. Apply a clear sealant or varnish to protect against moisture. Use waterproof materials when possible. For fabric items, consider scotchgard. Store items properly when not in use to prevent damage.
What's the Ideal Timeline for Setting up DIY Photography Stations?
You'll want to set up your DIY photography stations at least 2-3 hours before guests arrive. Start with the backdrop, then add props and lighting. Don't forget to test your setup and make any necessary adjustments.
In Summary
You've now got plenty of creative ideas for DIY wedding photography and videography signs that won't break the bank. Remember, it's all about personal touches and making your day unique. Don't be afraid to mix and match these ideas or come up with your own variations. With a little effort and imagination, you'll create memorable photo opportunities that'll have your guests snapping away. Your budget-friendly signs will add charm and personality to your special day's captured memories.

I’m Sarah, the creator and writer behind this site. I’m a wife and a mother of two wonderful kids who keep me on my toes and inspire me daily. My passion lies in creating and organizing memorable events and group activities, where people can come together and make lasting memories.

Leave a Reply