Create a winter wonderland for your wedding with these DIY stationery ideas. Craft snowflake-embellished invitations using glittery paper and die-cut shapes. Design icy blue place cards with frosty edges and elegant calligraphy. Make glittering save-the-date magnets from acrylic shapes and sparkling embellishments. Fashion rustic pine cone programs by combining nature with printed details. Add a touch of frost to your envelopes with vellum liners decorated with winter scenery. These projects capture the season's magic while keeping costs down. With a little creativity and some seasonal materials, you'll set the perfect tone for your frosty celebration.
Key Takeaways
- Create snowflake-embellished invitations using white cardstock, glitter, and a snowflake punch for an elegant winter theme.
- Design icy blue place cards with frosty edges using pale blue cardstock and white craft paint or silver metallic marker.
- Craft glittering save-the-date magnets using clear acrylic shapes, glitter, and magnetic strips for a memorable announcement.
- Make rustic pine cone programs by attaching printed information to pine cones with twine and hot glue.
- Use vellum paper to create frosted window envelope liners, decorated with winter scenery designs for a magical touch.
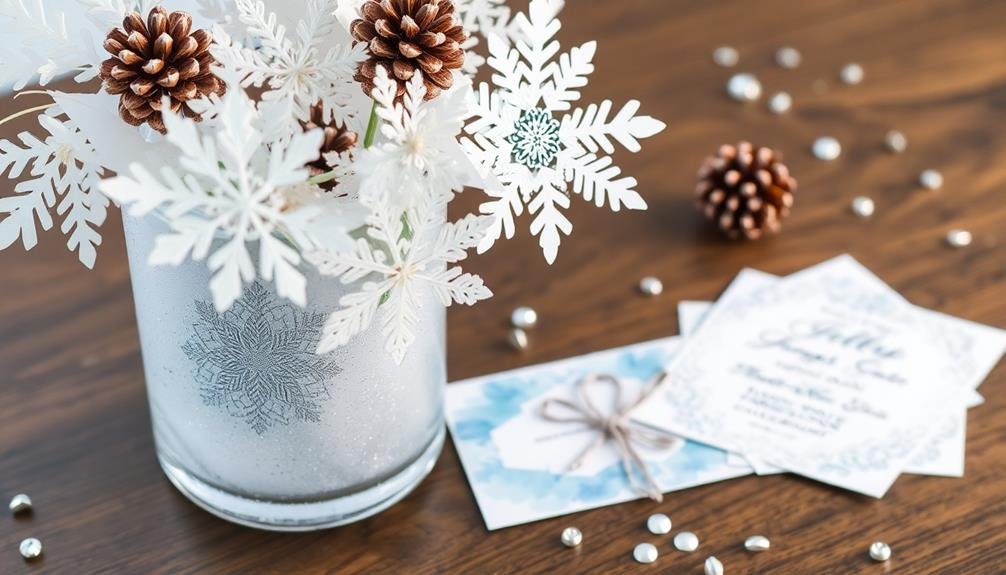
Snowflake-Embellished Invitations
Snowflakes gently falling onto your wedding invitations can create a magical winter wonderland effect. To achieve this look, you'll need white cardstock, glitter, and a snowflake punch or die-cutting machine.
Start by selecting a classic invitation design and printing it on high-quality paper. Next, punch out small snowflakes from glittery paper or use white paper and add glitter afterward.
Carefully arrange the snowflakes on your invitations, varying the sizes and placement for a natural, scattered look. Use a small dot of glue to secure each snowflake. For added dimension, slightly bend the edges of the snowflakes upward. You can also incorporate larger, more intricate snowflakes as focal points.
To enhance the wintry feel, consider using metallic silver or ice blue ink for your text. Add a touch of elegance with a vellum overlay featuring a delicate snowflake pattern.
For a cohesive look, apply the same snowflake embellishments to your RSVP cards, menu cards, and thank you notes. Remember to use a heavier envelope to protect your delicate creations during mailing.
With these simple techniques, you'll craft stunning, personalized invitations that set the tone for your winter wedding.
Icy Blue Place Cards
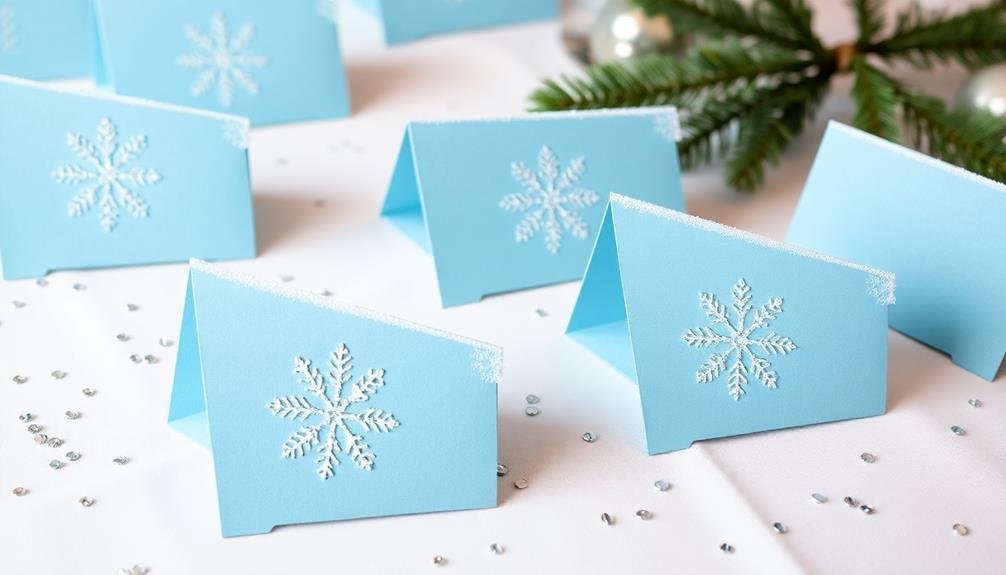
Carrying the winter theme from your invitations to your reception, icy blue place cards offer a sophisticated touch to your table settings. You can create these elegant cards using simple materials and techniques that won't break your budget.
Start with high-quality cardstock in a pale blue shade. Cut it into 3×2 inch rectangles for standard place cards. To add a frosty effect, lightly brush the edges with white craft paint or use a silver metallic marker. For a shimmer, sprinkle clear or iridescent glitter while the paint is still wet.
Write guests' names using a white gel pen or silver calligraphy ink. If you're not confident in your handwriting, print names on transparent adhesive labels using a fancy font. Alternatively, use a computer to print directly onto the cardstock.
Enhance the wintry look by adding small snowflake stickers or stamping snowflake designs in white ink. For a 3D effect, attach tiny crystal or pearl embellishments.
Finally, fold the cards in half and place them at each setting.
These DIY icy blue place cards will impress your guests and tie your winter wedding theme together beautifully.
Glittering Save-the-Date Magnets
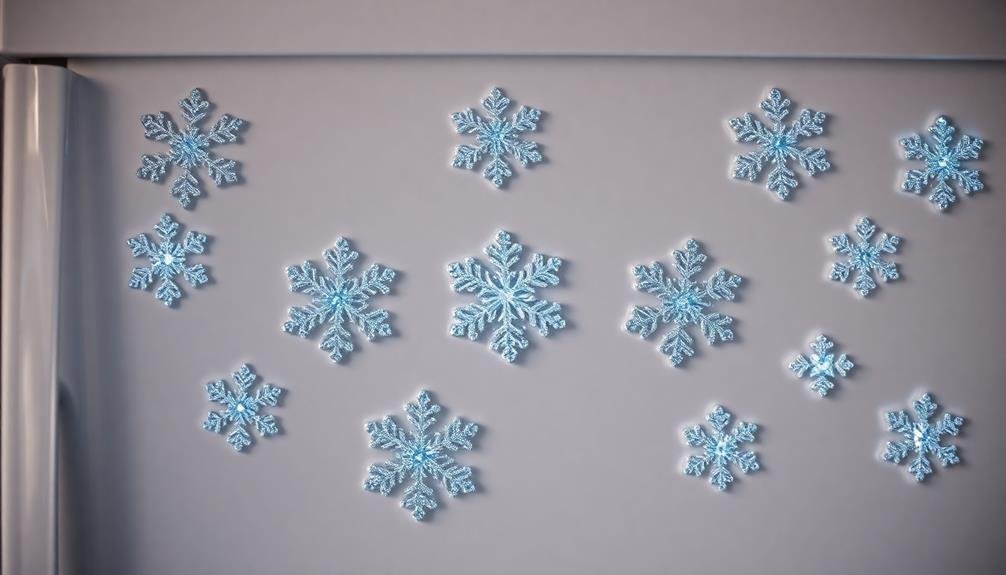
A touch of sparkle can make your save-the-date announcements unforgettable. Glittering save-the-date magnets are a perfect way to combine practicality with winter wedding charm.
You'll need clear acrylic shapes, magnetic strips, glitter, and your printed save-the-date information.
Start by cutting your acrylic shapes into snowflakes, stars, or simple circles. Print your wedding details on high-quality paper and cut them to fit within the acrylic shapes. Apply a thin layer of clear glue to one side of the acrylic and carefully sprinkle glitter over it.
Once dry, attach your printed information to the non-glittered side. For the finishing touch, adhere a small magnetic strip to the back. This allows your guests to display the save-the-date on their refrigerators, keeping your special day at the forefront of their minds.
Choose glitter colors that complement your winter theme – silver, white, or pale blue work well. For an extra frosty effect, mix in some iridescent glitter. Remember to seal the glitter with a clear spray to prevent shedding.
These DIY magnets aren't just beautiful; they're also cost-effective and can be made in batches, saving you time and money.
Rustic Pine Cone Programs
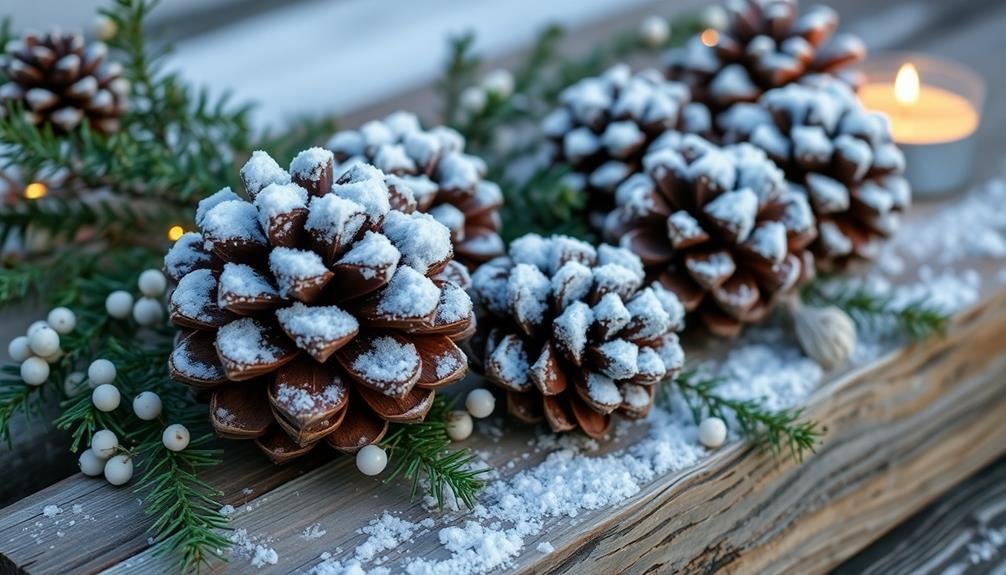
Pine cones bring a touch of woodland charm to your winter wedding stationery. For rustic pine cone programs, you'll need to gather pine cones, cardstock, twine, and a hot glue gun. Choose pine cones that are similar in size and shape for a cohesive look. Clean them thoroughly and let them dry completely before use.
Create your program content using design software or a word processor, then print it on thick cardstock. Cut the cardstock to size, leaving enough room at the top to attach the pine cone. Fold the program in half, creasing it neatly.
Next, tie a piece of twine around the top of each pine cone, leaving enough length to secure it to the program. Apply a small amount of hot glue to the back of the pine cone and press it firmly onto the top of the folded program. Hold it in place until the glue sets.
For an extra wintery touch, lightly dust the pine cones with artificial snow or silver glitter. You can also add sprigs of evergreen or small berries for additional festive flair.
These unique programs will serve as both informative guides and charming keepsakes for your guests.
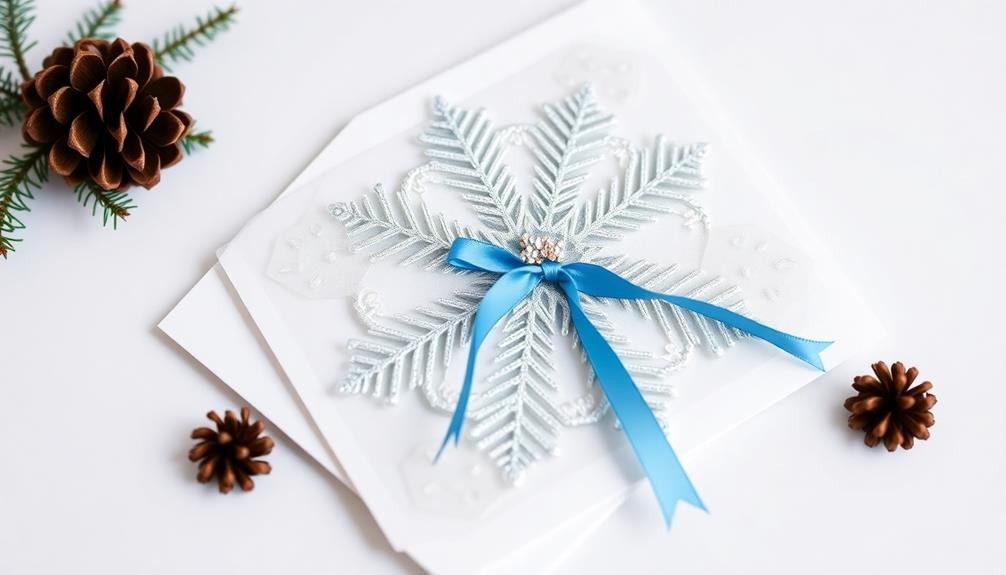
Frosted Window Envelope Liners
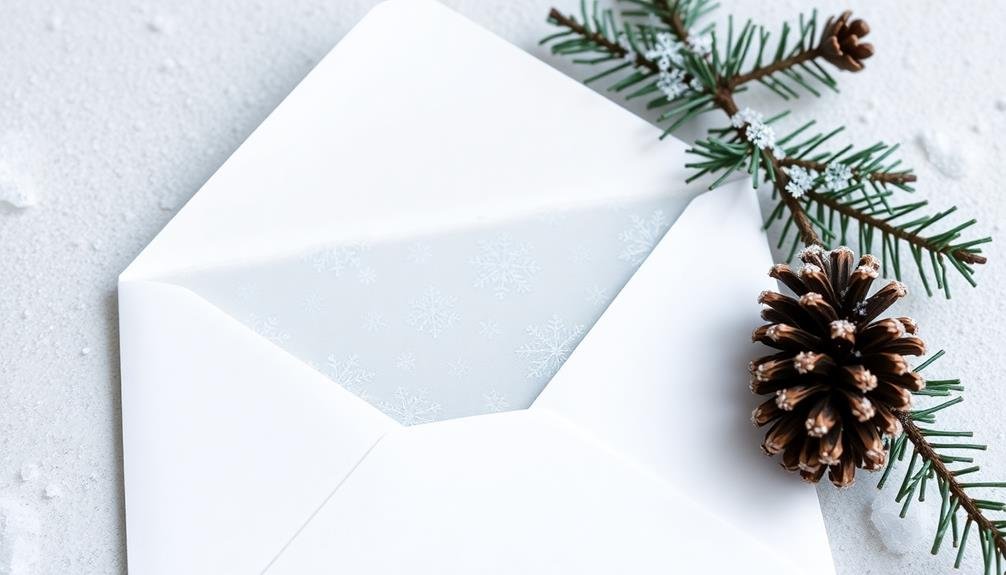
Frosted window envelope liners add a touch of winter magic to your wedding invitations. You can create this enchanting effect using vellum paper and a few simple techniques.
Start by measuring the inside of your envelopes and cutting vellum sheets to fit. Next, choose a design that evokes winter scenery, such as snowflakes, bare trees, or icicles.
To create a frosted look, you've got several options. Try using white ink on the vellum to paint your chosen design, or experiment with embossing powder for a raised, textured effect.
Another method is to use a fine-tipped glue pen to draw your design, then sprinkle it with fine glitter or translucent micro beads.
For a more natural appearance, you can lightly spray the vellum with frosted glass spray paint. This creates a delicate, icy sheen that's perfect for winter weddings.
Once your liners are dry, carefully insert them into your envelopes, securing them with a small amount of adhesive if needed.
These frosted window liners will give your guests a sneak peek of the winter wonderland theme awaiting them at your celebration, setting the tone for your special day.
Frequently Asked Questions
How Far in Advance Should Winter Wedding Invitations Be Sent Out?
You'll want to send out winter wedding invitations 8-10 weeks before your big day. This gives guests ample time to plan for travel and accommodations, especially considering potential weather challenges. Don't forget to include save-the-dates even earlier!
What Eco-Friendly Alternatives Are Available for Winter Wedding Stationery?
You'll find plenty of eco-friendly options for your winter wedding stationery. Consider recycled paper, plantable seed paper, or digital invitations. You can also use soy-based inks, opt for minimalist designs, or choose reusable materials like fabric or wood.
Can DIY Winter Wedding Stationery Be Professionally Printed?
Yes, you can have your DIY winter wedding stationery professionally printed. You'll design the artwork yourself, then send it to a printing service. They'll produce high-quality prints of your designs on your chosen paper stock.
How to Incorporate Cultural Traditions Into Winter Wedding Stationery Designs?
You can incorporate cultural traditions into winter wedding stationery by using traditional symbols, colors, or patterns. Include meaningful quotes or proverbs, incorporate family crests, or use culturally significant motifs. Don't forget to blend these elements with winter themes.
What Are Budget-Friendly Options for Winter Wedding Stationery?
You can save money on winter wedding stationery by creating DIY designs. Use digital templates, print at home, or opt for postcard invitations. Consider handmade paper, simple embellishments, and online RSVPs to keep costs down while maintaining a festive look.
In Summary
You've now got a winter wonderland of DIY stationery ideas for your frosty wedding. From snowflake-adorned invitations to rustic pine cone programs, you'll create a cohesive and magical theme. Don't forget the icy blue place cards and glittering save-the-dates to complete the look. With these creative and budget-friendly options, you'll impress your guests while keeping costs down. Embrace the season's beauty and let your crafty side shine through in every paper detail of your special day.

I’m Sarah, the creator and writer behind this site. I’m a wife and a mother of two wonderful kids who keep me on my toes and inspire me daily. My passion lies in creating and organizing memorable events and group activities, where people can come together and make lasting memories.
Leave a Reply