Create a professional-looking wedding dessert table on a budget with these DIY ideas. Use tiered cake stands for an elegant centerpiece, or arrange mismatched vintage china for a charming display. Stack rustic wooden crates for a country-chic look, or build a colorful macaron tower for visual impact. Frame a chalkboard menu to showcase your offerings, and construct a donut wall for a fun, interactive element. Craft cupcake bouquet centerpieces, design a coordinated candy buffet, and create a stunning backdrop using affordable materials. With these creative touches, you'll impress your guests without emptying your wallet. Discover how to bring these ideas to life and make your dessert table truly unforgettable.
Key Takeaways
- Create a tiered cake stand centerpiece using mismatched vintage china for a charming, professional look at a fraction of the cost.
- Assemble cupcake bouquets as edible centerpieces, combining decor and dessert for a unique, cost-effective display.
- Utilize wooden crates for a rustic arrangement, adding height and interest while keeping expenses low.
- Design a DIY donut wall as a stunning focal point, offering an interactive experience and doubling as a photo backdrop.
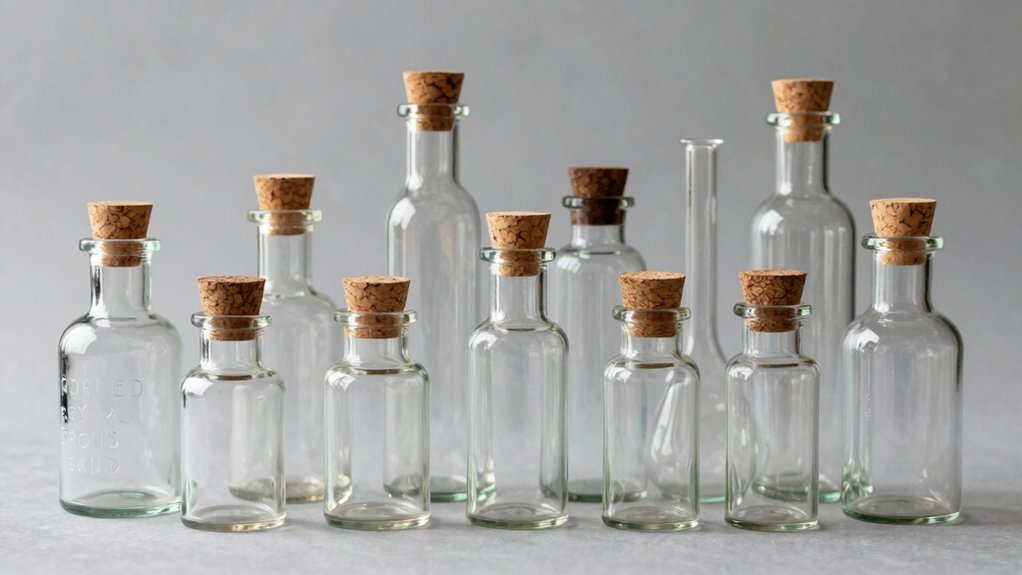
- Craft mason jar dessert parfaits for an elegant, portion-controlled option that can be prepared in advance to save time and money.
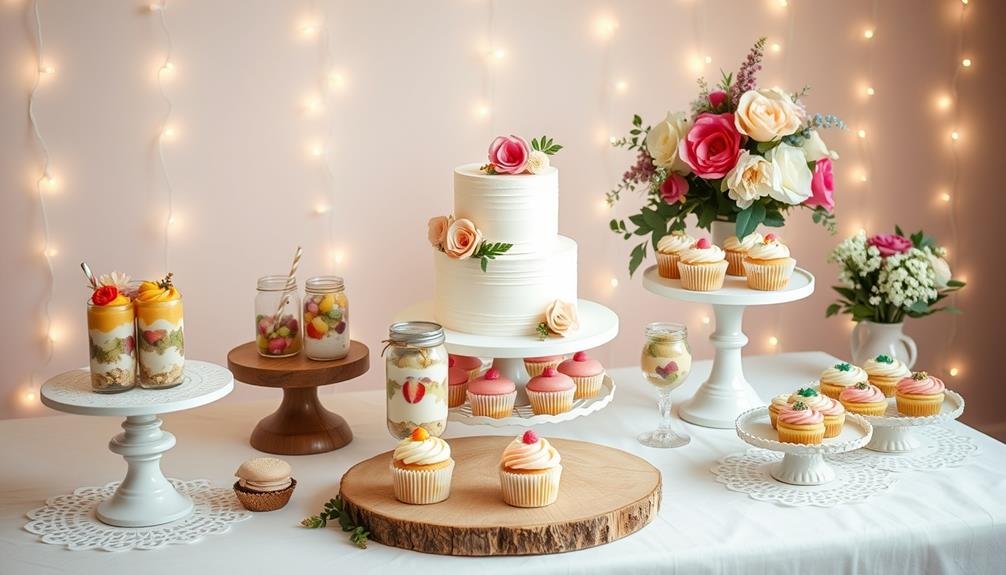
Tiered Cake Stand Centerpiece
A tiered cake stand centerpiece serves as the perfect focal point for your DIY wedding dessert table.
It's an elegant way to display a variety of treats while maximizing vertical space. To create this eye-catching centerpiece, you'll need three cake stands of different sizes and heights.
Start by selecting a large, sturdy base stand for the bottom tier. Place your main wedding cake or a collection of cupcakes here.
For the middle tier, choose a slightly smaller stand and fill it with bite-sized desserts like macarons, cake pops, or mini tarts.
Top it off with the smallest stand, perfect for showcasing a special treat or a small cutting cake for the newlyweds.
To add a personal touch, decorate the stands with ribbon, lace, or fresh flowers that match your wedding theme.
You can also use cake plates or even vintage china to create a unique, eclectic look.
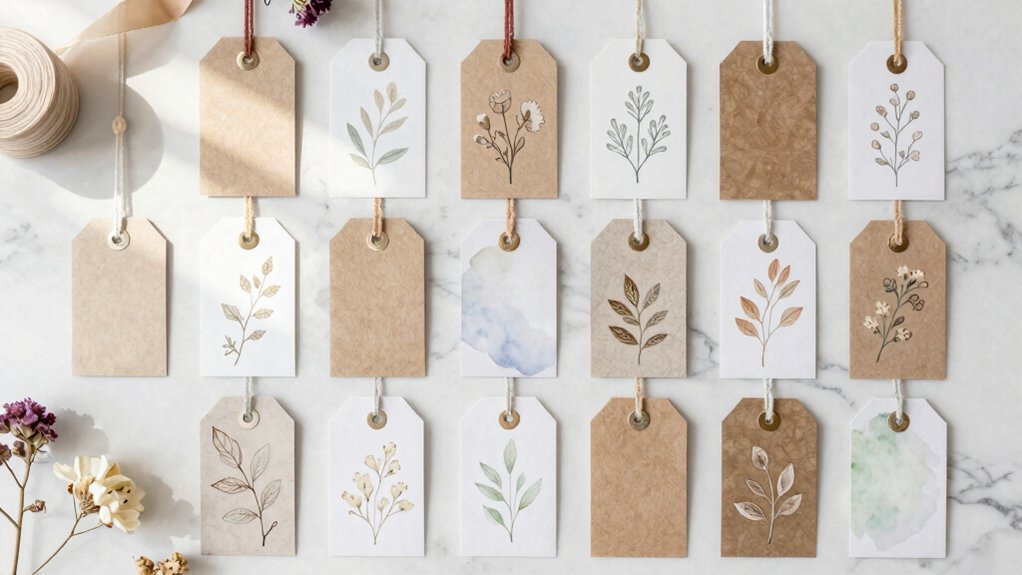
Don't forget to include small dessert cards to label each treat.
This DIY centerpiece not only saves money but also allows you to customize every detail to fit your vision perfectly.
Mismatched Vintage China Display
While tiered cake stands offer a classic look, you can also create a charming and eclectic dessert display using mismatched vintage china. This DIY approach adds a touch of nostalgia and personality to your wedding dessert table. Scour thrift stores, flea markets, and antique shops for unique plates, teacups, and saucers in various patterns and colors.
Don't worry about finding matching sets; the beauty lies in the mix-and-match aesthetic.
To create a cohesive look with your mismatched china display:
- Choose a color palette to guide your selections
- Vary the heights by stacking plates or using cake stands
- Group similar items together for visual balance
- Incorporate complementary vintage elements like doilies or lace tablecloths
Arrange your desserts on the vintage china, placing larger items on dinner plates and smaller treats in teacups or on saucers. Use tiered cake stands or overturned teacups to add height and dimension to your display.
Remember to include labels for each dessert, which you can create using small picture frames or folded cardstock. This DIY approach not only saves money but also adds a personal touch to your wedding celebration.
Rustic Wooden Crate Arrangement
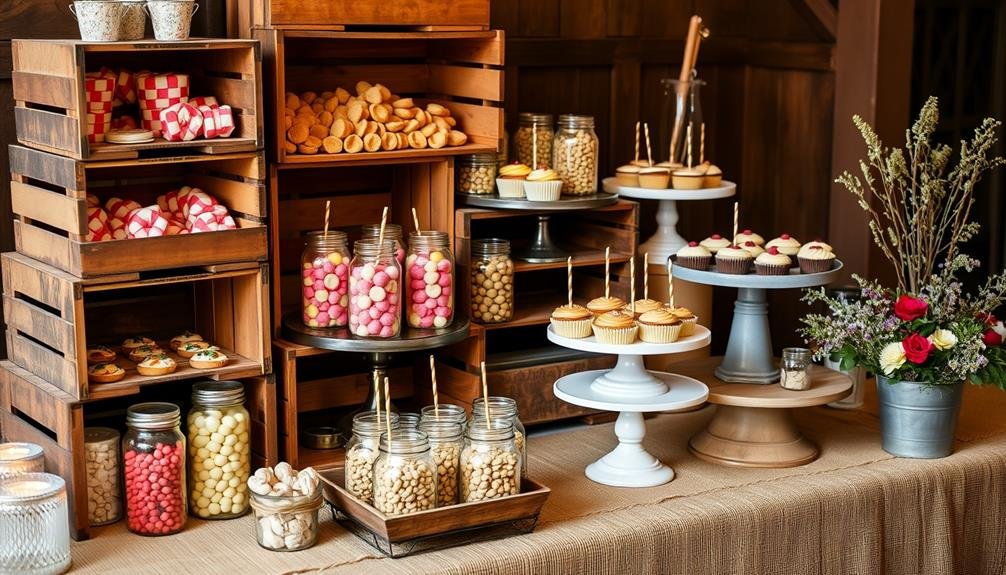
To create a rustic wooden crate arrangement for your wedding dessert table, you'll first need to source affordable crates from flea markets, online marketplaces, or craft stores.
Once you've gathered your crates, experiment with stacking and arranging them to create varying heights and visual interest.
Add a personal touch by decorating the crates with paint, stencils, or floral accents that match your wedding theme.
Sourcing Affordable Wooden Crates
Rustic wooden crates can really spruce up your DIY wedding dessert table, but finding affordable options doesn't have to break the bank.
You'll find that with a bit of creativity and resourcefulness, you can source inexpensive crates that'll look just as charming as their pricier counterparts.
Start by checking local farm stands, flea markets, and thrift stores. These places often have old wooden crates at bargain prices.
Don't shy away from crates that look a bit worn; they'll add to the rustic charm. If you're handy with tools, consider making your own crates using reclaimed wood or inexpensive pine boards.
Here are four more ways to source affordable wooden crates:
- Ask grocery stores if they've any fruit crates they're willing to part with.
- Check online marketplaces like Facebook Marketplace or Craigslist for secondhand options.
- Rent crates from party supply stores or event rental companies.
- Purchase unfinished crates from craft stores and stain them yourself.
Stacking and Arranging Techniques
Once you've sourced your rustic wooden crates, it's time to focus on arranging them effectively for your wedding dessert table. Start by cleaning and sanding the crates to guarantee a splinter-free surface. Next, experiment with different stacking configurations to create an eye-catching display.
Consider these stacking techniques:
| Technique | Description |
|---|---|
| Pyramid | Stack crates in descending sizes |
| Staircase | Arrange crates in ascending height |
| Asymmetrical | Mix different sizes for a dynamic look |
| Nested | Place smaller crates inside larger ones |
When arranging, keep stability in mind. Use wood glue or discreet brackets to secure stacked crates. Incorporate varying heights to add visual interest and maximize table space. Place larger desserts on lower levels for easy access, while smaller treats can go on higher tiers.
Don't forget to leave space between crates for decorative elements like flowers, candles, or framed signs. Use fabric or kraft paper to line the crates, adding a polished touch while protecting your desserts. Finally, consider the overall balance and flow of your dessert table, guaranteeing guests can easily navigate and serve themselves.
Decorating Crates Creatively
Frequently, the raw charm of rustic wooden crates can be enhanced with creative decorations. These versatile containers offer a perfect canvas for your DIY wedding dessert table. By adding personal touches, you'll transform simple crates into eye-catching displays that complement your wedding theme while saving money.
To decorate your crates creatively:
- Paint them in your wedding colors or whitewash for a shabby chic look.
- Line the interior with vintage fabric or lace for added texture.
- Attach floral arrangements or greenery to the corners or edges.
- Add custom signage or monograms using stencils or vinyl decals.
Don't hesitate to mix and match different sizes and shapes of crates to create visual interest. Stack them vertically or arrange them horizontally to maximize space and create levels for your desserts.
You can also repurpose old drawers or vintage suitcases alongside the crates for a unique, eclectic look. Remember to sand rough edges and seal any painted surfaces to guarantee food safety.
With these creative touches, your rustic crate arrangement will become a standout feature of your DIY wedding dessert table.
Colorful Macaron Tower
Create a stunning centerpiece for your wedding dessert table with a colorful macaron tower.
You'll need to carefully stack and secure the delicate macarons, choosing complementary flavors and hues that match your wedding palette.
Enhance the display with decorative elements like fresh flowers, ribbons, or a custom topper to make your macaron tower truly eye-catching.
Building the Macaron Tower
A stunning centerpiece for your DIY wedding dessert table, the colorful macaron tower adds a touch of whimsy and elegance. Building this eye-catching display isn't as intimidating as it may seem. You'll need a sturdy base, such as a foam cone or a tiered cardboard structure, and plenty of macarons in various colors and flavors.
To create your tower:
- Cover the base with fondant or edible paper to hide its structure.
- Secure each macaron with a dab of royal icing or melted chocolate.
- Start from the bottom, working your way up in concentric circles.
- Alternate colors and flavors for a visually appealing pattern.
As you build, make sure each layer is level and stable. You can fill any gaps with smaller macarons or edible decorations like sugar pearls or flowers.
For added stability, consider inserting wooden skewers through the center of the tower. Remember to leave some space between the macarons for easy guest access.
With patience and attention to detail, you'll create a professional-looking macaron tower that's sure to impress your wedding guests without breaking the bank.
Flavor and Color Combinations
When putting together your macaron tower, choosing the right flavor and color combinations can make or break your dessert display. Consider your wedding's color scheme and theme when selecting macaron hues. For a cohesive look, opt for complementary colors or shades within the same color family. You can create an ombre effect by arranging macarons from light to dark tones.
Popular flavor combinations include vanilla with lavender, chocolate with raspberry, and lemon with blueberry. Don't be afraid to experiment with unique pairings like salted caramel, pistachio rosewater, or matcha green tea. Remember to balance sweet and tart flavors for a well-rounded taste experience.
To add visual interest, incorporate metallic accents like gold or silver leaf on select macarons. You can also use edible glitter or pearl dust for a subtle shimmer. For a romantic touch, consider adding edible flower petals to some of your macarons.
Label each flavor with small, elegant tags to help guests navigate the options. This also adds a decorative element to your tower.
Decorative Display Tips
Elevating your macaron tower from a simple stack to a stunning centerpiece requires attention to detail and creative flair. Start by selecting a sturdy, tiered stand that complements your wedding theme. Opt for a clear acrylic or elegant metallic stand to let your macarons shine.
Arrange your macarons in a gradient pattern, shifting from light to dark shades or creating an ombré effect. This visual progression will captivate your guests and add depth to your display.
To make your macaron tower truly eye-catching, consider these decorative tips:
- Intersperse fresh flowers or edible blooms between macaron layers
- Add metallic accents with gold or silver leaf on select macarons
- Incorporate ribbons or lace around each tier for a romantic touch
- Place small LED lights beneath the stand for a magical glow
Don't forget to label your macaron flavors with elegant calligraphy cards or small chalkboards. This personal touch will help guests navigate the delicious options.
Framed Chalkboard Menu
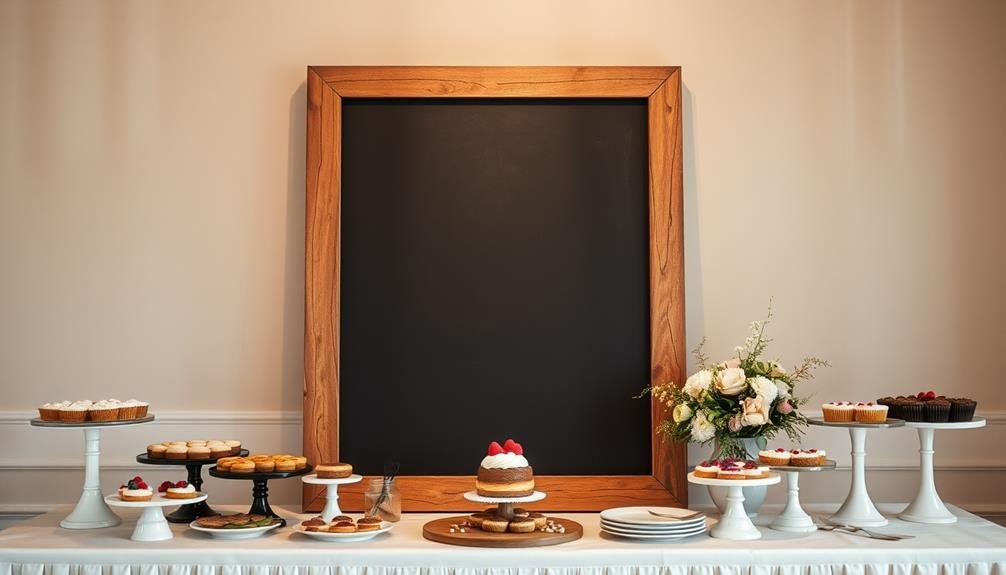
One classic and versatile addition to your DIY wedding dessert table is a framed chalkboard menu. This elegant yet cost-effective solution allows you to showcase your dessert offerings while adding a touch of rustic charm to your setup.
You can easily create this piece by purchasing an inexpensive large frame from a thrift store or craft shop and painting it to match your wedding colors.
To transform the frame into a chalkboard, simply apply chalkboard paint to a piece of sturdy cardboard or plywood cut to fit inside the frame. Once dry, you're ready to list your desserts in beautiful chalk lettering.
If you're not confident in your handwriting skills, consider using stencils or hiring a friend with good penmanship to help.
Don't forget to include any special dietary information, such as gluten-free or vegan options, to help guests navigate your dessert selection.
You can also use the chalkboard to display a sweet quote about love or marriage, adding a personal touch to your dessert table.
This DIY project isn't only budget-friendly but also allows for last-minute changes, making it a practical and stylish choice for your wedding day.
Mason Jar Dessert Parfaits
Mason jar dessert parfaits offer a charming and practical addition to your wedding dessert table.
You'll create an eye-catching display with layers of colorful ingredients, allowing guests to see the tempting components inside each jar.
Layered Visual Appeal
A stunning addition to any DIY wedding dessert table, parfaits layered in mason jars offer both visual appeal and delicious variety. These customizable treats allow you to showcase your creativity while catering to different tastes. By using clear glass jars, you'll create an eye-catching display that doubles as portion control.
To achieve a professional look with your mason jar parfaits:
- Choose complementary colors and textures for each layer
- Use a piping bag for neat, precise layers
- Alternate moist and dry ingredients to prevent sogginess
- Garnish the top with a decorative element that matches your wedding theme
When assembling your parfaits, start with a sturdy base like crushed cookies or cake crumbs. Follow with layers of pudding, mousse, or fruit compote. Add texture with chopped nuts, chocolate chips, or fresh fruit.
For a polished finish, top each parfait with whipped cream and a sprinkle of edible glitter or a fresh berry. Don't forget to provide small spoons for easy eating.
Customizable Flavor Combinations
Your wedding's uniqueness shines through in the flavor combinations you choose for your mason jar parfaits. These versatile desserts allow you to mix and match flavors, textures, and colors to create personalized treats that reflect your taste and style.
Start with a base layer of crushed cookies, graham crackers, or cake crumbs. Then, add alternating layers of creamy fillings and fruit or candy toppings. For a classic combo, try vanilla pudding with fresh berries and whipped cream. If you're feeling adventurous, experiment with unexpected pairings like lemon curd and lavender shortbread or salted caramel and dark chocolate ganache.
Don't forget to contemplate seasonal ingredients to keep costs down and flavors fresh. In summer, incorporate peaches or strawberries; in fall, try pumpkin or apple. You can also add visual interest by using colorful ingredients like pistachios, edible flowers, or brightly-hued fruit purees.
To save time on your big day, prepare the components in advance and assemble the parfaits the morning of the wedding. Label each flavor combination clearly so guests can easily choose their favorites.
With these customizable parfaits, you'll offer a delightful array of desserts that cater to various tastes and dietary needs.
Donut Wall Extravaganza
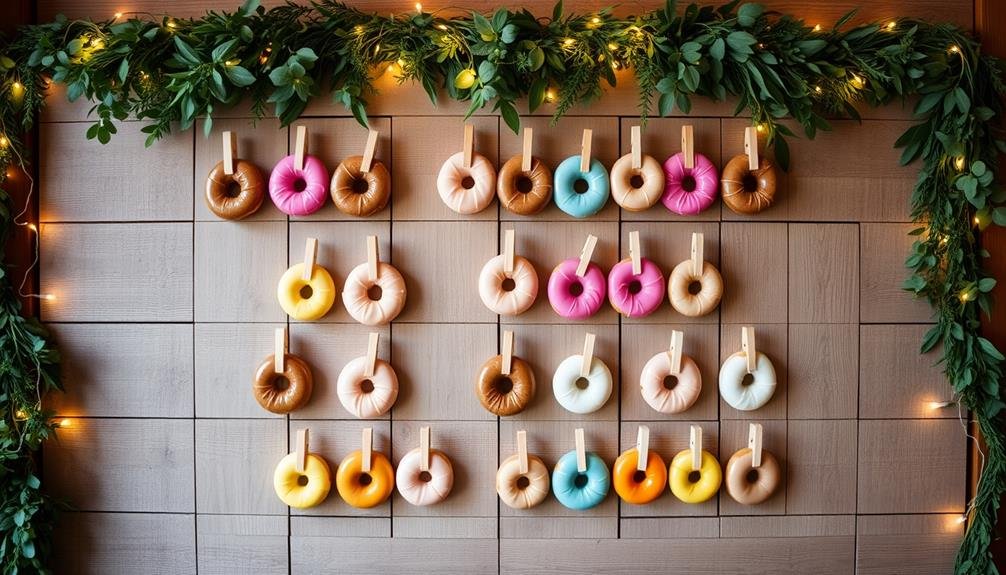
Delightful rings of sugary goodness await your guests with a donut wall extravaganza. This eye-catching display isn't just a treat for the taste buds; it's a feast for the eyes too.
You'll create a stunning focal point for your dessert table while offering a variety of flavors and toppings to satisfy every sweet tooth.
To craft your DIY donut wall, you'll need a large wooden board, dowels or hooks, and of course, plenty of donuts. Choose a mix of classic and unique flavors to keep things interesting.
Don't forget to take into account dietary restrictions by including some gluten-free or vegan options.
Here's why a donut wall is perfect for your wedding:
- Versatility: Customize the wall to match your wedding theme and colors
- Interactivity: Guests can easily grab their favorite treats
- Photo-worthy: Creates a fun backdrop for memorable pictures
- Cost-effective: Donuts are often cheaper than traditional wedding cakes
Remember to keep the display fresh by replenishing donuts throughout the event.
With a little creativity and planning, your donut wall will be the talk of the reception, offering a delicious and budget-friendly alternative to traditional wedding desserts.
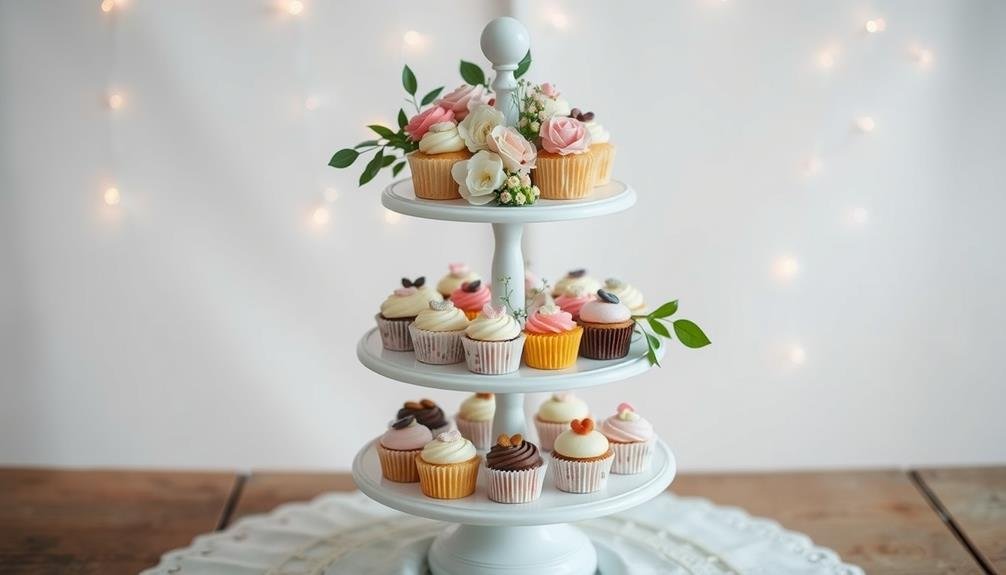
Cupcake Bouquet Centerpieces
Blossoming with sweetness, cupcake bouquet centerpieces offer a charming twist on traditional floral arrangements. These edible displays combine the beauty of flowers with the deliciousness of cupcakes, creating a stunning focal point for your dessert table.
To craft your own, you'll need a foam ball, toothpicks, and an assortment of cupcakes in various flavors and colors.
Start by covering the foam ball with tissue paper or fondant to create a base. Next, secure each cupcake to the ball using toothpicks, arranging them in a circular pattern. Begin at the bottom and work your way up, ensuring each cupcake is snugly placed against its neighbors.
For added flair, use different frosting techniques and toppings to mimic the appearance of various flowers.
To elevate your cupcake bouquet, consider placing it in a decorative pot or vase. You can also incorporate real greenery or silk leaves between the cupcakes for a more natural look.
Don't forget to match your color scheme to your wedding palette for a cohesive appearance. With a little creativity, you'll have a unique and delectable centerpiece that doubles as both decor and dessert.
Candy Buffet Color Scheme
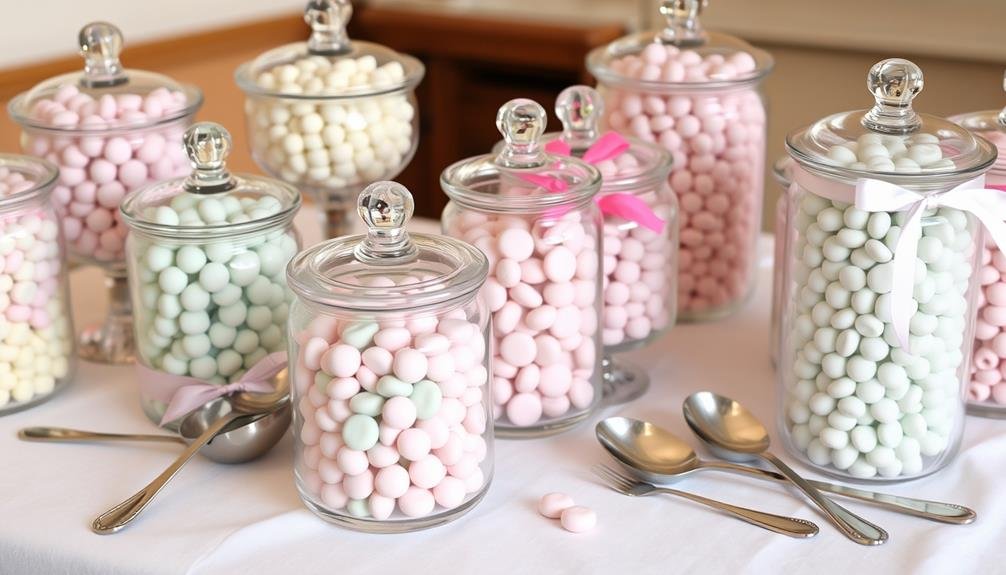
When planning a candy buffet for your wedding, choosing the right color scheme is essential for creating a visually appealing and cohesive display. Reflect on your wedding's overall color palette and theme when selecting candies and decorations for your buffet. Opt for a mix of complementary hues that'll create visual interest and depth.
To create a stunning candy buffet color scheme:
- Choose a base color: Select one or two main colors that match your wedding theme.
- Add accent colors: Incorporate pops of contrasting or complementary colors to create dimension.
- Include neutral tones: Use white, cream, or metallic candies to balance bold colors.
- Layer shades: Mix different shades of your chosen colors for a more dynamic look.
Don't forget to reflect on the packaging and containers for your candies. Clear glass jars and bowls allow the colors of the sweets to shine through, while colored containers can add another layer to your chosen palette.
Use ribbons, labels, and signage in coordinating colors to tie everything together. By carefully selecting your candy buffet's color scheme, you'll create a visually stunning and memorable dessert display that'll delight your guests and enhance your wedding's overall aesthetic.
Dessert Table Backdrop Ideas
A stunning backdrop can elevate your dessert table from ordinary to extraordinary. Consider creating a DIY floral wall using artificial flowers and a wire grid. You'll save money on fresh blooms while still achieving a lush, romantic look.
Another budget-friendly option is a fabric backdrop. Drape sheer curtains or tulle in your wedding colors for an elegant effect. Hang string lights behind the fabric to add a magical glow.
For a rustic touch, use wooden pallets as your backdrop. Paint them in your chosen colors or leave them natural for a farmhouse feel. Add personalized signage or your initials for a custom touch.
If you're handy with a sewing machine, create a backdrop of cascading paper flowers. It's a time-consuming project, but the result is breathtaking and unique.
Don't overlook the power of balloons. Create an arch or wall of balloons in various sizes and colors for a playful, modern look.
Ultimately, consider a simple yet effective option: hang a large piece of fabric or paper and use vinyl letters to spell out a meaningful phrase or your names.
Frequently Asked Questions
How Far in Advance Should I Start Planning My DIY Wedding Dessert Table?
You should start planning your DIY wedding dessert table at least 3-4 months in advance. This gives you ample time to research ideas, test recipes, gather supplies, and coordinate with helpers. Don't rush the process; early planning guarantees success.
What's the Average Cost Savings of a DIY Dessert Table Versus Catering?
You'll typically save 40-60% with a DIY dessert table compared to catering. Your exact savings depend on your choices, but you could cut costs from $10-15 per person to $4-6 per person by doing it yourself.
How Can I Keep Desserts Fresh During Outdoor Summer Weddings?
You'll want to keep desserts cool and fresh at your outdoor summer wedding. Use insulated containers, ice packs, and shade. Serve chilled items last, and consider refrigerated displays or dessert trucks. Don't forget about heat-resistant options like cupcakes.
Are There Any Food Safety Considerations for Homemade Wedding Desserts?
Yes, there are food safety concerns for homemade wedding desserts. You'll need to follow proper hygiene, use fresh ingredients, maintain appropriate temperatures, and avoid cross-contamination. Don't leave perishable items out for more than two hours, especially in warm weather.
What Are Some Alternatives for Guests With Dietary Restrictions or Allergies?
You'll want to offer gluten-free, dairy-free, and vegan options for guests with dietary restrictions. Consider fruit platters, nut-free desserts, and sugar-free treats. Label all items clearly and provide ingredient lists to guarantee everyone can enjoy safely.
In Summary
You've now got a treasure trove of DIY wedding dessert table ideas that'll wow your guests without breaking the bank. From tiered cake stands to donut walls, you're equipped to create a stunning display that's uniquely yours. Remember, it's all about creativity and personal touches. Don't be afraid to mix and match these ideas or add your own flair. With a little effort and imagination, you'll have a professional-looking dessert table that's sure to be the talk of your wedding.

I’m Sarah, the creator and writer behind this site. I’m a wife and a mother of two wonderful kids who keep me on my toes and inspire me daily. My passion lies in creating and organizing memorable events and group activities, where people can come together and make lasting memories.

Leave a Reply