
You'll love these budget-friendly wedding photo display ideas for your reception. Create a charming clothesline gallery with twine and clothespins, or set up a Polaroid guestbook wall for interactive fun. Transform a vintage window pane into a unique showcase, or repurpose wooden pallets for a rustic touch. Hang photos in mason jars for a whimsical look, or use an old suitcase as a memory box. Arrange crates for a creative display, or opt for elegant floating frame centerpieces. For a romantic glow, try photo lantern luminaries. These affordable ideas will help you showcase your cherished memories in style. Discover more ways to make your wedding truly special.
Clothesline Photo Gallery
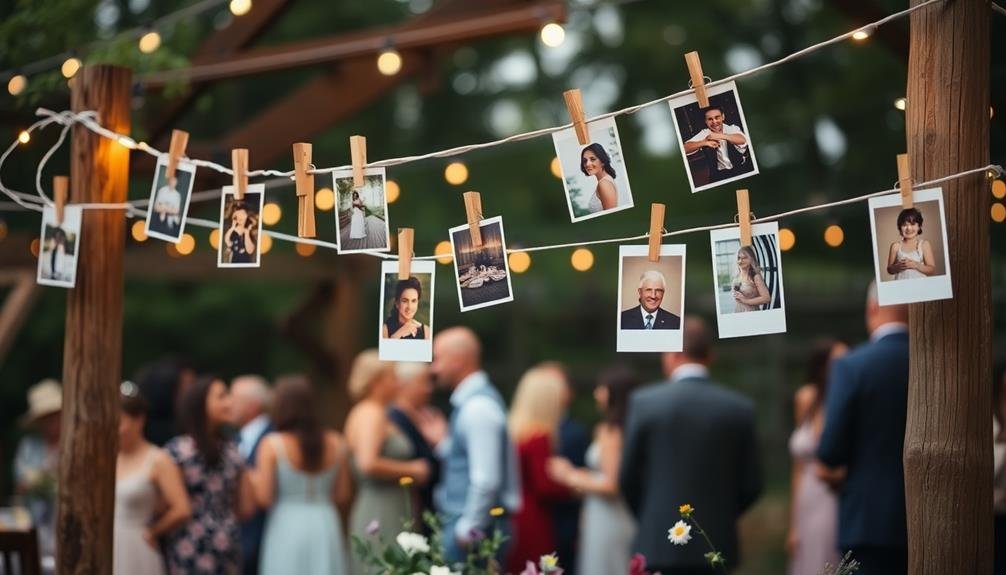
A clothesline photo gallery offers a charming and budget-friendly way to showcase your wedding memories. You'll need clothesline or twine, clothespins, and your favorite photos to create this rustic display. Hang the lines across a wall or between trees for an outdoor reception, ensuring they're taut and secure.
Print your photos in various sizes for visual interest. Mix candid shots, engagement photos, and family pictures to tell your love story. Use wooden clothespins to attach the images, spacing them evenly along the lines. For a cohesive look, consider using all black-and-white or sepia-toned prints.
To add dimension, create multiple rows of photos at different heights. Incorporate small chalkboards with handwritten captions or dates between pictures. Enhance the display with fairy lights woven through the lines for a magical evening ambiance.
This DIY project is customizable to fit your wedding theme. Use colored twine or ribbons that match your palette. For a beach wedding, swap clothespins for small shells or starfish.
You can easily rearrange photos throughout the event, keeping guests engaged and entertained.
Polaroid Guestbook Wall
Set up a Polaroid camera station where guests can snap instant photos of themselves throughout your reception.
Encourage them to hang their pictures on a designated wall and write personalized messages alongside.
This interactive display not only serves as a unique guestbook but also becomes a focal point of your wedding décor, allowing you to relive cherished moments long after the celebration ends.
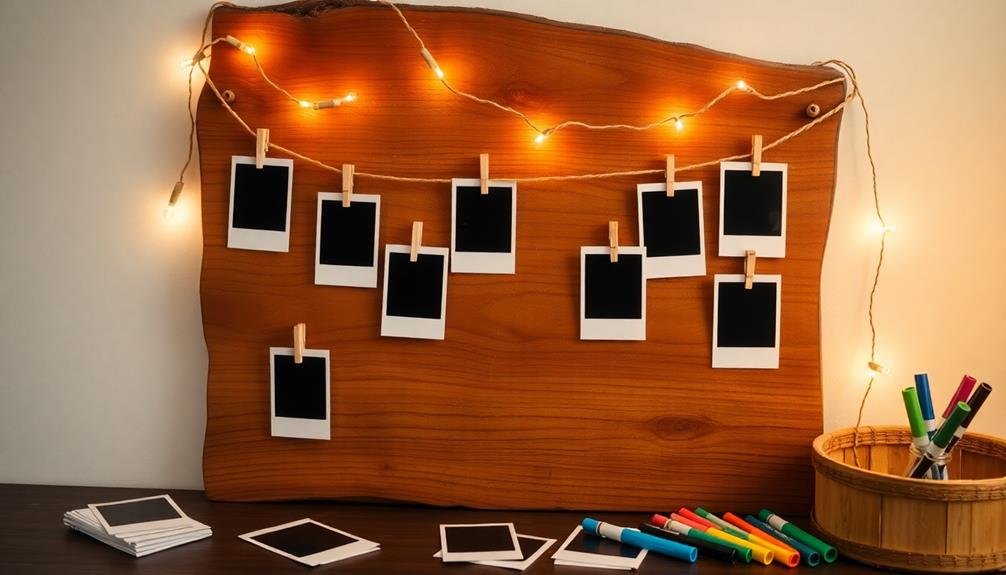
Create Instant Photo Memories
Capturing instant memories with a Polaroid guestbook wall adds a fun, interactive element to your wedding reception. To create this budget-friendly photo display, set up a designated area with a blank wall or large poster board. Provide Polaroid cameras or instant film cameras for guests to use, along with plenty of film.
Encourage guests to take selfies or group photos and hang them on the wall using washi tape, clothespins, or decorative pushpins. You can also include a table with colorful markers, stickers, and other embellishments for guests to personalize their photos before adding them to the display.
To make the most of this idea, consider creating a photo-taking station with props and a fun backdrop. You can use a simple fabric backdrop or create a DIY floral wall for added visual interest.
Don't forget to include instructions for guests on how to use the cameras and where to hang their photos.
As the reception progresses, you'll see the wall fill up with candid shots and heartfelt messages from your loved ones, creating a unique and memorable keepsake of your special day.
Personalize With Guest Messages
Personalizing your Polaroid guestbook wall with guest messages adds a heartfelt touch to your budget-friendly photo display. Set up a designated area with a blank wall or large board where guests can hang their Polaroid photos and write personalized messages.
Provide instant cameras, film, and colorful markers for guests to use throughout the reception. Encourage creativity by offering prompts or questions for guests to answer alongside their photos. You might ask them to share their favorite memory of the couple or offer marriage advice.
To make the display more visually appealing, create a backdrop using string lights, fabric, or decorative paper. As the night progresses, you'll see your guestbook wall come to life with candid snapshots and meaningful messages.
This interactive element not only serves as entertainment for your guests but also creates a unique keepsake for you to cherish long after the wedding day.
After the reception, carefully remove the photos and messages, and compile them into a scrapbook or photo album. This budget-friendly approach combines a guestbook, photo booth, and wedding decor all in one, making it a practical and sentimental choice for your special day.
Interactive Wedding Décor Element
A Polaroid guestbook wall serves as an interactive wedding décor element that engages your guests and creates a unique visual display. To set it up, designate a wall or large board near your reception area. Hang string lights or ribbons across the space to create a grid pattern. Provide Polaroid cameras or a portable printer for instant photos, along with plenty of film or paper.
Encourage guests to take selfies or group shots, then clip their photos to the wall using clothespins or washi tape. Place markers nearby so they can write messages or well-wishes on the white space beneath their pictures. This interactive element doubles as entertainment and a growing piece of art throughout your reception.
For added flair, incorporate your wedding theme into the backdrop. Use a rustic wooden frame for a barn wedding or a gilded frame for a glamorous affair. You can also pre-hang some of your engagement photos or childhood pictures to fill in spaces and inspire guests.
After the wedding, you'll have a collection of candid moments and personal messages to cherish, all captured in a budget-friendly, creative way.
Vintage Window Pane Showcase
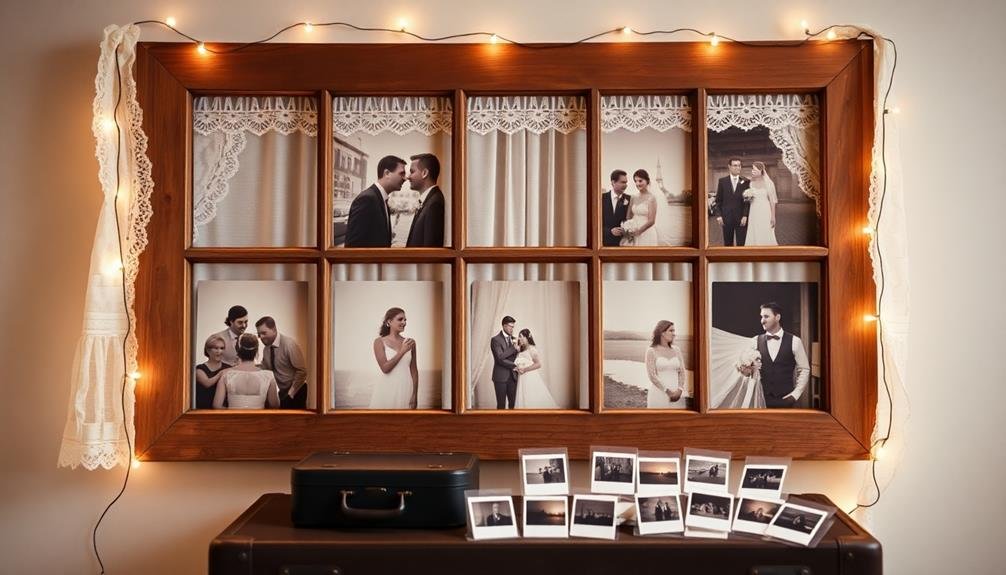
Transform an old window pane into a stunning photo showcase for your wedding.
You'll need to clean and restore the frame, carefully arrange your chosen photos within the panes, and incorporate the finished piece into your rustic decor.
This vintage-inspired display offers a unique way to highlight your favorite memories while adding charm to your wedding venue.
DIY Restoration Tips
When restoring a vintage window pane for your wedding photo display, you'll need to tackle a few key steps.
First, carefully remove any old paint or varnish using a paint stripper and scraper. Be gentle to avoid damaging the wood. Once clean, sand the frame smooth with fine-grit sandpaper.
Next, repair any cracks or loose joints with wood filler and clamps. Allow the repairs to dry completely before proceeding.
If the glass is intact, clean it thoroughly with glass cleaner. If it's broken, carefully remove the shards and measure for replacement panes.
Apply a coat of primer to the wooden frame, followed by your chosen paint color. Use thin, even coats to prevent drips.
For a distressed look, lightly sand some areas after the paint dries. To protect the wood, finish with a clear sealant.
Photo Arrangement Techniques
Creatively arranging photos in a vintage window pane can elevate your wedding display from ordinary to extraordinary. This technique adds a charming, rustic touch to your reception decor while showcasing your favorite memories.
To create a stunning vintage window pane photo display, you'll need to carefully select and arrange your photos for maximum impact.
Start by choosing a variety of photos that tell your love story. Mix candid shots with posed portraits, and include both color and black-and-white images.
When arranging the photos, consider these tips:
- Group photos by theme or color scheme
- Vary the sizes and orientations of the images
- Create a focal point with a larger, central photo
- Use odd numbers of photos for a balanced look
- Leave some panes empty for visual breathing room
Fasten the photos to the window pane using removable adhesive or small clips. You can enhance the display by adding fairy lights, ribbons, or small floral accents.
Don't forget to clean and polish the window pane before mounting your photos to guarantee it looks its best.
With careful planning and arrangement, your vintage window pane photo display will become a mesmerizing centerpiece at your wedding reception.
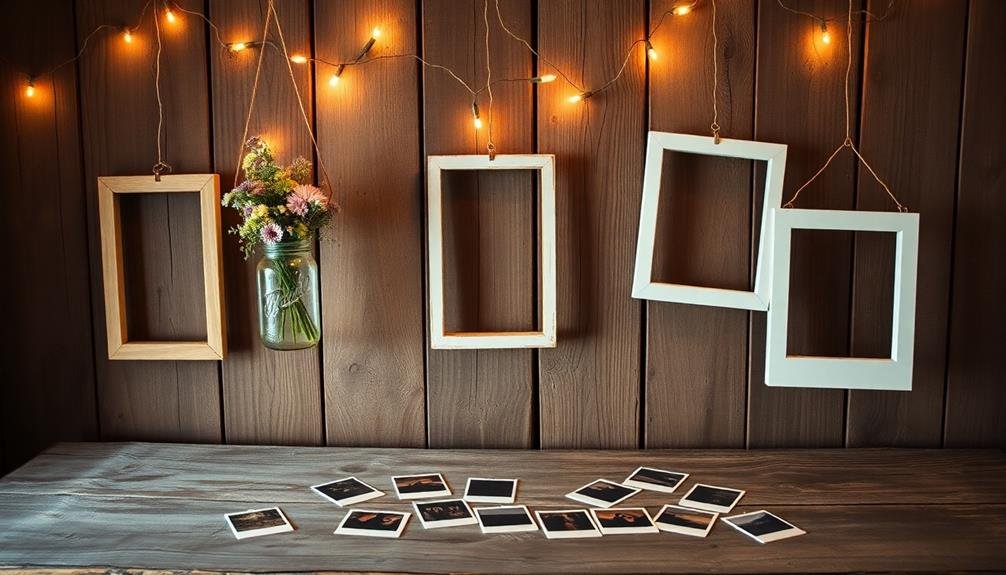
Rustic Decor Integration
Integrating a vintage window pane photo display into your rustic wedding decor can tie the whole theme together. Start by sourcing an old window frame from a flea market, antique store, or even your grandparents' barn. Clean it up, but don't worry about perfection – a bit of weathering adds character.
Choose photos that complement your rustic theme, such as black and white or sepia-toned prints. Measure the panes and resize your images accordingly. Attach the photos to the back of the window using double-sided tape or photo corners for easy removal later.
You can prop the window frame on an easel near the entrance or create a focal point by hanging it on a barn door or exposed brick wall. Add some fairy lights around the frame for a warm glow, or weave dried flowers and twine through the panes for extra rustic charm.
Don't limit yourself to just one window – create a gallery wall with multiple frames of different sizes. Mix in other rustic elements like wooden crates, mason jars, or burlap accents to enhance the overall aesthetic.
This DIY project isn't only budget-friendly but also serves as a meaningful keepsake after your special day.
Wooden Pallet Photo Display

A wooden pallet photo display offers a rustic and budget-friendly way to showcase your wedding memories. You'll love how this DIY project adds charm to your reception while keeping costs low.
Start by sourcing a wooden pallet, which you can often find for free at local businesses or purchase inexpensively from hardware stores.
To create your pallet photo display, follow these steps:
- Clean and sand the pallet to guarantee a smooth surface
- Apply a coat of paint or stain to match your wedding colors
- Attach twine or wire across the pallet's slats
- Hang your photos using clothespins or small clips
- Add decorative elements like fairy lights or greenery
Get creative with your photo selection, mixing candid shots with formal portraits. You can also include meaningful quotes or your wedding date to personalize the display.
Don't forget to contemplate the pallet's size and placement within your venue. A vertical orientation works well for tight spaces, while a horizontal layout can create a dramatic focal point.
With a wooden pallet photo display, you'll have a unique and memorable way to share your love story with guests while staying within your budget.
Hanging Mason Jar Frames
Hanging mason jar frames offer a perfect blend of rustic charm and elegance for your wedding photo display.
You'll love how these simple yet stunning frames can be easily assembled with minimal DIY skills.
Rustic Charm and Elegance
While rustic weddings continue to captivate couples, hanging mason jar frames offer a charming and budget-friendly way to showcase your cherished photos. This DIY approach combines the timeless appeal of mason jars with the warmth of personal memories, creating a display that's both elegant and down-to-earth.
To create your own hanging mason jar frames, you'll need:
- Mason jars in various sizes
- Twine or ribbon
- Printed photos
- Battery-operated fairy lights
- Wooden dowels or branches
Start by cleaning the jars and removing their lids. Attach twine or ribbon around the jar's neck, creating a loop for hanging. Insert your chosen photos into the jars, ensuring they're visible through the glass.
For an extra touch of magic, add fairy lights to some jars, creating a soft, warm glow. Hang the jars from wooden dowels or branches suspended from the ceiling or between trees for an outdoor reception.
This display not only serves as a beautiful backdrop but also doubles as a conversation starter for guests. It's a perfect blend of rustic charm and personal storytelling, allowing you to share your journey as a couple in a unique and memorable way.
Easy DIY Assembly
Creating these charming photo displays is simpler than you might think. To assemble hanging Mason jar frames, you'll need Mason jars, twine, scissors, and printed photos.
Start by cleaning the jars thoroughly and allowing them to dry completely. Cut a piece of twine about 24 inches long for each jar. Thread the twine through the jar's neck, creating a loop for hanging.
Next, trim your photos to fit inside the jars. You can use regular prints or opt for weathered-looking vintage-style images to enhance the rustic appeal. Carefully roll the photo and slide it into the jar, adjusting it so the image faces outward. Secure the lid tightly to keep the photo in place and protect it from moisture.
To hang your Mason jar frames, choose sturdy branches, wooden beams, or a dedicated display stand. Space the jars evenly along your chosen support, tying each one securely.
Adjust the height and positioning of the jars to create an eye-catching arrangement. For added flair, consider incorporating fairy lights or small battery-operated LED candles inside some jars to create a warm, magical glow throughout your reception space.
Ladder Photo Stand
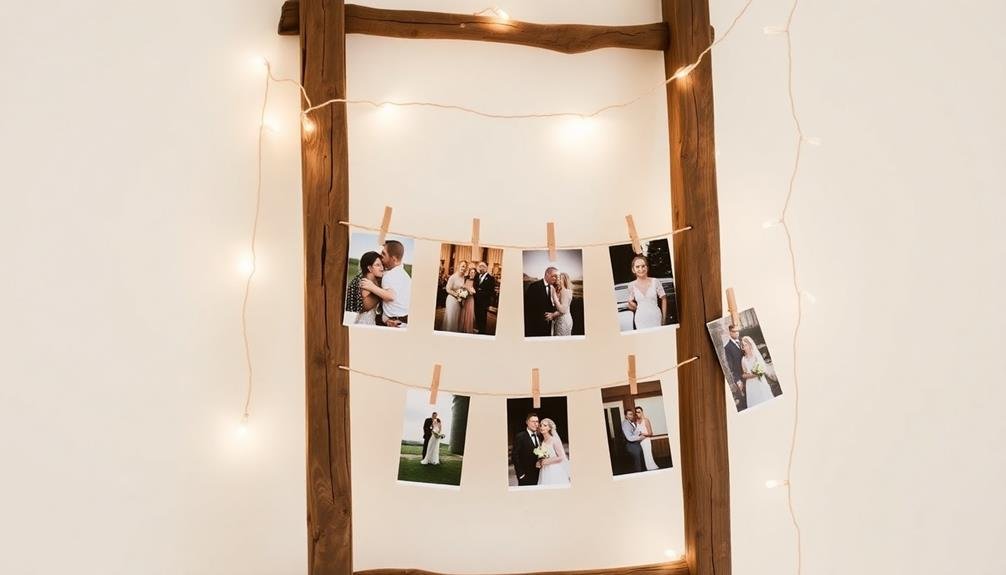
A rustic ladder can transform into an eye-catching photo display for your budget-friendly wedding. You'll need to source an old wooden ladder, either from a thrift store, flea market, or your own garage. Clean it up and give it a fresh coat of paint if needed. Position the ladder against a wall or in a corner of your reception venue for maximum impact.
To create your ladder photo stand:
- Hang string lights or fairy lights along the rungs for a warm glow
- Use wooden clothespins to attach photos to twine strung between the steps
- Place potted plants or flowers on some of the rungs for a natural touch
- Incorporate meaningful objects like vintage cameras or small framed quotes
- Hang a "Our Story" sign at the top to tie it all together
Don't forget to mix up the sizes and orientations of your photos for visual interest. Include a variety of snapshots from your relationship, childhood pictures, and even photos of your guests.
This personalized touch will give your guests something to admire and talk about during the reception. With a ladder photo stand, you'll create a unique and memorable display that won't break the bank.
Repurposed Suitcase Memory Box
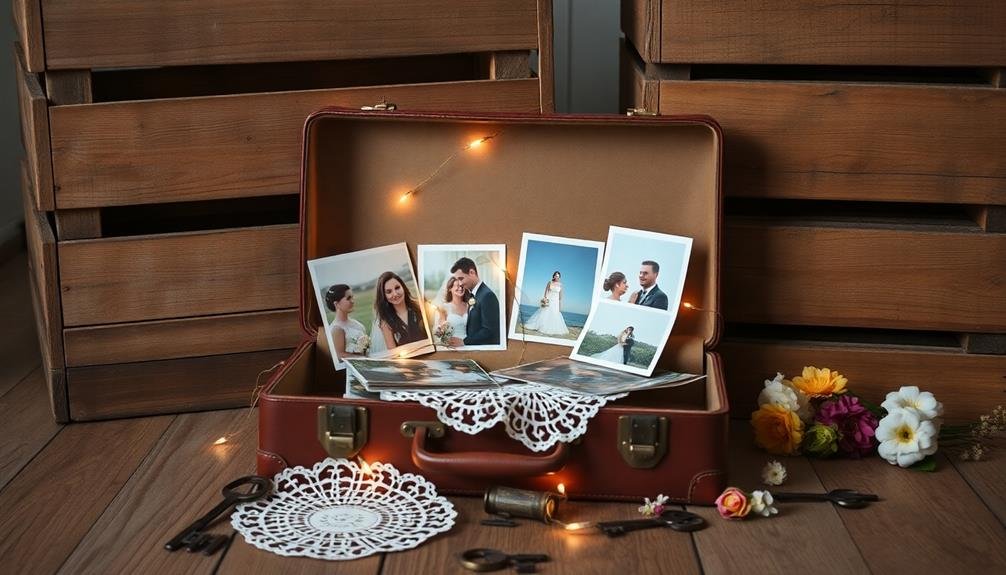
Vintage suitcases offer a charming way to display wedding photos on a budget. You can easily transform an old suitcase into a unique memory box for your wedding reception.
Start by cleaning the suitcase thoroughly and lining the interior with fabric or decorative paper. Attach strings or twine across the open lid to create a clothesline effect for hanging photos.
Print your favorite wedding photos or engagement pictures in various sizes and clip them to the strings using mini clothespins or decorative clips. You can also add other mementos like handwritten notes, ticket stubs, or small trinkets that represent your relationship.
Place the open suitcase on a table or stack of books to achieve the right height for guests to view.
For added charm, incorporate fairy lights around the edges of the suitcase or weave them through the strings. You can also use the bottom of the suitcase to display larger framed photos or a guest book.
This repurposed suitcase memory box not only serves as a budget-friendly photo display but also doubles as a unique keepsake you can use in your home after the wedding.
Rustic Crate Photo Arrangement

For a touch of rustic charm, wooden crates offer an excellent canvas for displaying wedding photos on a budget. You can easily source these crates from local farms, flea markets, or home improvement stores.
Paint them in colors that complement your wedding theme or leave them natural for an authentic rustic look. Stack the crates in various configurations to create an eye-catching display that's both functional and decorative.
To enhance your rustic crate photo arrangement:
- Use twine or burlap ribbon to hang photos inside the crates
- Add battery-operated string lights for a warm, inviting glow
- Incorporate small potted plants or flowers for a fresh, natural touch
- Place framed photos of different sizes for visual interest
- Include meaningful wedding mementos alongside the photos
Don't forget to secure the crates properly to guarantee they're stable and safe.
You can also repurpose these crates after the wedding as stylish home decor or storage solutions. This budget-friendly option allows you to showcase your cherished memories while adding a unique, personalized element to your reception space.
With a bit of creativity, you'll create a stunning photo display that your guests will admire and remember.
Floating Frame Centerpieces

Moving from rustic crates to a more modern aesthetic, floating frame centerpieces offer an elegant and minimalist approach to displaying wedding photos.
These versatile pieces can serve as both table decorations and conversation starters for your guests.
To create floating frame centerpieces, you'll need double-sided glass frames, which you can find at most craft stores or online retailers. Choose frames in various sizes to add visual interest.
Select your favorite wedding photos, engagement shots, or even childhood pictures of you and your partner to showcase.
Place the frames at different heights on each table using clear acrylic risers or small easels. This creates a dynamic, multi-dimensional display that catches the eye.
For added ambiance, surround the frames with battery-operated tea lights or small floral arrangements.
To keep costs down, opt for smaller frames and print your photos at home or through a budget-friendly online service. You can also repurpose these frames after the wedding as home decor or gifts for family members.
Floating frame centerpieces are perfect for couples who want a clean, contemporary look that doesn't compromise on personal touch or budget-consciousness.
Photo Lantern Luminaries
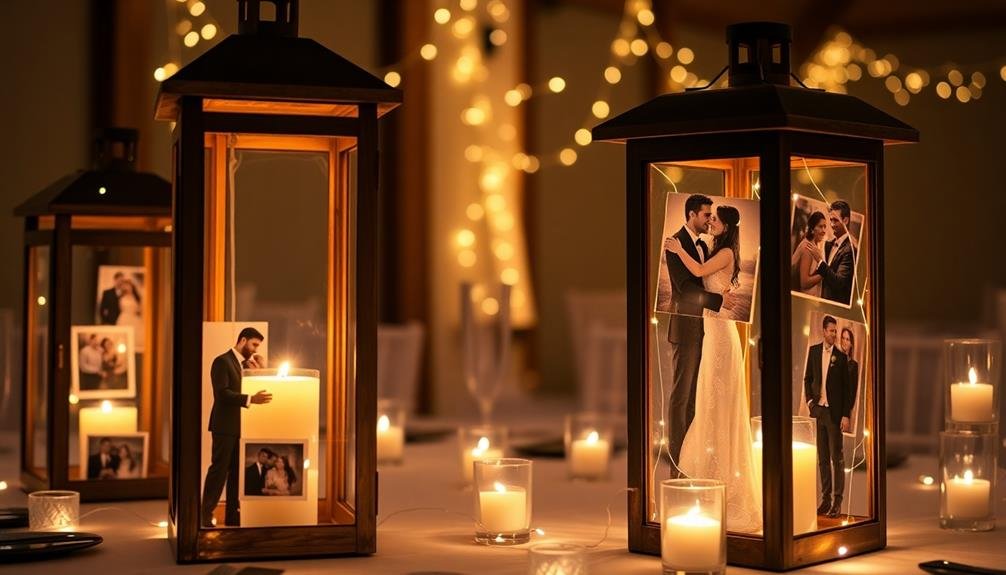
As the sun sets on your wedding day, photo lantern luminaries can transform your reception space into a magical, glowing gallery of memories. These budget-friendly decorations are easy to create and add a warm, intimate atmosphere to your celebration.
You'll need paper lanterns, battery-operated LED lights, and printed photos of you and your partner.
To create your photo lantern luminaries:
- Choose photos that showcase your relationship's journey
- Print the selected images on translucent paper
- Carefully attach the photos to the lanterns using double-sided tape
- Insert LED lights into each lantern
- Hang the lanterns strategically around your venue
You can display these luminaries in various ways to enhance your reception's ambiance. Suspend them from tree branches for an outdoor wedding, or create a stunning backdrop behind your sweetheart table.
Line pathways with lanterns to guide guests through your venue, or cluster them as centerpieces on dining tables.
Photo lantern luminaries not only serve as beautiful decor but also double as conversation starters. Your guests will enjoy discovering different moments from your relationship as they move around the reception.
This personal touch adds a unique and memorable element to your special day without breaking the bank.
Frequently Asked Questions
How Can I Protect Outdoor Photo Displays From Unexpected Rain?
To protect outdoor photo displays from unexpected rain, you'll want to use waterproof frames or laminate your photos. You can also set up a clear plastic tent or canopy over the display area for added protection against sudden showers.
What's the Best Way to Secure Photos Without Damaging Them?
You'll want to use photo-safe adhesives or mounting methods. Try removable adhesive dots, photo corners, or magnetic strips. Don't use tape or glue directly on photos. Consider clear protective sleeves for added security without damaging the images.
How Many Photos Should I Display for a 100-Guest Wedding?
For a 100-guest wedding, you'll want to display around 50-75 photos. This'll give guests plenty to look at without overwhelming them. You can mix individual shots with group photos to create an engaging and diverse display.
Are There Photo Display Options Suitable for Destination Weddings?
You've got options for destination wedding photo displays! Consider lightweight, portable solutions like digital frames, photo banners, or collapsible photo boards. You can also create a slideshow or use local elements to showcase your pictures creatively.
What Lighting Works Best for Nighttime Outdoor Photo Displays?
For nighttime outdoor photo displays, you'll want soft, warm lighting. String lights, lanterns, or battery-operated LED candles work well. They'll create a cozy ambiance and illuminate your photos without harsh glare. Consider using dimmer switches for adjustable brightness.
In Summary
You've now got plenty of creative, budget-friendly ideas to display your cherished photos at your wedding reception. Remember, it's all about personalizing these concepts to fit your unique style and theme. Don't be afraid to mix and match or put your own spin on things. With a little creativity and DIY spirit, you'll create a stunning photo display that'll wow your guests and make your special day even more memorable.

I’m Sarah, the creator and writer behind this site. I’m a wife and a mother of two wonderful kids who keep me on my toes and inspire me daily. My passion lies in creating and organizing memorable events and group activities, where people can come together and make lasting memories.

Leave a Reply