Looking for budget-friendly wedding photo booth ideas? You've got plenty of options to create a fun and memorable experience for your guests. Try a DIY floral backdrop, set up a Polaroid station, or craft a rustic wood frame. Create a balloon wall extravaganza or use vintage suitcases as props. A fabric strip curtain or fairy light backdrop can add a magical touch. Cardboard cutouts and themed costume trunks encourage guest interaction. Don't forget chalkboard speech bubbles for personalized messages. With these creative ideas, you'll have a unique photo booth that won't break the bank. Explore further to discover how to bring these concepts to life at your reception.
DIY Floral Backdrop
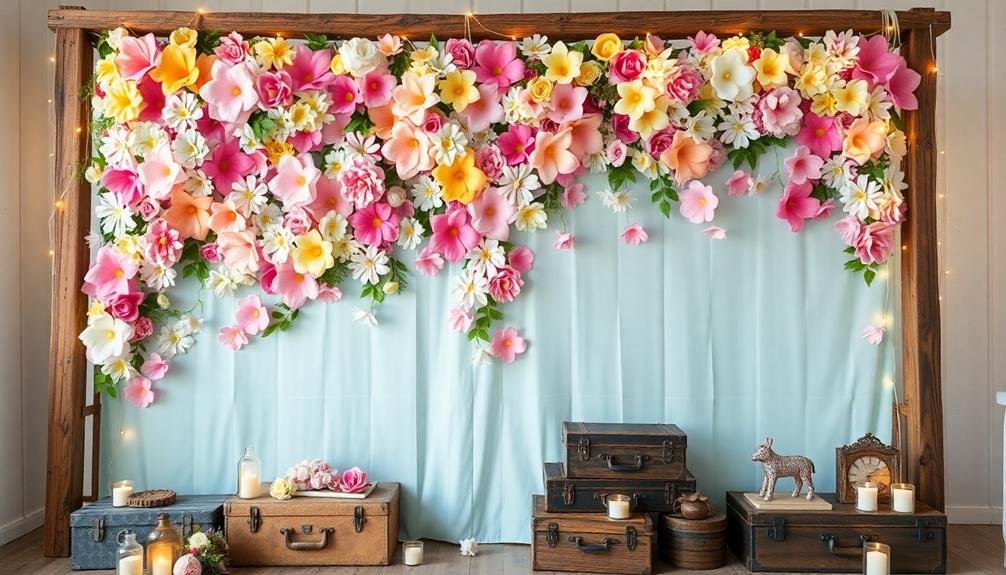
One of the most striking elements you can add to your budget wedding photo booth is a DIY floral backdrop. This eye-catching feature will create a stunning visual for your photos without breaking the bank.
To create your floral backdrop, start by selecting artificial flowers in your wedding colors. You'll find affordable options at craft stores or online retailers.
Begin by attaching a large piece of fabric or paper to a sturdy frame or wall. Next, arrange your flowers in a pleasing pattern, starting from one corner and working your way across. Use hot glue or floral wire to secure the blooms in place.
For added depth and texture, incorporate greenery, ribbons, or fairy lights. Don't be afraid to mix flower sizes and types for a more natural look. Consider creating an ombré effect by gradually changing flower colors from top to bottom.
To save even more, ask friends and family to help with the assembly process. Remember to test your backdrop's durability and make any necessary reinforcements before the big day.
With creativity and effort, you'll have a professional-looking floral backdrop that'll impress your guests and provide a beautiful setting for memorable photos.
Polaroid Station
Set up a Polaroid station to create instant nostalgia at your wedding reception.
You'll capture candid moments and provide guests with immediate keepsakes to take home.
Consider crafting a DIY backdrop using materials like fabric, streamers, or paper flowers to enhance the vintage charm of your Polaroid photos.
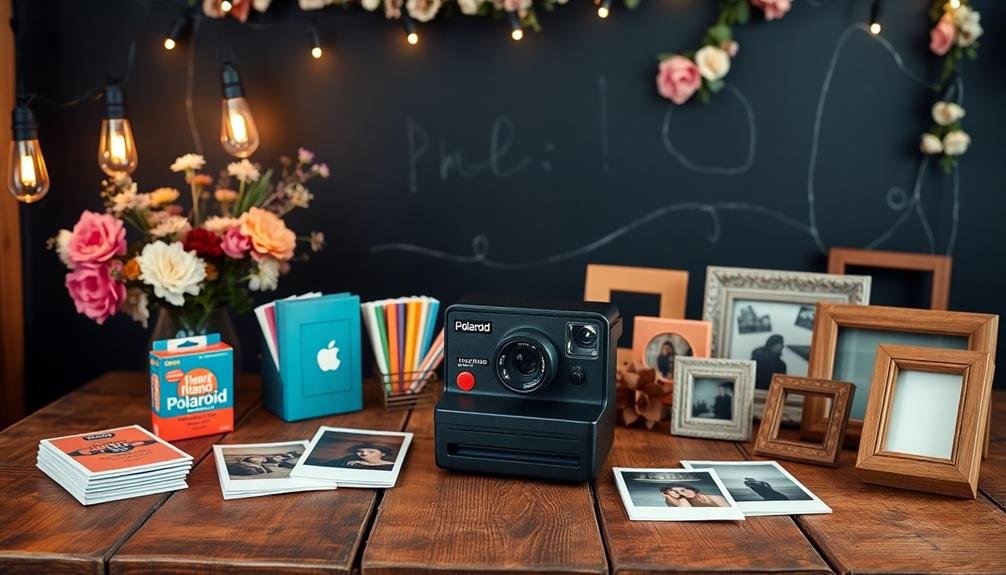
Instant Nostalgia Creation
Conjure up instant memories with a Polaroid station at your wedding. This budget-friendly photo booth alternative offers a unique, nostalgic experience for your guests. Set up a designated area with a simple backdrop and provide Polaroid cameras or instant film cameras for guests to use.
You'll need to stock up on film, which can be pricey, so consider limiting each guest to one or two shots. Encourage creativity by offering props like hats, glasses, and signs. Place a table nearby with markers, washi tape, and decorative paper for guests to personalize their photos.
Create a display area where guests can hang their photos as they develop. Use string lights and clothespins for a charming clothesline effect, or provide a large corkboard with push pins. This evolving photo wall becomes a focal point of your reception, showcasing the fun throughout the night.
Don't forget to leave instructions for using the cameras and remind guests to shake their photos gently. At the end of the night, you'll have a collection of unique, personalized snapshots that capture the spirit of your wedding day.
DIY Backdrop Options
To elevate your Polaroid station, creating a stunning backdrop doesn't have to break the bank. With a bit of creativity and some DIY spirit, you can craft a beautiful setting that'll make your wedding photos pop.
Consider using large sheets of fabric, like tulle or linen, draped elegantly to create a soft, romantic atmosphere. Alternatively, repurpose old picture frames by hanging them in a cluster, creating a vintage-inspired look that's perfect for snapshots.
For a more natural feel, gather some branches or flowers from your local park or garden. Arrange them in a large vase or create a wall hanging for a rustic, organic backdrop. Don't forget to incorporate your wedding colors or theme into your chosen design for a cohesive look.
Here are some quick and easy DIY backdrop ideas:
- Create a paper flower wall using tissue paper or crepe paper
- Hang string lights or fairy lights in a cascading pattern
- Use washi tape to create geometric patterns on a plain wall
Rustic Wood Frame Setup
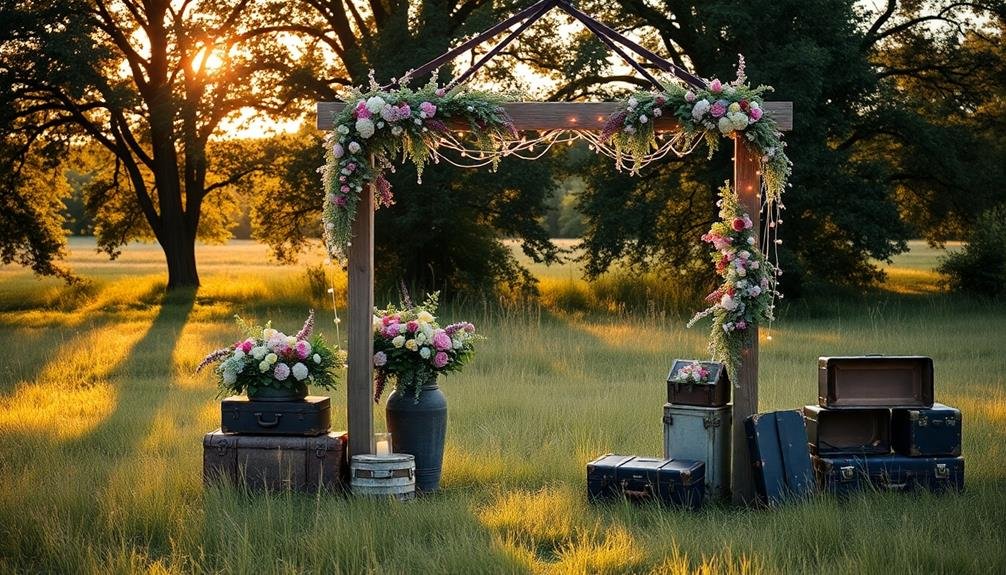
While planning your budget-friendly wedding, a rustic wood frame setup can transform your photo booth into a charming focal point. This DIY option adds a touch of rustic elegance without breaking the bank.
Start by sourcing reclaimed wood or purchasing affordable lumber from a local hardware store. Create a simple frame structure, ensuring it's sturdy enough to stand on its own. Sand the wood for a smooth finish and apply a stain or paint to match your wedding's color scheme.
Enhance the frame with strings of fairy lights, dried flowers, or greenery to add visual interest. You can also hang small chalkboards or wooden signs with personalized messages or your wedding hashtag.
For added versatility, consider making the frame collapsible or easily disassembled for transportation. This allows you to set it up quickly at your venue.
Don't forget to provide props that complement the rustic theme, such as burlap banners, mini chalkboards, or vintage-inspired items. Place a small table nearby with these accessories to encourage guests to get creative with their photos.
Balloon Wall Extravaganza

A balloon wall extravaganza can jazz up your wedding photo booth without costing a fortune. Create a stunning backdrop using balloons of various sizes and colors that match your wedding theme. You'll need a sturdy frame or wall to attach the balloons, fishing line or clear tape, and an air pump to save time and energy.
Start by inflating balloons to different sizes, then arrange them in a pleasing pattern. Attach larger balloons first, filling in gaps with smaller ones. For added dimension, incorporate balloon garlands or arches into your design. Don't forget to leave space for props and signage.
To make your balloon wall even more eye-catching:
- Add metallic or confetti-filled balloons for extra sparkle
- Incorporate floral elements or greenery for a romantic touch
- Use letter balloons to spell out a meaningful phrase or your names
Remember to set up your balloon wall in a well-ventilated area away from direct sunlight and heat sources to prevent premature popping.
With some creativity and patience, you'll have a show-stopping photo booth backdrop that your guests will love posing in front of throughout the reception.
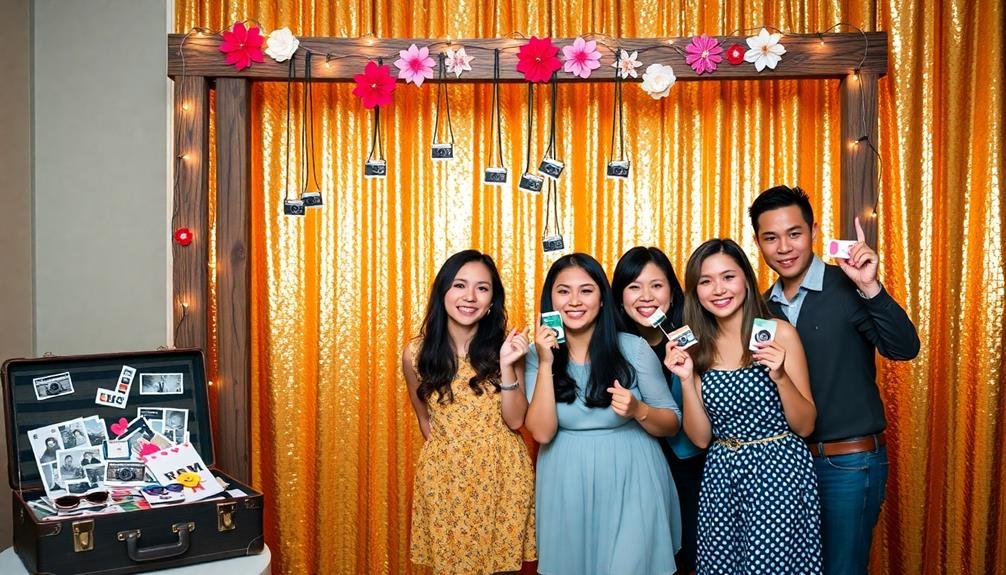
Vintage Suitcase Prop Collection
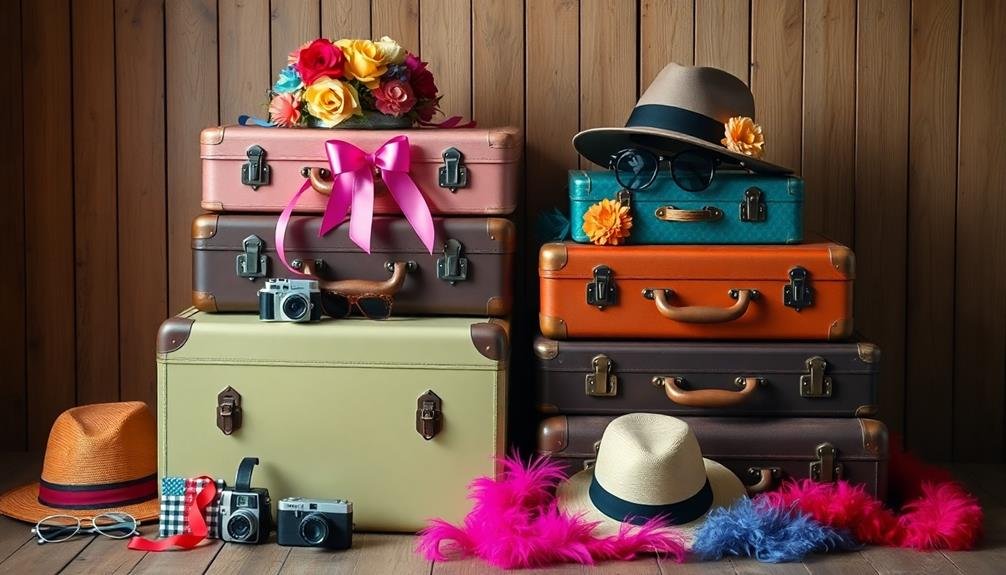
Moving from balloons to vintage charm, a suitcase prop collection offers a unique and budget-friendly photo booth backdrop. You'll need to source a few vintage suitcases from thrift stores, flea markets, or family attics. Look for a variety of sizes, colors, and styles to create visual interest.
Arrange the suitcases in a stack or pyramid formation, using smaller ones on top and larger ones as the base. Secure them with hidden zip ties or adhesive strips to prevent toppling. Add character by leaving some suitcases slightly open, revealing glimpses of vintage fabrics or old travel stickers.
Enhance the display with complementary props like old maps, postcards, or a vintage camera. Consider hanging a world map behind the suitcases to reinforce the travel theme. You can also incorporate string lights to add a warm glow to the setup.
Encourage guests to pose with the suitcases, pretending to set off on a journey or returning from an adventure. This prop collection not only serves as a photo backdrop but also doubles as a unique decor element for your reception space, saving you money on additional decorations.
Chalkboard Speech Bubble Props
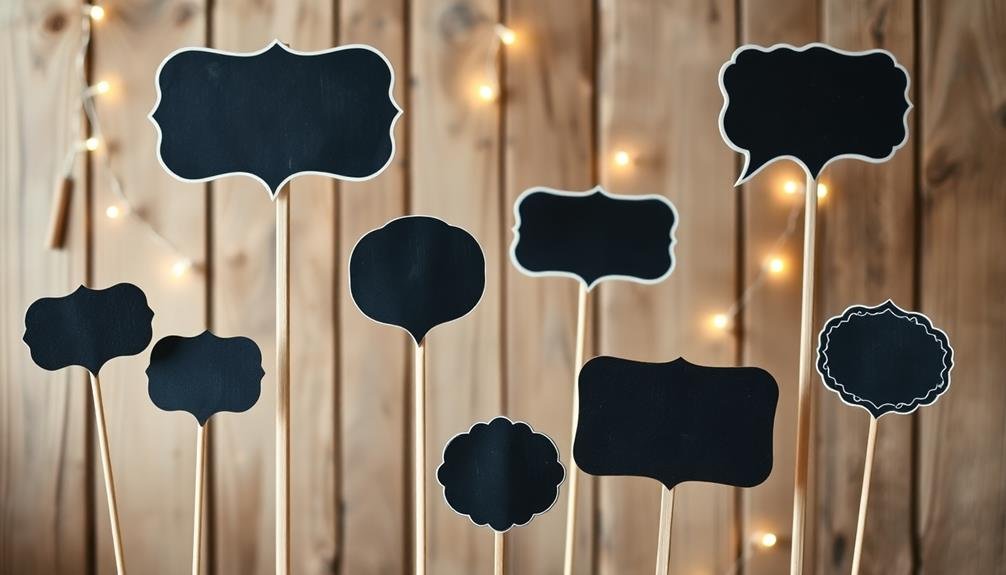
For a fun and interactive photo booth experience, chalkboard speech bubble props offer endless possibilities. These versatile props allow your guests to personalize their messages and create unique photos. You can easily make these props yourself using chalkboard paint, wooden or cardboard cutouts, and dowels or sticks.
To get started, cut out various speech bubble shapes from thin wood or sturdy cardboard. Apply chalkboard paint and let them dry thoroughly. Attach handles to the back of each bubble using strong glue or staples. Place a basket of colorful chalk nearby so guests can write their own messages.
Here are some ideas to make your chalkboard speech bubbles even more engaging:
- Create themed bubbles for different parts of your wedding (e.g., "Just Married," "Congrats!")
- Include prompts or questions for guests to answer
- Offer pre-written options for those who need inspiration
Don't forget to provide a cloth or eraser so guests can easily wipe clean and reuse the bubbles.
With chalkboard speech bubble props, you'll give your wedding guests a creative outlet and guarantee a wide variety of memorable photos from your special day.
Fabric Strip Curtain Background

While chalkboard speech bubbles add interactive fun, your photo booth's background sets the stage for memorable snapshots. A fabric strip curtain offers an eye-catching and budget-friendly solution that's easy to customize. You'll create a stunning backdrop by hanging vertical strips of fabric in various colors and textures.
To make your fabric strip curtain, choose materials that complement your wedding colors. Mix and match different fabrics like tulle, satin, and burlap for added visual interest. Cut the strips to your desired length, then tie or secure them to a rod or sturdy string. You can arrange the strips in a specific pattern or create a random, whimsical look.
| Fabric Type | Color Ideas | Texture |
|---|---|---|
| Tulle | Pastels | Sheer |
| Satin | Metallics | Smooth |
| Burlap | Earth tones | Rough |
This DIY backdrop is not only affordable but also versatile. You can easily adjust its width and height to fit your space, and it's lightweight enough to transport and set up quickly. After the wedding, repurpose the fabric strips for other decorations or crafts, making this a sustainable choice for eco-conscious couples.
Cardboard Cutout Characters
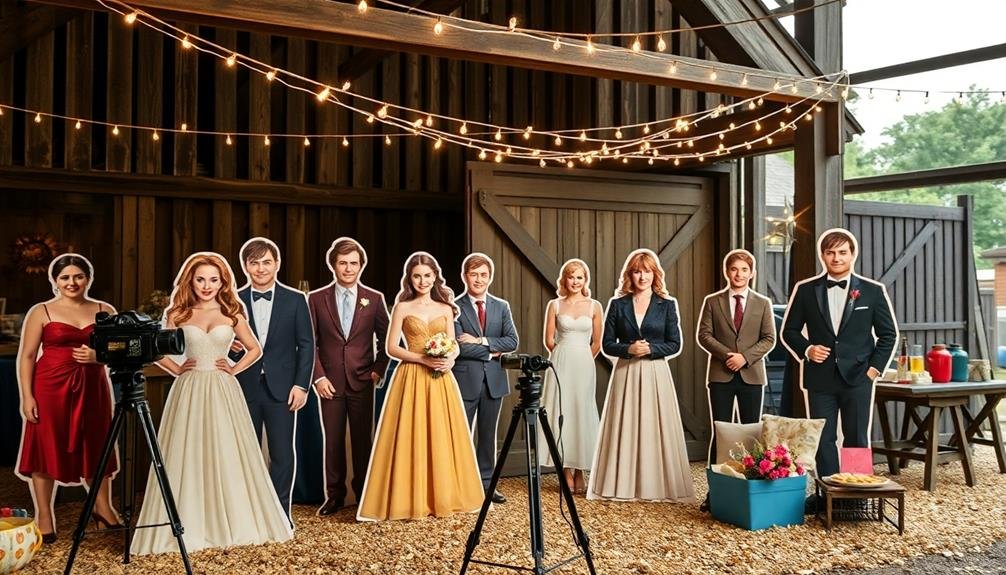
Three cardboard cutout characters can transform your photo booth into an interactive and entertaining experience. You'll find that these life-sized props add a playful element to your wedding photos, allowing guests to pose with their favorite characters or celebrities.
To create these cutouts, you'll need large pieces of cardboard, printed images, and some basic crafting supplies. Start by selecting popular characters or figures that align with your wedding theme or personal interests. Print the images in sections and piece them together on the cardboard. Cut out the shapes carefully, leaving tabs at the bottom for stability. For added durability, consider laminating the cutouts or applying a clear protective coating.
Here are some ideas to make your cardboard cutouts stand out:
- Create a mix of full-body and head-in-hole designs for variety
- Add speech bubbles with removable messages for customization
- Incorporate elements of your wedding theme into the characters' outfits
Place the cutouts near your photo booth area, making sure they're secure and won't topple over. Provide some simple props like hats or glasses to complement the characters. Your guests will love posing with these unique additions, creating memorable and fun photos to cherish for years to come.
Themed Costume Trunk
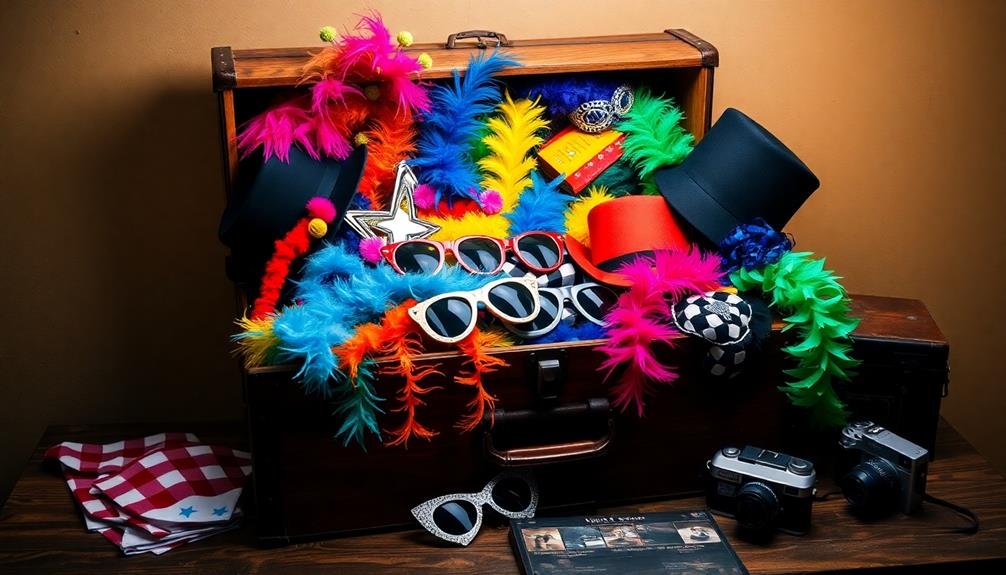
A themed costume trunk can elevate your photo booth experience beyond static props and backdrops. This budget-friendly option allows guests to transform themselves into various characters, creating memorable and hilarious photos.
To set up your costume trunk, start by selecting a theme that matches your wedding style or personal interests. Popular choices include vintage Hollywood, fairytale characters, or specific decades like the roaring '20s or groovy '70s.
Scour thrift stores, garage sales, and online marketplaces for affordable costume pieces and accessories. Fill your trunk with a variety of items such as hats, wigs, glasses, boas, and statement jewelry.
Don't forget to include some oversized clothing pieces like jackets, vests, or dresses that can easily fit over wedding attire. Add fun accessories like fake mustaches, masks, and props related to your theme.
Organize the items neatly in the trunk and place it near your photo booth area. Create a sign explaining the concept and encouraging guests to engage and get creative.
You'll be amazed at the imaginative combinations your guests come up with, resulting in unique and entertaining photos you'll cherish for years to come.
Fairy Light Curtain Booth
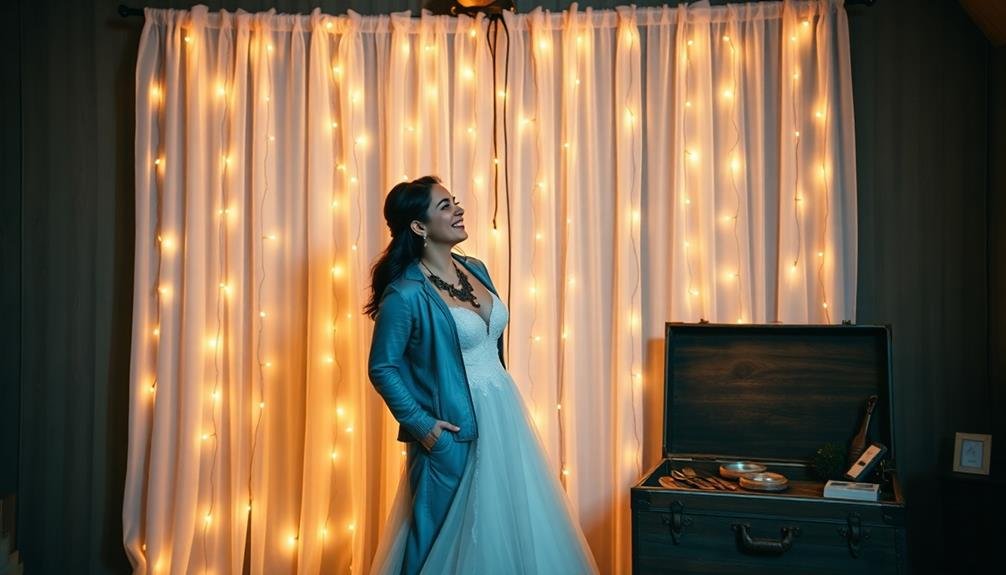
Enchantment awaits with a fairy light curtain booth, a magical and cost-effective photo backdrop for your wedding.
You'll create a dreamy atmosphere that'll have your guests lining up for photos all night long. To set up this ethereal booth, you'll need a sturdy frame, sheer curtains, and several strands of fairy lights.
Start by assembling the frame, which can be made from PVC pipes or a portable clothing rack. Drape the sheer curtains over the frame, creating a soft, flowing backdrop.
Next, carefully weave the fairy lights through the curtains, ensuring even distribution for a uniform glow. You can add extra sparkle by incorporating metallic or iridescent elements like tinsel or sequined fabric.
Here's why a fairy light curtain booth is perfect for your budget-friendly wedding:
- Easy DIY setup with minimal materials
- Versatile design that complements various wedding themes
- Creates a romantic ambiance for stunning photos
Don't forget to provide props that match your wedding's style.
Consider supplying whimsical items like paper flowers, star-shaped wands, or delicate masks to enhance the magical atmosphere.
With this enchanting backdrop, you'll capture timeless memories without breaking the bank.
Frequently Asked Questions
How Much Should I Budget for a Wedding Photo Booth?
You should budget $300-$1000 for a wedding photo booth. Costs vary based on rental duration, features, and whether you're hiring a professional or creating a DIY setup. Consider your guest count and overall wedding budget when deciding.
What's the Ideal Space Requirement for a Photo Booth Setup?
You'll need about 6×8 feet for a standard photo booth setup. This allows room for the booth, props, and guests. Don't forget to factor in space for a queue line if you're expecting high demand.
How Far in Advance Should I Start Planning the Photo Booth?
You should start planning your photo booth at least 3-4 months before your wedding. This gives you time to choose a setup, gather props, and test equipment. Don't wait until the last minute—early preparation guarantees a smooth experience.
Are There Any Photo Booth Apps for Smartphones Worth Considering?
Yes, there are several photo booth apps worth considering for your smartphone. You'll find options like Simple Booth, Photobooth Mini, and Pocketbooth. They offer features like filters, props, and easy sharing, making them fun and convenient alternatives to traditional setups.
What Lighting Works Best for DIY Photo Booths at Evening Receptions?
For evening DIY photo booths, you'll want soft, diffused lighting. Use LED ring lights or string lights to create a flattering glow. Avoid harsh shadows by placing lights at eye level. Don't forget a backdrop to enhance the ambiance.
In Summary
You've got plenty of budget-friendly photo booth options to make your wedding reception unforgettable. Whether you're crafting a DIY floral backdrop or setting up a Polaroid station, these ideas will keep your guests entertained and create lasting memories. Don't be afraid to get creative with props, backdrops, and themes. Remember, it's not about spending a fortune; it's about capturing the joy and personalities of your loved ones on your special day. Have fun with it!

I’m Sarah, the creator and writer behind this site. I’m a wife and a mother of two wonderful kids who keep me on my toes and inspire me daily. My passion lies in creating and organizing memorable events and group activities, where people can come together and make lasting memories.

Leave a Reply